


Sashiko: Upcycling with embroidery
Sashiko is a versatile embroidery technique that requires very little to get started and offers amazing results. It combines aesthetic beauty with functionality and efficient use of materials. It can be as simple or complicated as you'd like.
 Sashiko is a type of embroidery developed in Edo-period Japan to strengthen clothing, piece together old fabrics to make new garments and reinforce patchwork - all with a beautiful geometric pattern that often mimics nature. It is an approach to sewing that traditionally revolves around upcycling and making the items you already have last longer.
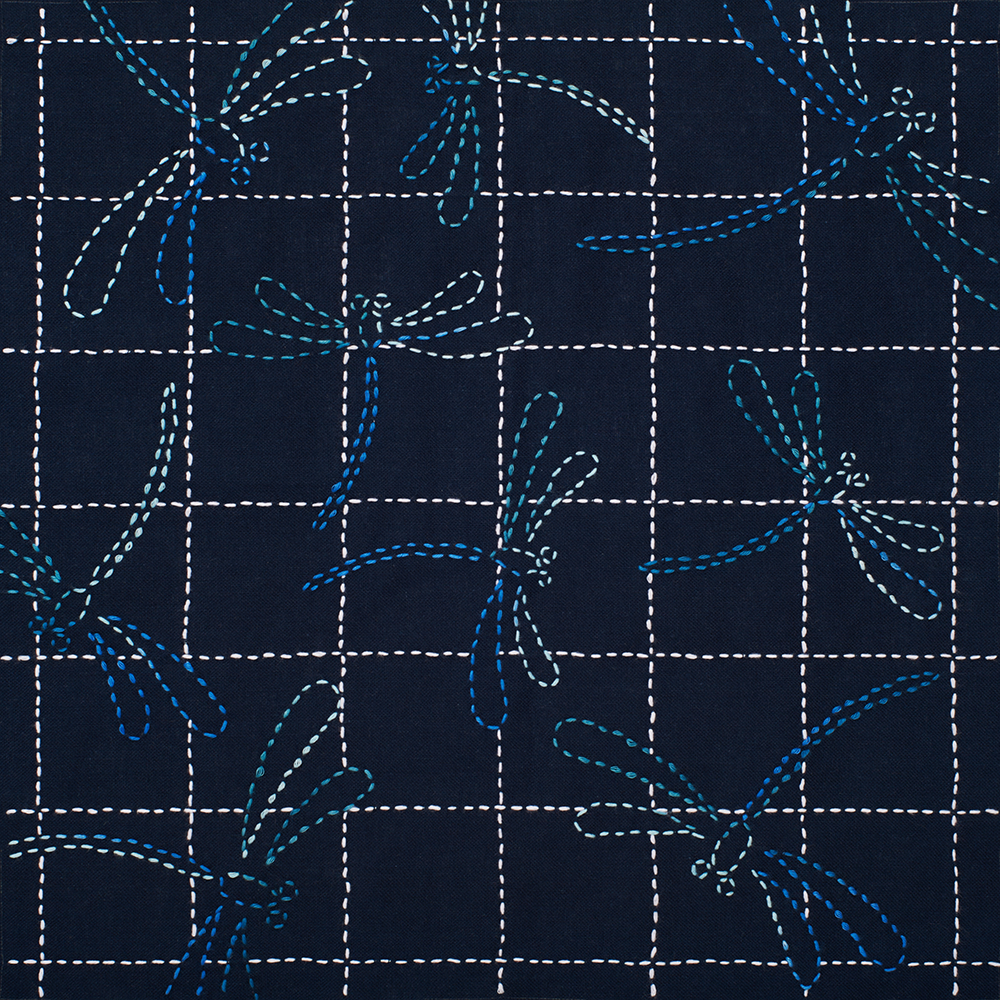
The traditional look of dark indigo fabric sewn with white thread is due to clothing restrictions in Japan at the time. Members of the lower class were not permitted to wear colorful clothing. Indigo dye was one of the exceptions to this rule. White thread was cheap and stood out well against the deep blue of the fabric giving it the distinct look of traditional sashiko. However, you can use any fabric and thread color that makes you happy.
Materials
I suggest you practice sashiko a few times before you start to mend your favorite shirt. To practice sashiko there are some basic materials you’ll need and others you might want.
- Fabric: A plain weave, natural fiber fabric with a low thread count is best. Common fabrics used for sashiko are cotton, linen or a 50/50 blend.
- Sashiko thread: This is a closely twisted cotton thread, thicker and stronger than most embroidery thread. It offers the durability needed for mending and strengthening fabric.
- Sashiko needle: These are stronger and longer than typical embroidery needles. The added length allows you to make several stitches before pulling the needle through.
- Palm thimble: While not necessary, a palm thimble is good to have. Wear this thimble like a ring on your middle finger and so you can use of the top of your palm to push the needle through.
- Needle Puller: Because sashiko involves pulling a thick needle through multiple layers of fabric, a needle puller is useful.
Technique
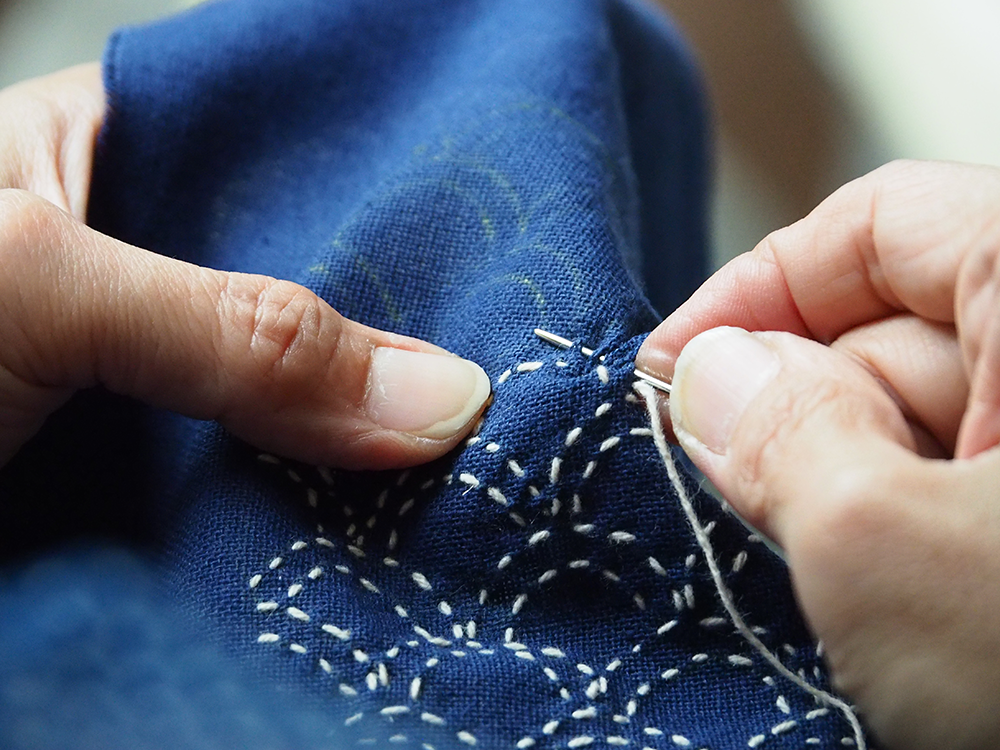 Sashiko translates to “little stabs,” which is a good way to describe the technique. You push the needle through the fabric little by little in a series of small stitches.
-
Hand posture (optional): Grip the needle between your thumb and your pointer or middle finger with the eye of the needle sitting against the top of your palm (or against the palm thimble). Rest the fabric between the needle and your thumb. Grip the fabric with your other hand to keep it taut.
-
Begin stitching: Push the needle through the back of the fabric just until the tip of the needle pokes through. Then aim the needle back at the front of the fabric and push the tip through. Try not to bring the needle all the way through the fabric after each stitch. Instead, continue to push the fabric little by little onto the needle.
-
Pull it through: Once you have a few stitches on the needle, pull it through the rest of the way. Resist pulling the thread too tight. Smooth out the fabric each time you pull the needle through to prevent puckering.
Patterns, stitches & knots
 Patterns: Sewing along the pattern in the way that uses the least thread is good form. Look for a pathway that would allow you the most continuous coverage. If you find your thread an awkward distance away from where you need to stitch next, you can leave a bit of loose thread at the back and “hop” to the next part of the pattern. However, don’t be afraid to cut the thread and start in a different area if needed.
Stitches: You’re aiming for a basic running stitch. Try to keep the stitches and the spaces between them as uniform as you can, even in corners or other areas where the lines of the pattern meet.
Knots: Sashiko also often incorporates knotless sewing. This can be done by simply sewing back over the first and last few stitches of the pattern. Begin sewing three or four stitches ahead of where you’d like your pattern to begin, then sew backwards toward that beginning point. Once you reach it, sew the other way back over those initial stitches and continue with your pattern. For the end, simply sew back over the last three or four stitches of your pattern.
If you’d like to dive deeper into sashiko, check out the books listed below!
