Artsy Crafty Library: Watercolor Galaxy
At the beginning of 2020 I decided to pick up a new creative outlet. The timing turned out to be poignant. I had always been mesmerized by the art of watercolor but was intimidated to try it. A year earlier I had been given the supplies but somehow I still couldn’t find the courage to attempt that first painting. However, once I found a subject that spoke to me, I couldn’t keep my brushes hidden away any longer.
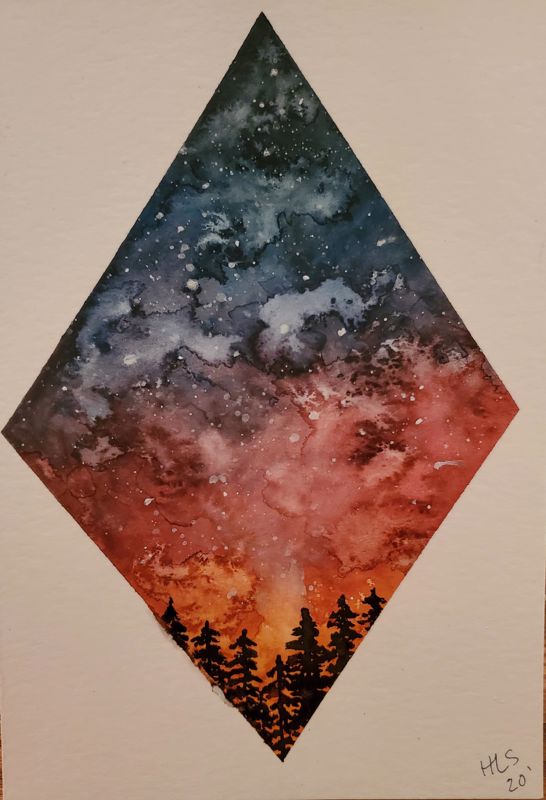
My first completed painting, the one that made me fall in love with watercolor, was a forest galaxy tutorial by watercolor artist Sarah Cray. For this painting I used red, blue and purple liquid watercolor for the sky, but you can use whichever colors you prefer (galaxies are very diverse!). I used black for the trees, white for the stars, and a small amount of table salt to help create the galaxy effect. I used 140lb cold press paper for my painting, but any watercolor paper will do.
Practice makes perfect
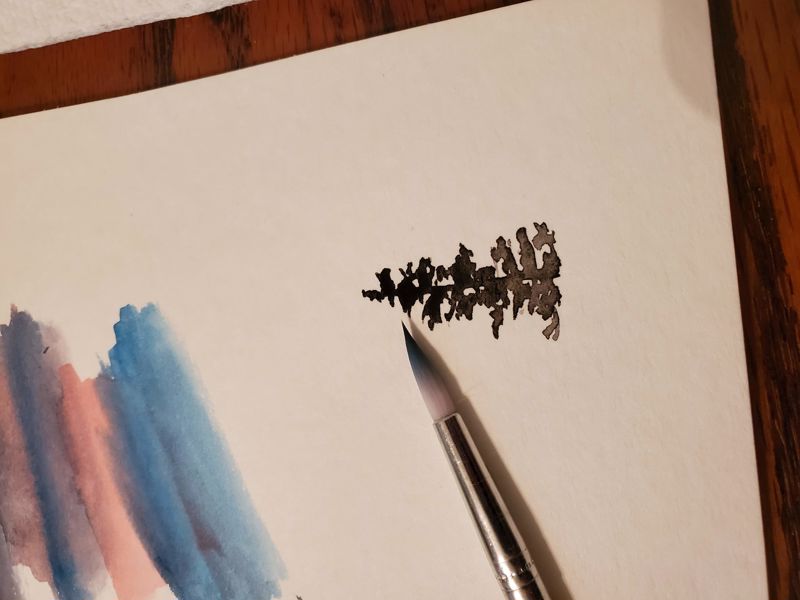 I like to begin my watercolor projects by practicing brush strokes on a separate piece of paper. There are many watercolor techniques to explore. For this project, I focused on practicing wet-on-wet technique and painting trees. I did this both with my round 6 and round 2 brushes. Watercolor trees look very intricate, but they actually aren’t that complicated to paint. You begin by creating a thin line for the base of the tree (light pressure works best), then fill in the tree's foliage by painting an assortment of dashes (larger dashes at the bottom, then smaller and lighter as you reach the top of the tree. There isn’t a right number of dashes, but be careful not to overdo it. It’s better if your dashes aren’t symmetrical throughout your tree.
Embrace imperfections
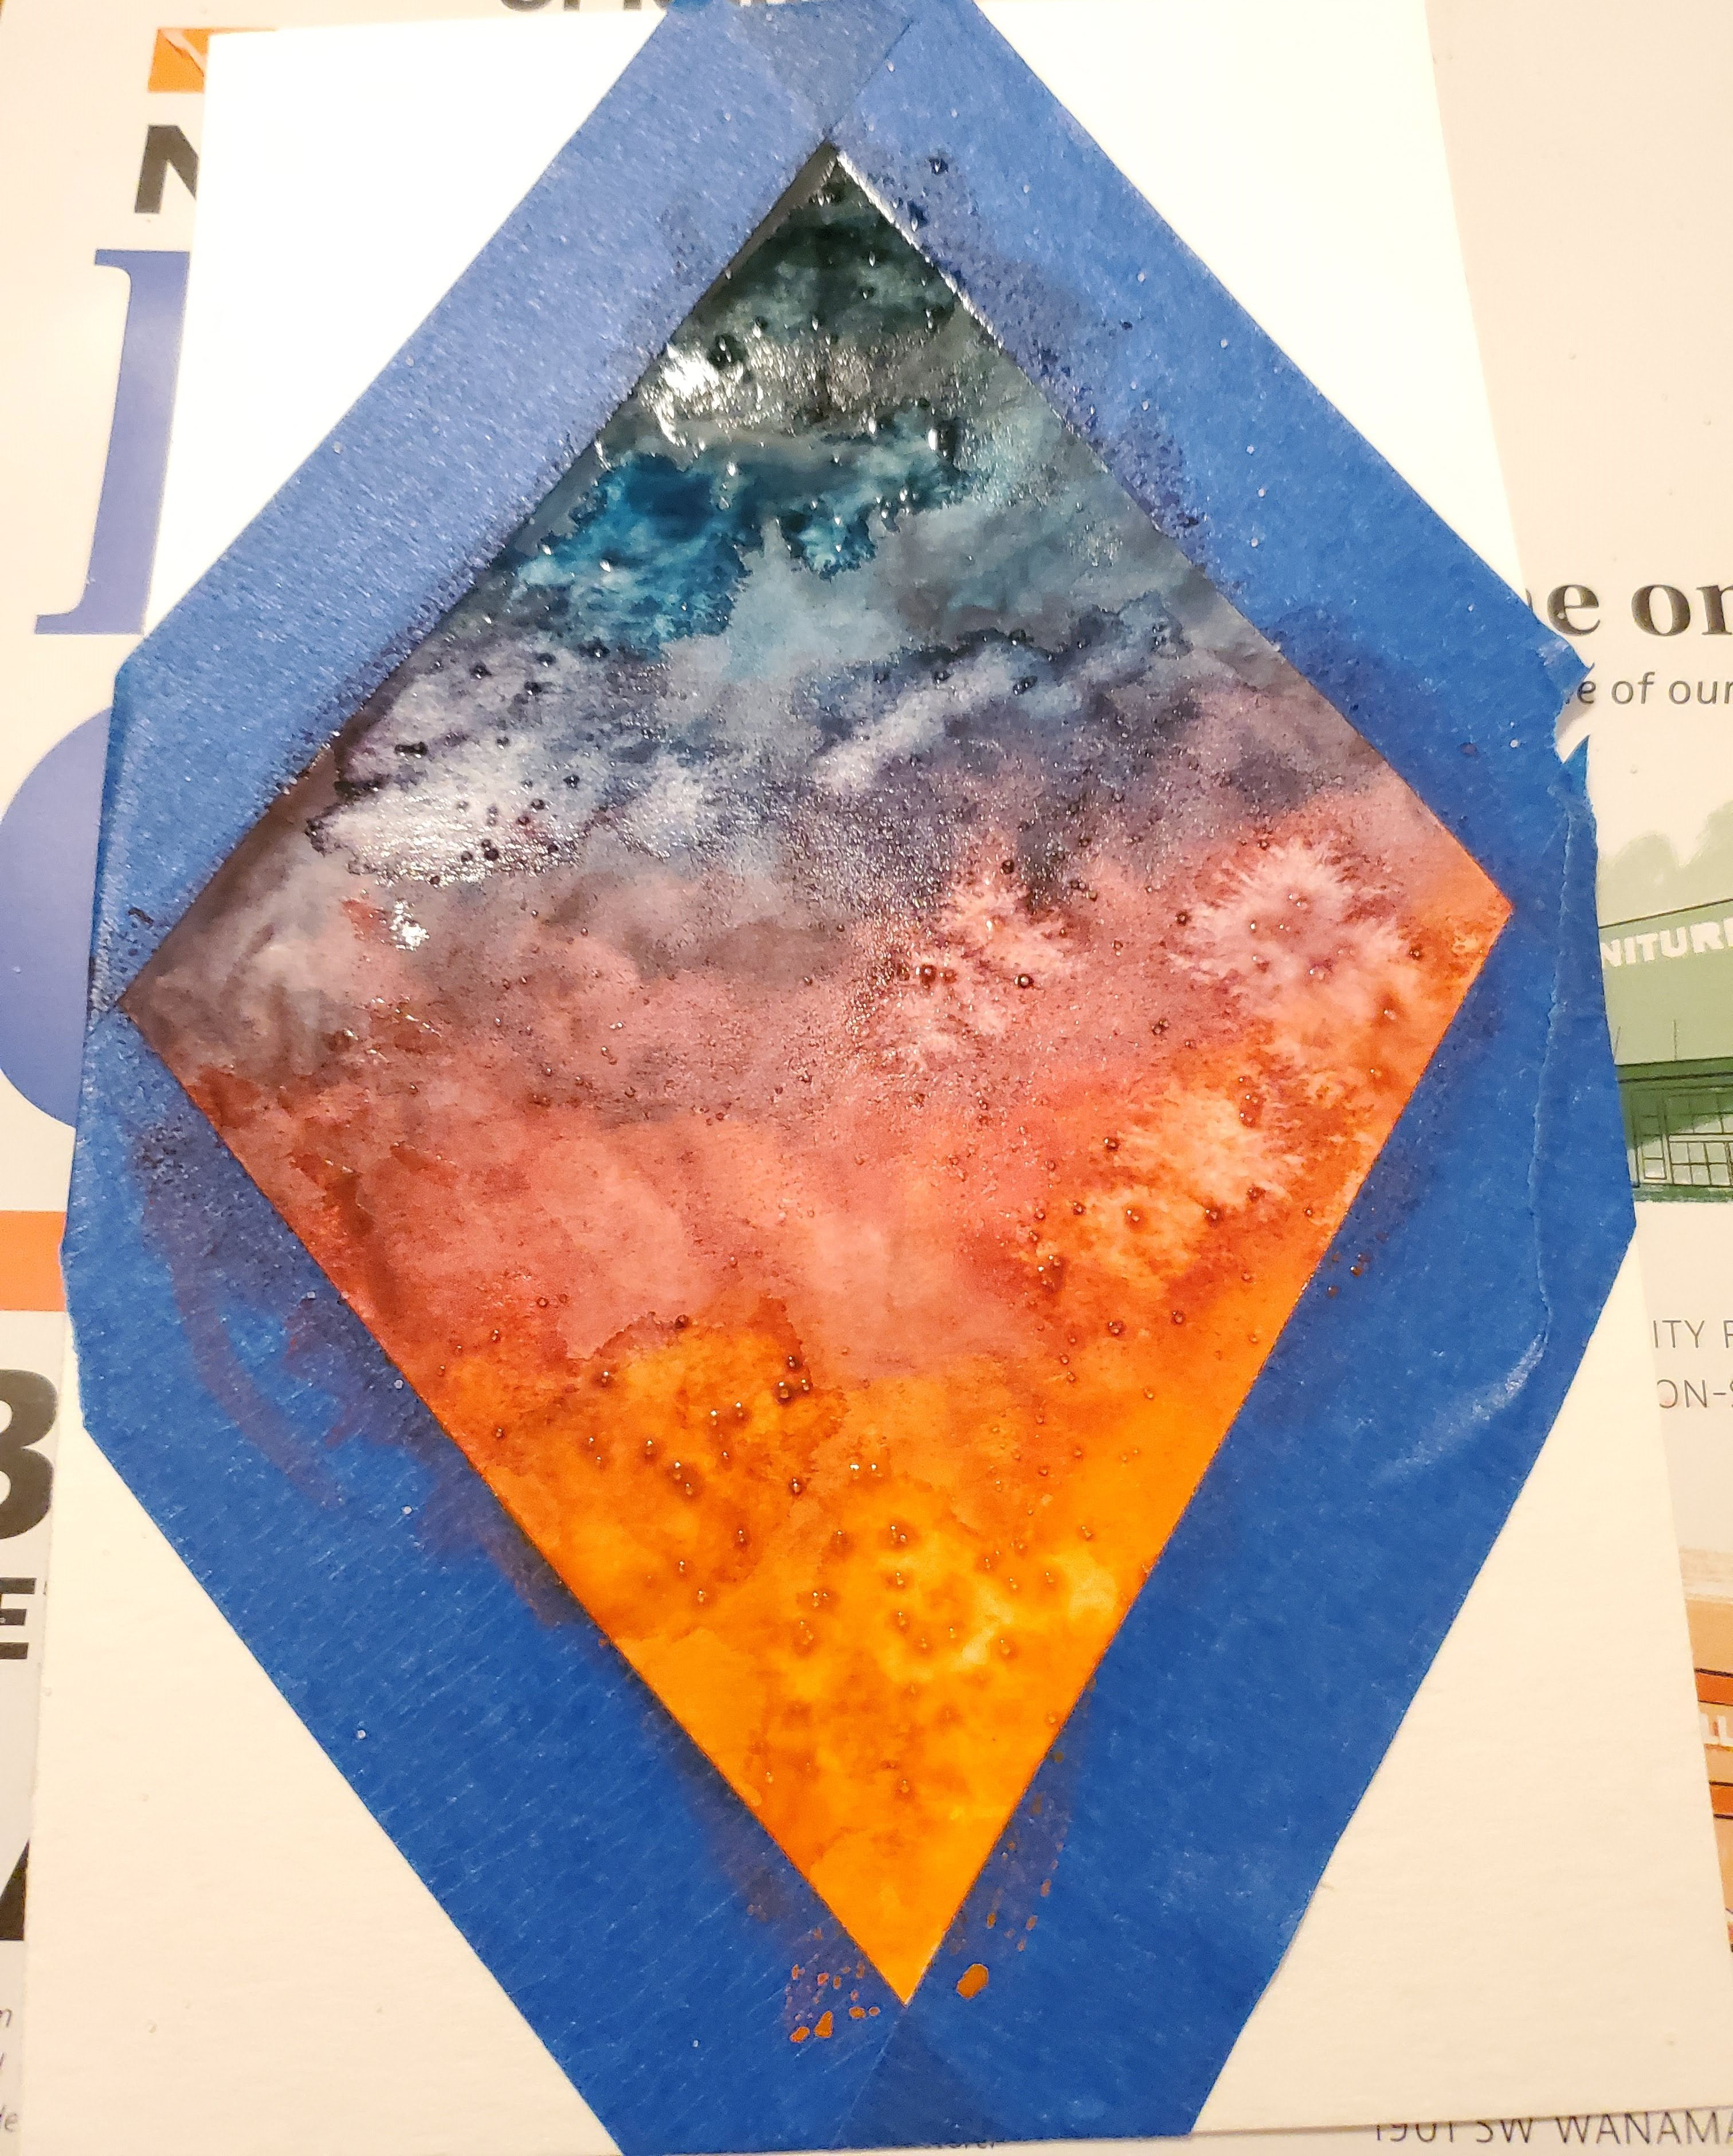 When I finished practicing, I taped down my watercolor paper using blue painter’s tape (washi tape works too). I created a diamond shape with my tape, but you can simply tape your edges down or create your own shape if you are feeling extra creative. Once your paper is secure, you’re ready to start painting.
The first step was to paint my sky. Since I was using the wet-on-wet technique I saturated my taped area with water then quickly began adding the darker colors at the top of my painting gradually lightening until I finished with orange at the bottom. Quick tip: the more liquefied your colors are, the lighter they will appear on paper.
Before the paint dried, I carefully sprinkled grains of salt in various spots. Sea salt works best (larger grains), but table salt will work too. Adding salt helped create the galaxy effect. When you finish sprinkling the salt, your background will need time to dry. This is the perfect time to take a break! If you don’t want to wait, you can speed up the drying process with a hair dryer.
Once my sky was dry I added stars to my galaxy with white paint. I used watercolor for this, but you can also use Bleedproof White paint. This was probably my favorite part of the project. To add the stars, I grabbed some white paint on my paintbrush, held it sideways over the sky portion, and then gently tapped over random areas where I wanted the stars to land. I repeated this step until I felt that the sky was sufficiently covered.
The final step of this painting was to create the trees. I used my smaller Round 2 paintbrush for this part since I wanted the main subject matter to be my sky. Using light pressure, I created several thin lines upward from the bottom of my painting (various heights, but never more than an inch or two). I was also careful not to paint any lines right in the center so my composition would remain more balanced. From here I practiced creating small sideways dashes from the bottom of my line to the top to create the tree branches. Once I finished painting my trees, I let my painting dry one last time before calling it good.
Most importantly, have fun!
My favorite part of any watercolor project (besides painting stars) is removing the tape to reveal the crisp, unpainted border. It’s amazing how such a small detail can perfectly balance a painting's composition. For this reason, I prefer to add a border to my paintings, (especially landscapes). This was a simple and fun first project in my watercolor journey, and I will always be proud of it!
