









Artsy Crafty Library: Embrace Imperfection With Simple Pottery
Content
Embracing Artistic Beginnings –Ginger Park
"Dude, sucking at something is just the first step toward being sorta good at something." –Jake the Dog, Adventure Time
I took Jake's words of wisdom to heart when I started my pottery journey. As long as I can remember my attitude had been, "If I'm not good at it, I'm going to stop and do something I'm good at." Last year I decided I needed to cut myself some slack, do something I'm not good at and stick with it. Pottery was that something.
As predicted, I was very bad at the beginning. It took 4 classes before I made a recognizable object – a cylinder. Another 4 classes before I made something functional – a small mug that was roundish. I think I was 16 classes in by the time I made something I was proud to show my spouse. But the whole time I kept to my mission of having fun during practice and not giving up. Sure, there were times I got frustrated and cursed. But I'd step away for a couple hours or a couple days and jump back in with a good attitude.
Like learning many artistic skills, my progress was not a steady upward curve. There were/are peaks and valleys. Sometimes a bad day at pottery can follow a day when I made my best piece ever! I learned to take it in stride. Make more pieces on my good days and take a break after a certain number of bad pieces (for me that's 3). It is even better when an instructor or another potter can help me figure out what I was doing differently on bad days.
I encourage you to try something artistic you aren't good at and stick with it, even if you are making what you might consider "bad art." Make the goals of creating escaping everyday tasks, playing and relaxing, not making gallery-worthy art.
Now that I've shared some beginner philosophy, Travis is going to share the step by step of clay projects you can do at home with minimal supplies. Keep the words of Jake the Dog in mind and don't worry about not being good, it's just a step in the process.
Working With Air-Dry Clay –Travis Garwood
Air-dry clay is an excellent material for beginners because it doesn't require a kiln and can be finished with paint once dry. Coil building is a classic hand-building technique that uses rolled sections of clay to create sturdy, decorative pots.
Materials
- Air-dry clay
- Smooth work surface or silicone mat
- Small bowl of water
- Wooden or plastic clay modeling tools (optional)
- Toothpick, fork or craft knife (for scoring)
- Sponge or damp paper towel
- Acrylic paint (optional)
- Clear acrylic sealer or varnish (optional)
Step 1: Prepare the Clay
Knead the air-dry clay for 2–3 minutes until it feels soft and smooth. If the clay feels dry, lightly dampen your hands while kneading. Keep unused clay wrapped in plastic or covered with a damp towel to prevent it from drying out.
Step 2: Roll the Coils
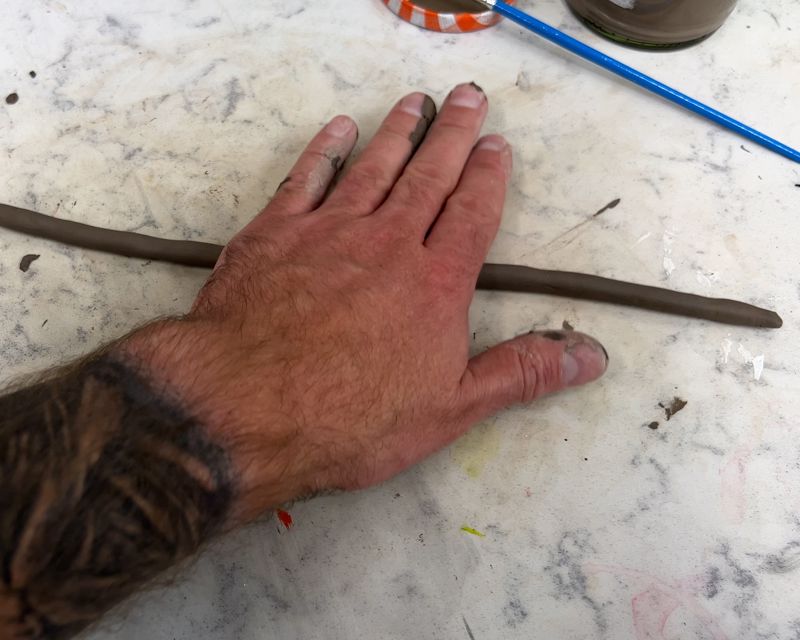 Roll pieces of clay into long coils using your palms and fingertips. Aim for coils that are about 1/4 - 1/2 inch thick. Try to keep each coil an even thickness for a balanced pot.
Step 3: Create the Base
- Method 1: Roll a ball of clay and flatten it into a circle about ¼ inch thick. Trim the edges if to create a smooth, even base.
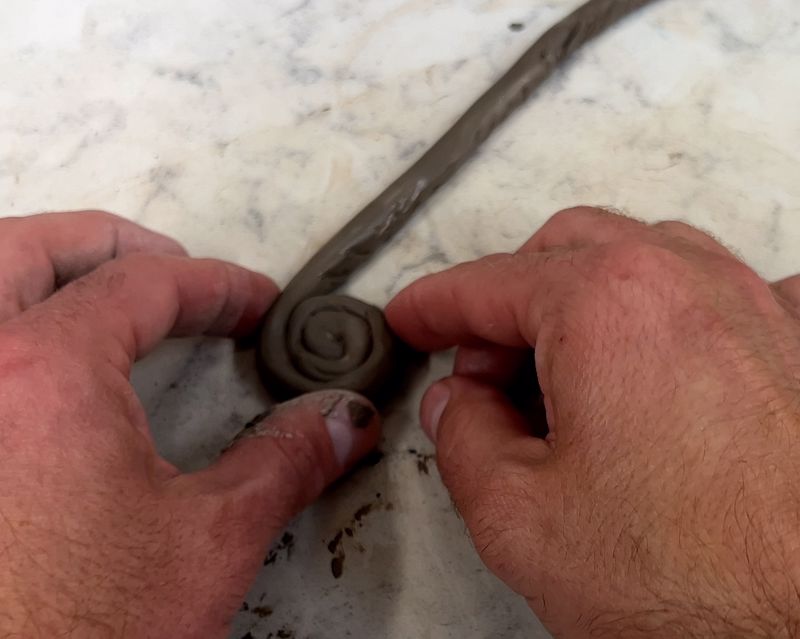
- Method 2: Roll out a coil of air-dry clay about ½ inch thick. Try and keep the thickness consistent. Roll up one end onto itself until you get the base to the desired size.
- Smooth the edges with your fingers or leave the lines if you like that design element.
Step 4: Preparing to Attach a Coil
1. Lightly scratch (score) the edge of the base with the tool that is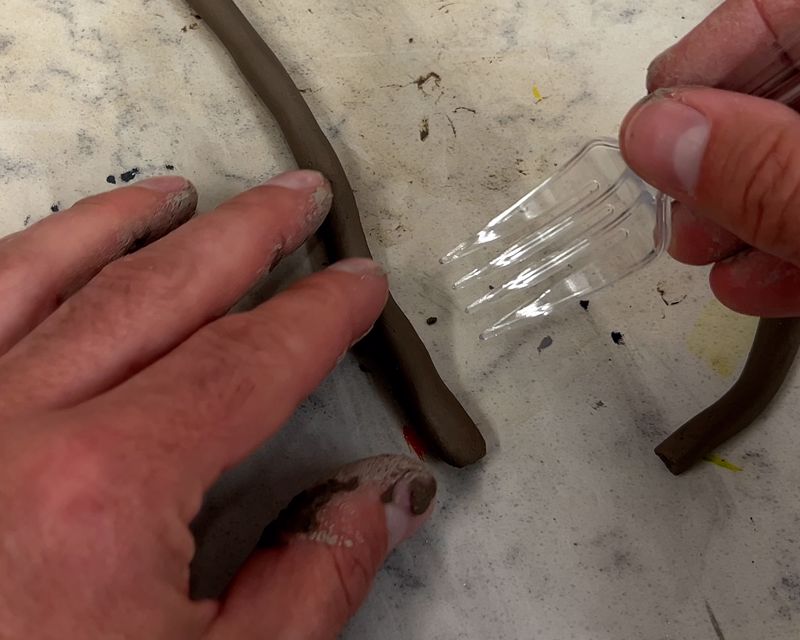 available to you where the first coil is going to be laid down. Score the bottom of the first coil where it will attach to the base. Add a small amount of water to both scored surfaces to help the clay bond.
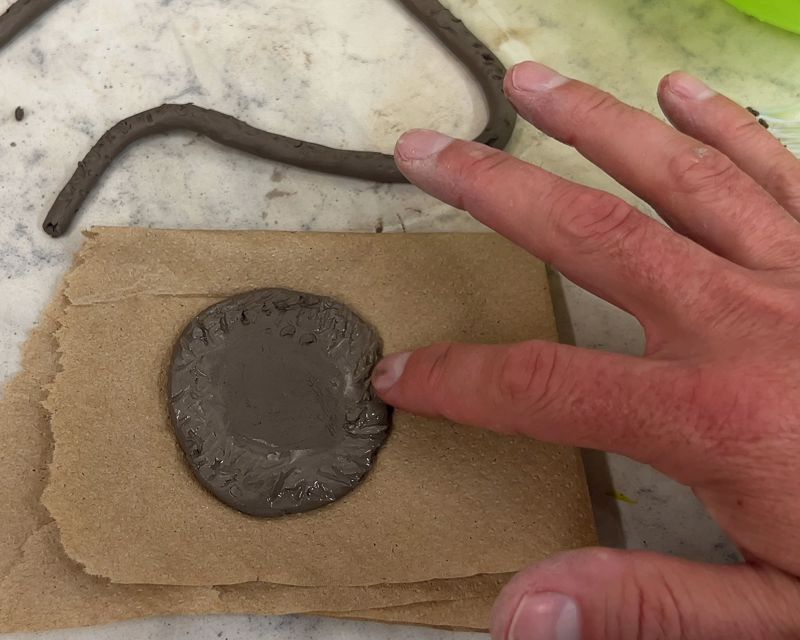
Step 5: Attach the First Coil
Wrap the first coil around the edge of the base and trim the ends so they meet neatly. Gently press the coil into place without flattening it.
Step 6: Blend the Seam (Optional)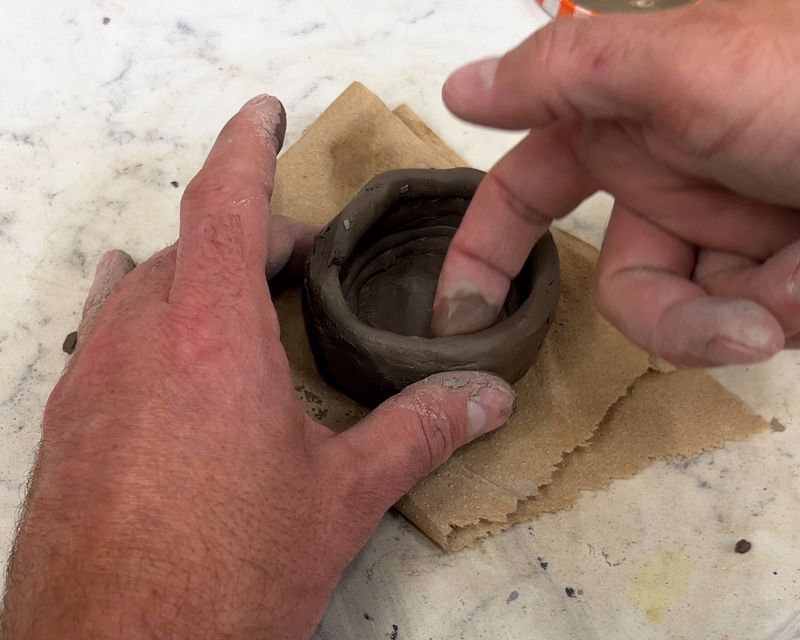
Decide if you like the seams showing or want a smooth pot.
If you don't want lines, smooth the inside seam using your finger or a clay tool. Leave the outside seam visible for a hand built look or smooth it for a polished finish.
Step 7: Continue Building
Score and lightly moisten each new layer before adding another coil. Stack coils one at a time, blending the seams as you go if you want.
Change the shape by adjusting each new coil:
- Place directly above for straight sides.
- Move slightly outward for a wider bowl.
- Move slightly inward for a vase or narrower opening.
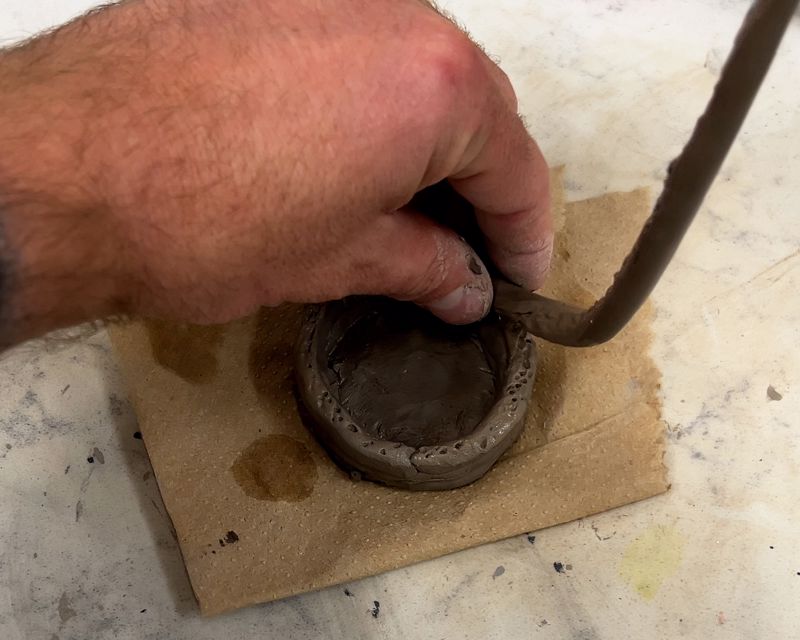
Step 8: Smooth and Decorate
Smooth the inside and outside with your fingers or a slightly damp sponge if you want a smooth look. Fill in small cracks while the clay is still workable.
Add texture using stamps, lace, leaves, fabric or carved patterns.
Step 9: Dry the Pot
Place the finished pot on a flat surface. Allow it to dry naturally for 24–72 hours, depending on the clay and the thickness of the pot. Rotate it occasionally so all sides dry evenly. Flipping upside down if necessary.
Avoid placing it in direct sunlight or near heaters, as rapid drying may cause cracking.
Step 10: Paint and Seal (Optional) 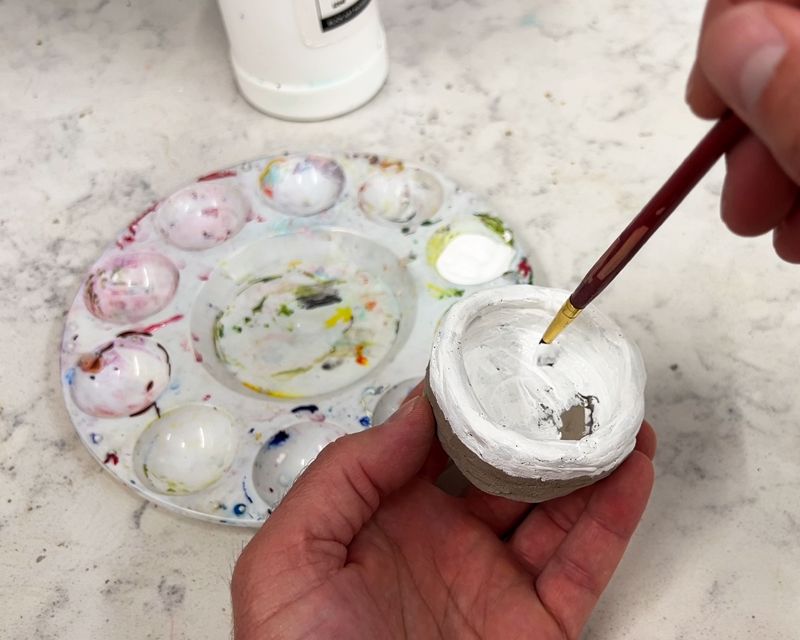
Once the pot is completely dry you can paint it with acrylic paints.
If you paint, let the paint dry thoroughly. Then apply a clear acrylic sealer or varnish to help protect the surface and add a matte or glossy finish. Note: this doesn't mean you can use the pot with food or drink. Unfired clay should NOT be used with food or drink.
Helpful Tips
- Keep your hands and tools clean while working.
- Work at a steady pace so the clay doesn't dry before you're finished.
- If you need to take a break, wrap your project loosely in plastic to keep it workable.
- Build gradually, very tall pots may need time to firm up before adding more coils.
- Air-dry clay is decorative and is not food-safe or waterproof, even when sealed.
With just a few simple tools and a little patience, you can create unique coil pots that are perfect for displaying dried flowers, holding small treasures or decorating your home. Each handmade piece is one of a kind, making coil building a fun and rewarding creative activity for all ages.