

Artsy Crafty Library: Dyeing fabric with Kool-Aid
Dyeing fabric using just Kool-Aid and a few common kitchen supplies uses the same basic principles as more normal acid dyeing. The types of food coloring in Kool-Aid lend themselves well to the acid dyeing process. The packets also include citric acid that will help set the dye.
The acid dyeing process can only be used to dye animal fibers such as silk and wool, and it is not suitable for cotton materials such as t-shirts. Habotai silk scarves are inexpensive and widely available. These are good for practicing your technique before moving on to more expensive fabric.
Supplies needed
- silk scarf
- Kool-Aid packets
- microwave
- microwave-safe bowl
- water
- white vinegar
- plastic bag
- rubber gloves (to prevent the Kool-Aid from staining your hands)
Step-by-Step
1. Soak the scarf for about 10 minutes in warm water with a small amount of white vinegar added (1 tablespoon of vinegar per cup of water). The vinegar will help make your dyed scarf more colorfast.
2. Remove the scarf from the soaking liquid and squeeze out the excess water.
3. Wind up, crumple or fold your scarf to create varied effects. You can tie the cloth with strings or rubber bands if you want to secure it.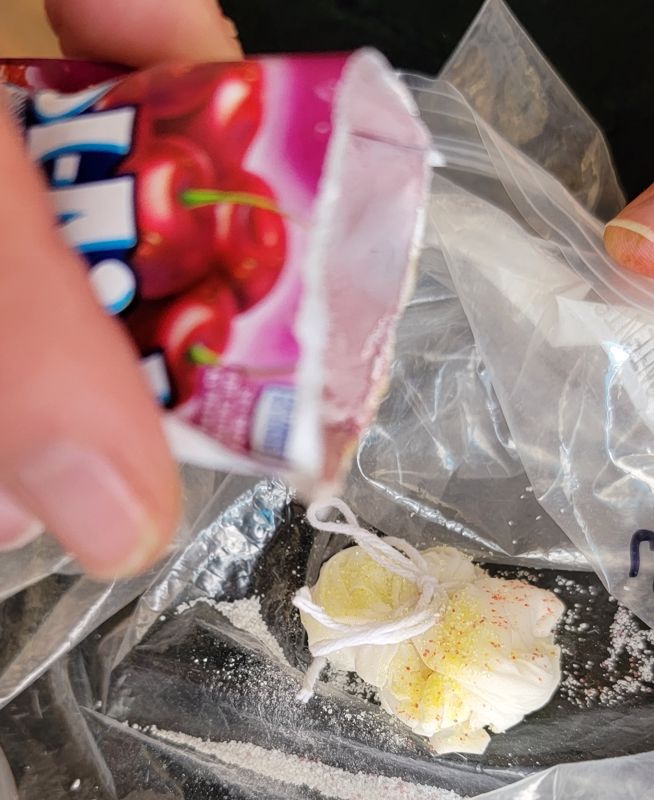
4. Place the scarf in a plastic bag. Sprinkle dry Kool-Aid powder onto the damp scarf. Use a small amount of powder (1/2-1 teaspoon total) for a light colored scarf with lots of the white showing. Use up to 2 teaspoons total for a very vividly colored scarf.
5. Add enought water to the bag to saturate the scarf, about 1/4 cup. Now smush the scarf around gently to help get the Kool-Aid to dissolve and penetrate the fabric.
6. Allow the scarf to rest for about 5-10 minutes in the plastic bag, then tip the scarf out of the plastic bag and into a microwave-safe bowl.
7. Pour the excess dye water from the bag or add extra fresh water to the bowl at this time to be sure the scarf is wet during the heating process. Do not allow the scarf to become dry at any time while it is being heated in the microwave.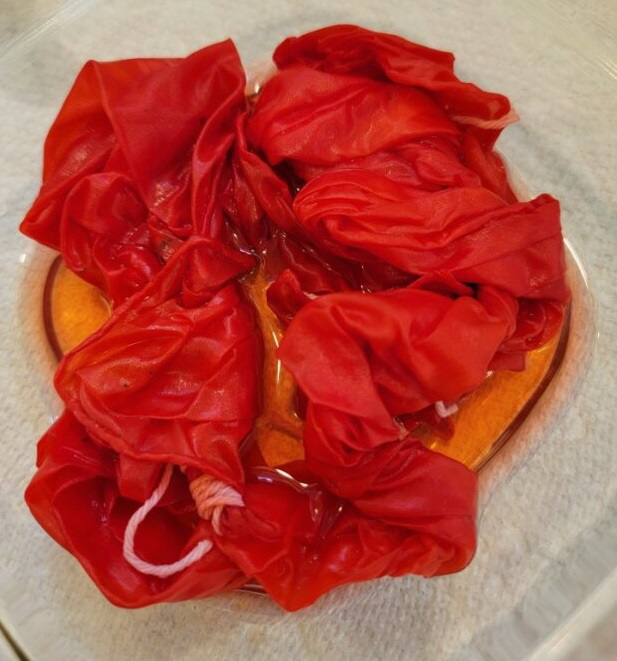
Loosely cover the bowl with a paper towel to prevent spattering and to keep in some of the steam generated while heating.
Microwave on high for 2 minutes, pausing every 30 seconds to check that the bowl is venting properly and that there is still liquid in the bowl. Listen for popping or spattering and pause to let it cool down if you hear this. Use kitchen mitts or pot holders as the bowl will be hot and steam will be escaping from under the cover.
8. Watch for the liquid in the bowl to start to turn clear. If after 2 minutes it is not yet clear, you may try microwaving up to 2 more minutes, pausing to check every 30 seconds. After this time, remove the cover from the bowl and allow the scarf to cool before handling it.
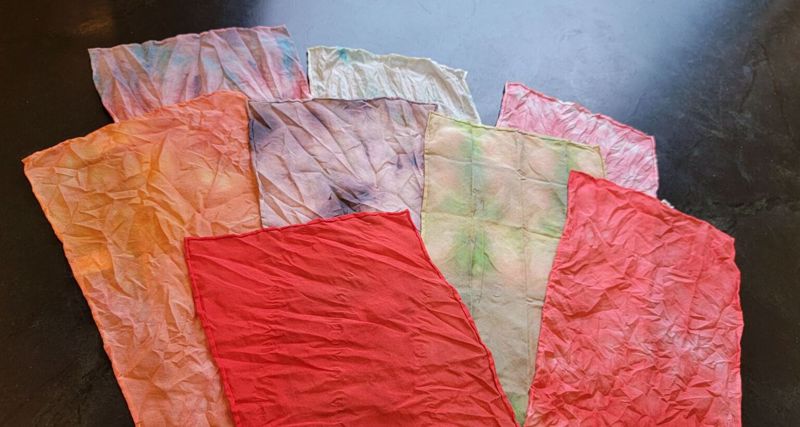
9. Once the scarf has cooled down enough to handle, rinse it out with cool water. Flatten out scarf and place it on a towel to dry.
10. Silk may be ironed but use care, as it is delicate and burns easily. Always be sure that silk is slightly damp and use a clean cloth between the iron and the silk and use the silk or lowest setting on the iron.
More projects
You can find tutorials on other dyeing projects at Creativebug, available to you for free as a TSCPL patron. You will need to log in with your library card.
Once you've logged in, use the search bar at the top to find courses on “Dyeing.”
Check out this booklist for some great resources on dyeing fabric.