
Artsy Crafty Library: Clay Ornaments
Content
Handmade magic for every season
With air dry clay, you can craft beautiful ornaments at home without a kiln, oven or special equipment. Whether you’re making personalized gifts or simply enjoying a cozy afternoon project, these ornaments are a perfect blend of simplicity and charm.
Materials You’ll Need
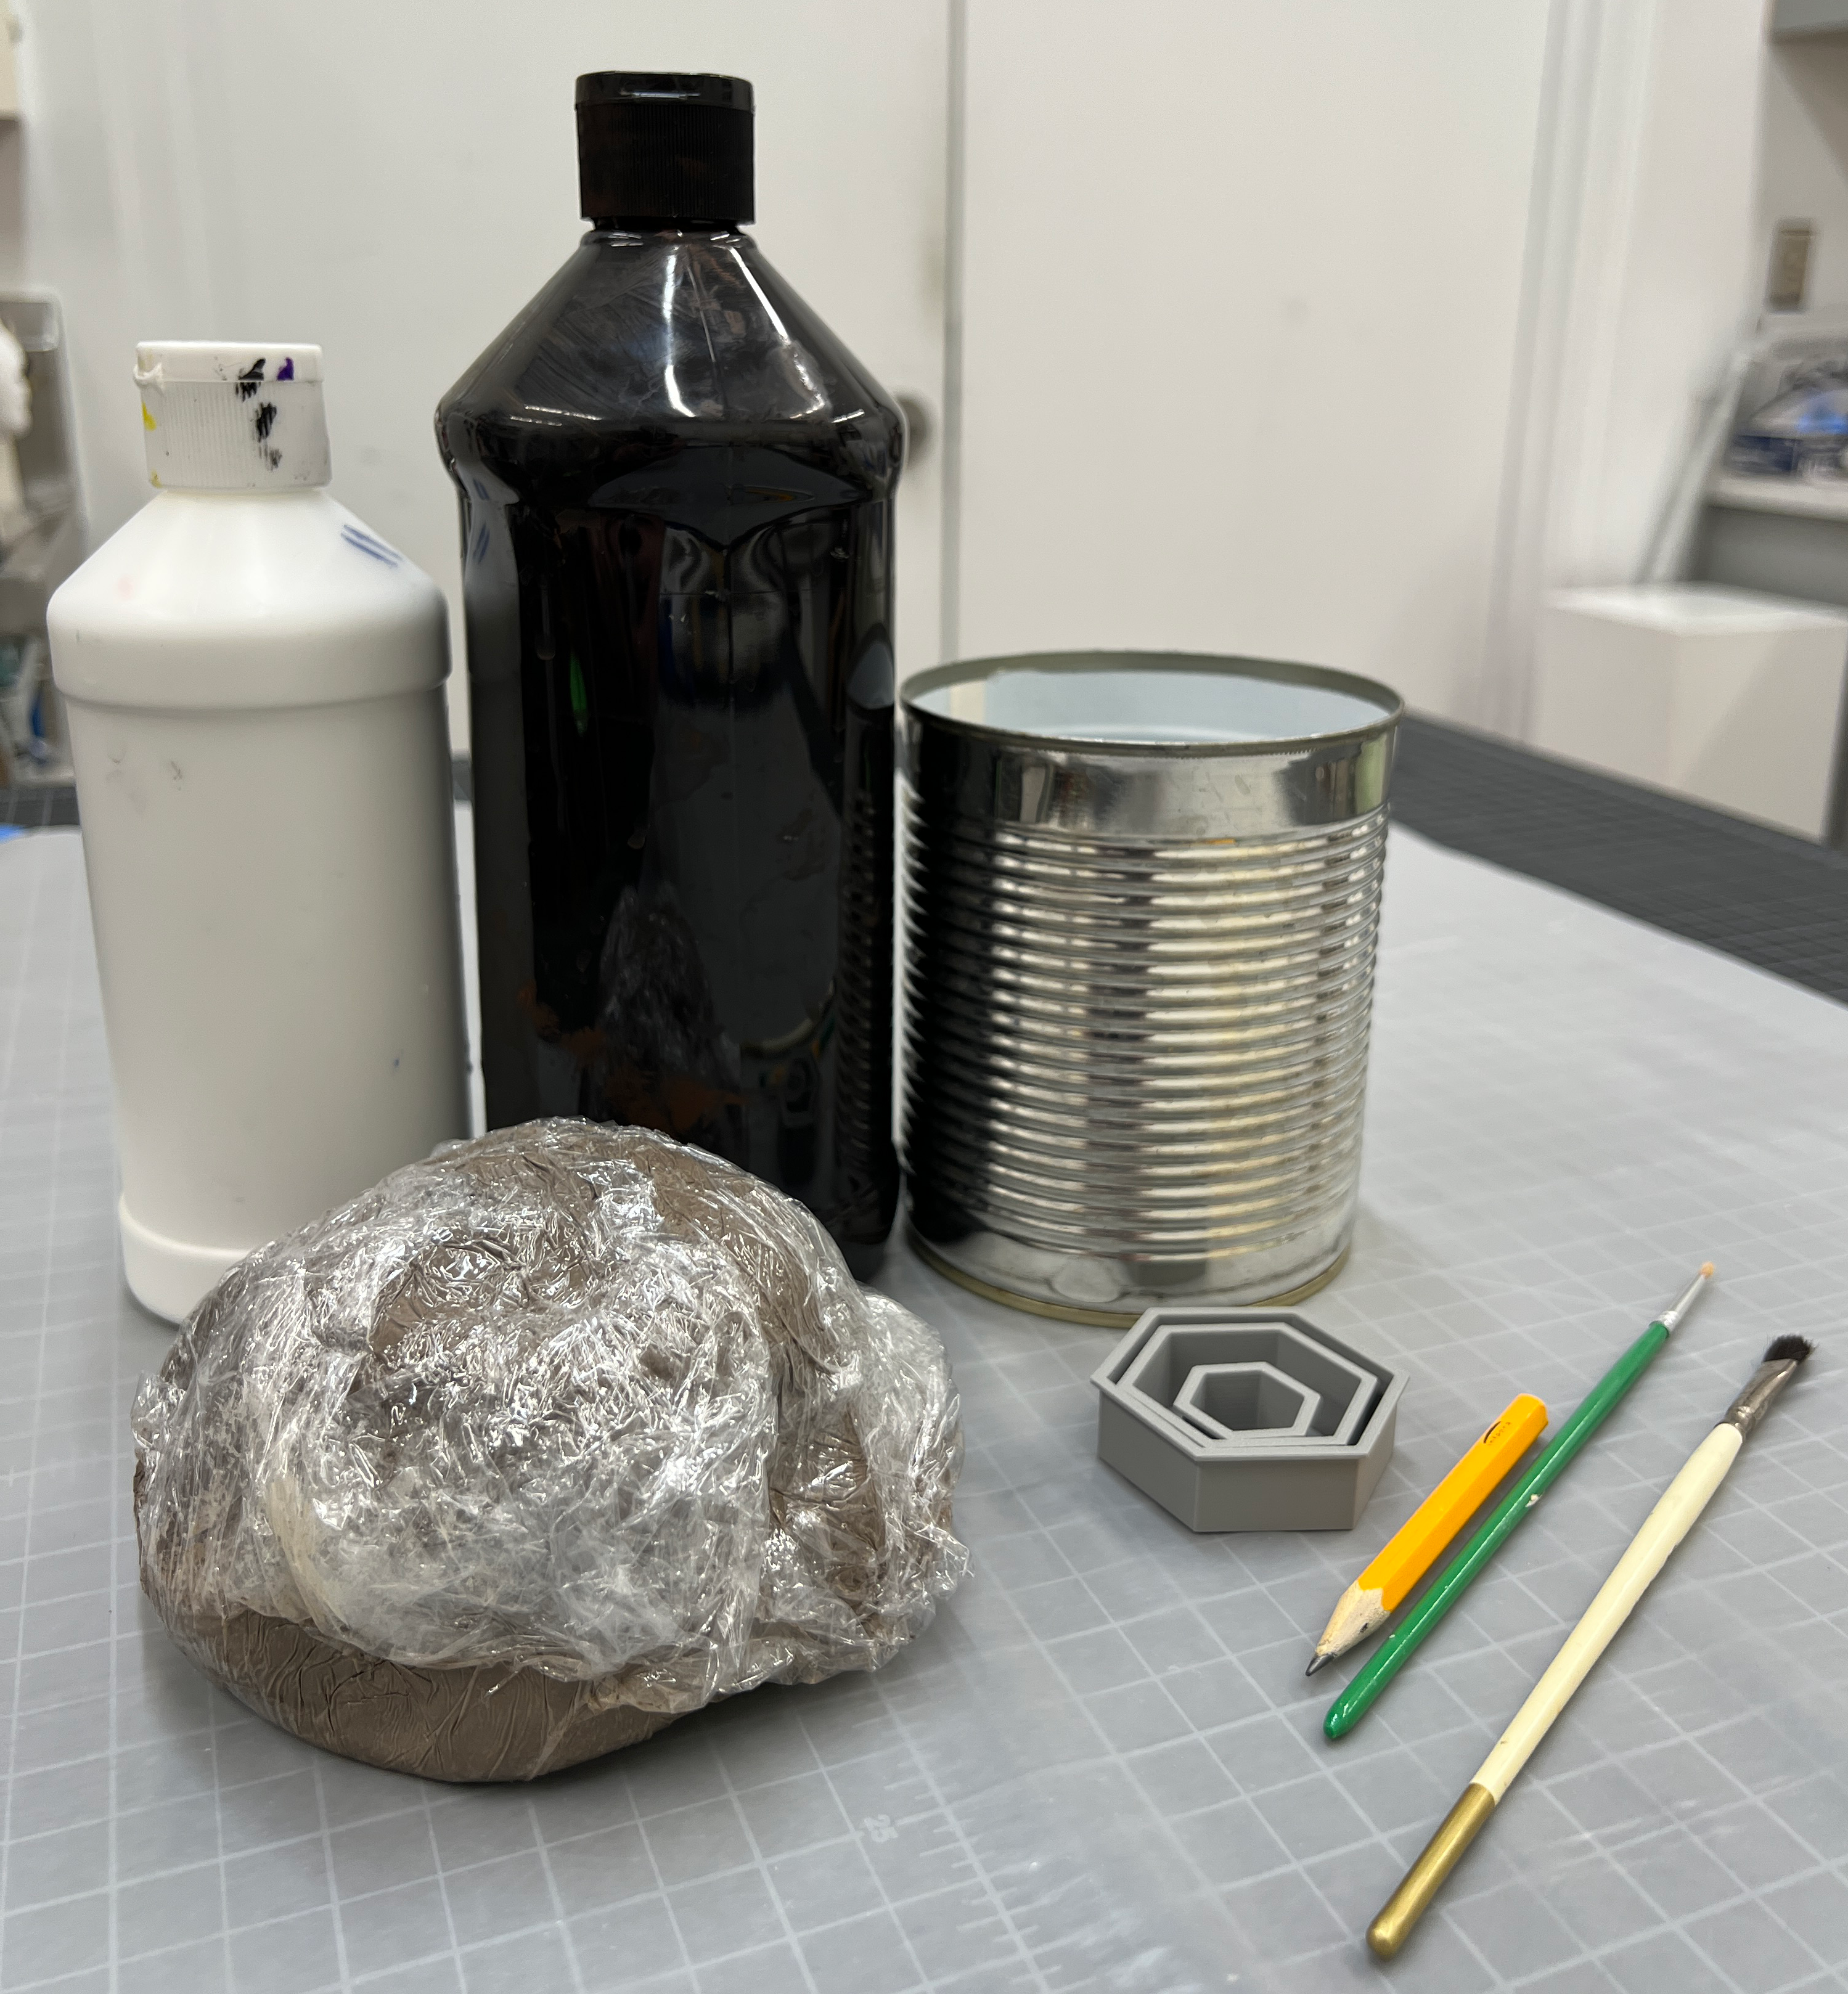 Air dry clay (white or colored varieties work beautifully)
 - Rolling pin (or even a smooth glass bottle)
- Cookie cutters (stars, hearts, trees, circles or anything that inspires you)
- Straw or skewer (to create a hole for hanging)
- Texturing tools (lace, leaves, stamps or everyday items like forks)
- Acrylic paints or markers (for decorating once dry)
- Ribbon, twine or string (to finish and hang your ornaments)
Step-by-Step Guide
1. Soften the clay
- Start by removing a portion of clay from its packaging.
- Knead it in your hands for several minutes until it feels smooth and pliable.
- If the clay feels stiff, wrap it in a damp cloth for a few minutes to restore moisture.
- Proper kneading prevents cracks and makes shaping easier later on.
2. Roll it out
- Place the clay on a clean, flat surface covered with wax paper or a silicone mat to prevent sticking.
- Use a rolling pin (or a smooth bottle) to flatten the clay evenly. Items should not be used or food after use on clay.
- Aim for a thickness of about ¼ inch — thin enough to look delicate, but thick enough to stay sturdy.
- Rotate the clay as you roll to keep the slab even and avoid warping.
3. Cut out shapes
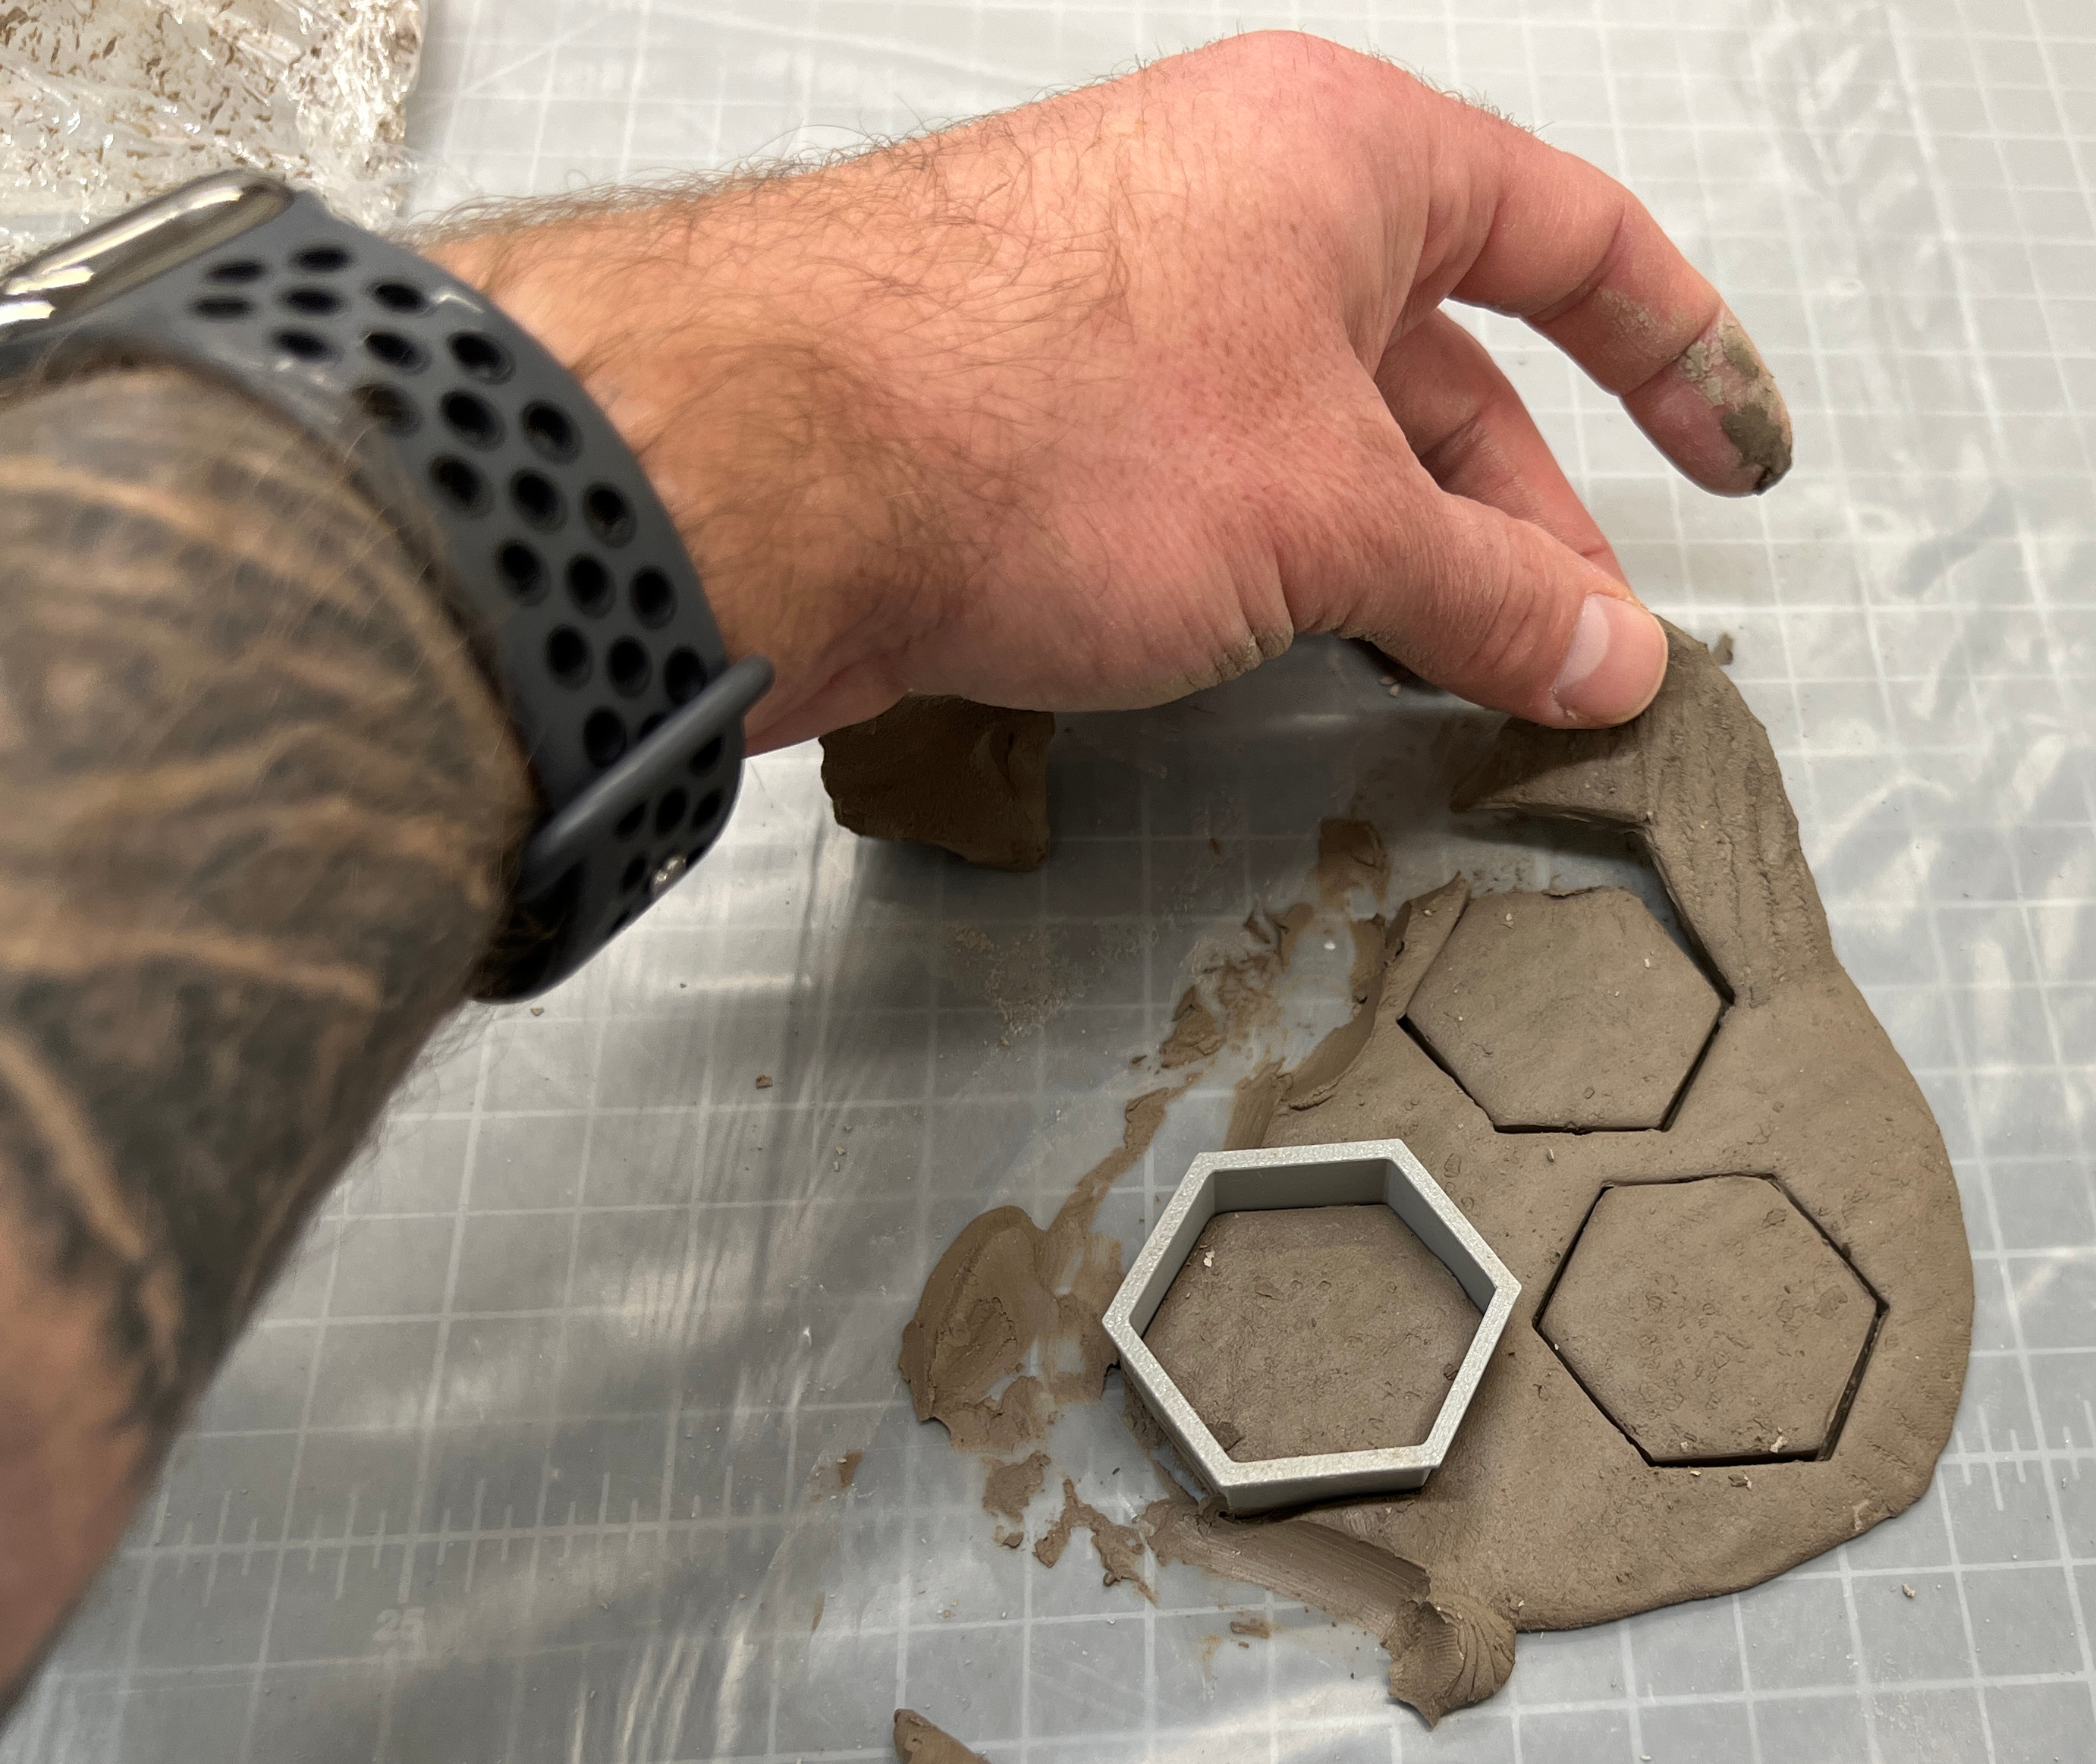 Press cookie cutters firmly into the clay slab to create your ornament shapes.
 - Wiggle the cutter slightly before lifting to ensure clean edges.
- Remove excess clay around the shapes and re-roll it to make more ornaments.
- For freeform designs, use a knife or sculpting tool to cut your own shapes.
4. Add texture & detail
- Lay lace, leaves or textured material over the clay and press gently with the rolling pin to imprint patterns.
- Use stamps or household items (forks, buttons, bottle caps) to create unique designs.
- Use a toothpick or sculpting tool to carve details like initials, dates or decorative lines.
- Remember: subtle textures often look more elegant once painted.
5. Make a hanging hole
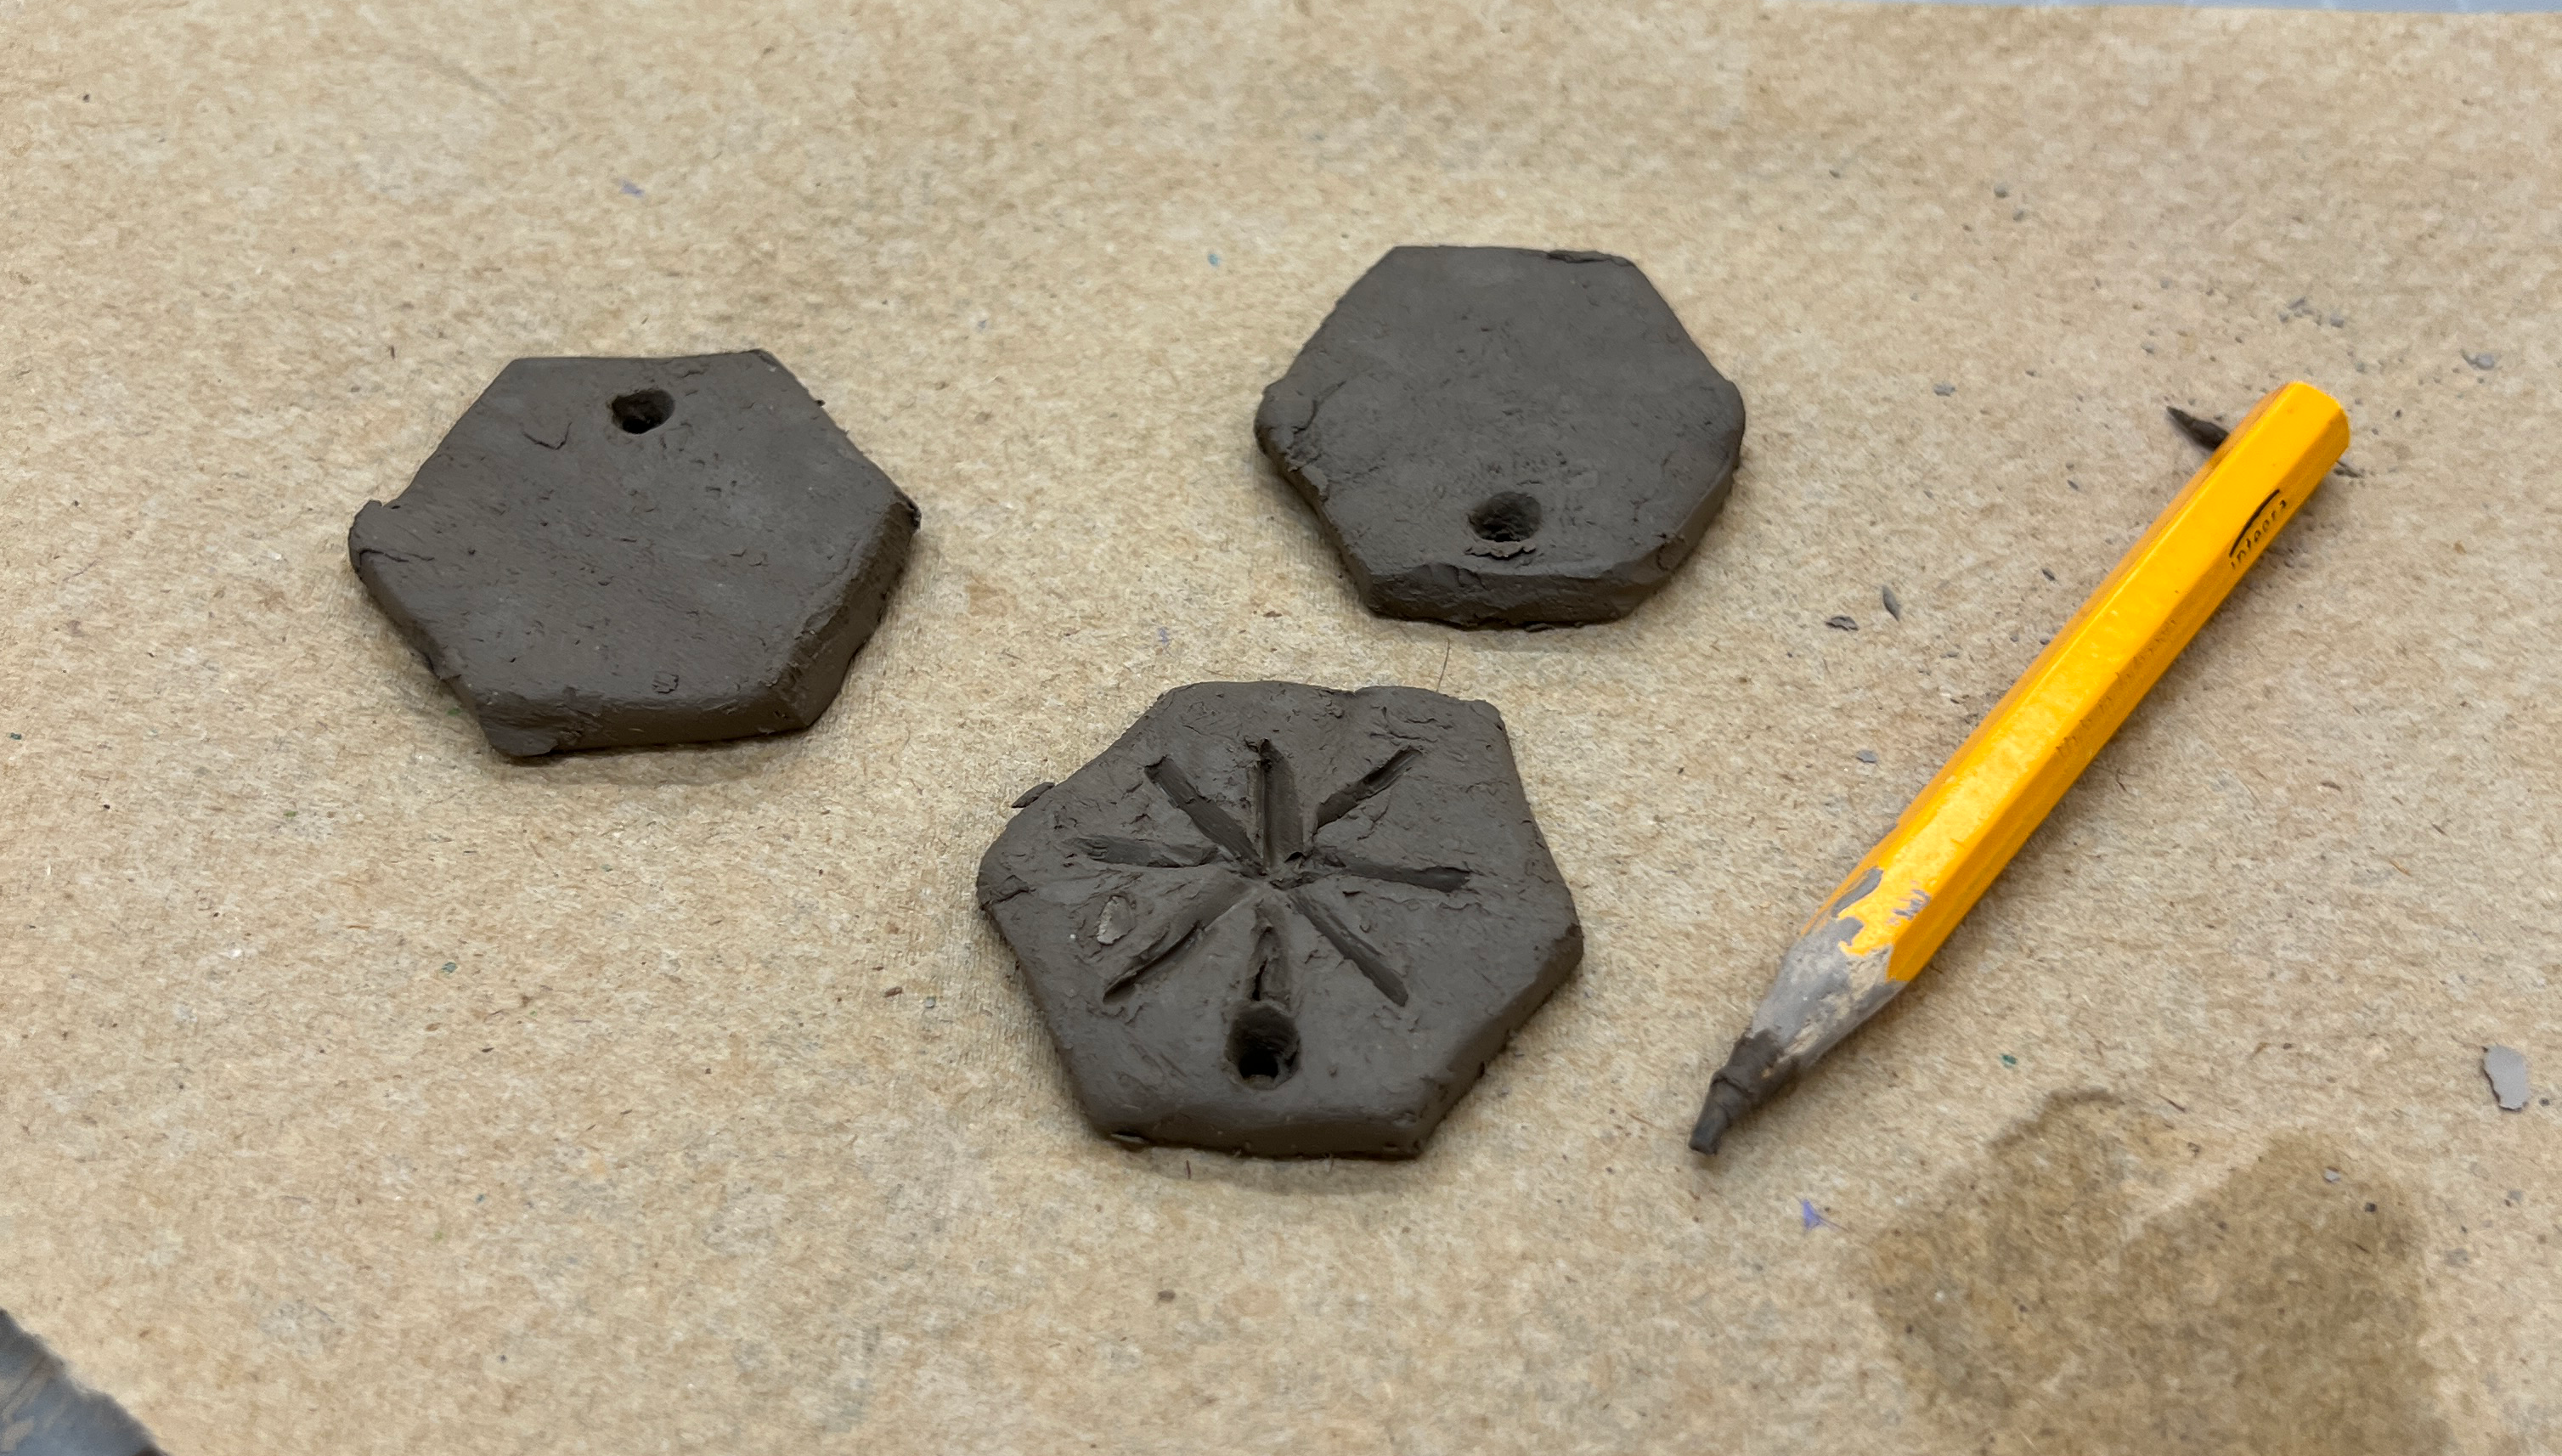 Use a straw, skewer or the end of a paintbrush to poke a hole near the top of each ornament.
 - Make sure the hole is large enough for ribbon or twine to pass through easily.
- Smooth the edges of the hole with a damp fingertip to prevent cracking during drying.
6. Drying Time
- Place ornaments on a flat, non-stick surface (wax paper works well).
- Allow them to dry naturally for 24 - 48 hours depending on thickness.
- Flip ornaments every 12 hours to prevent curling or warping.
- Avoid direct sunlight or heaters, which can cause cracks. Slow, even drying is best.
7. Decorate
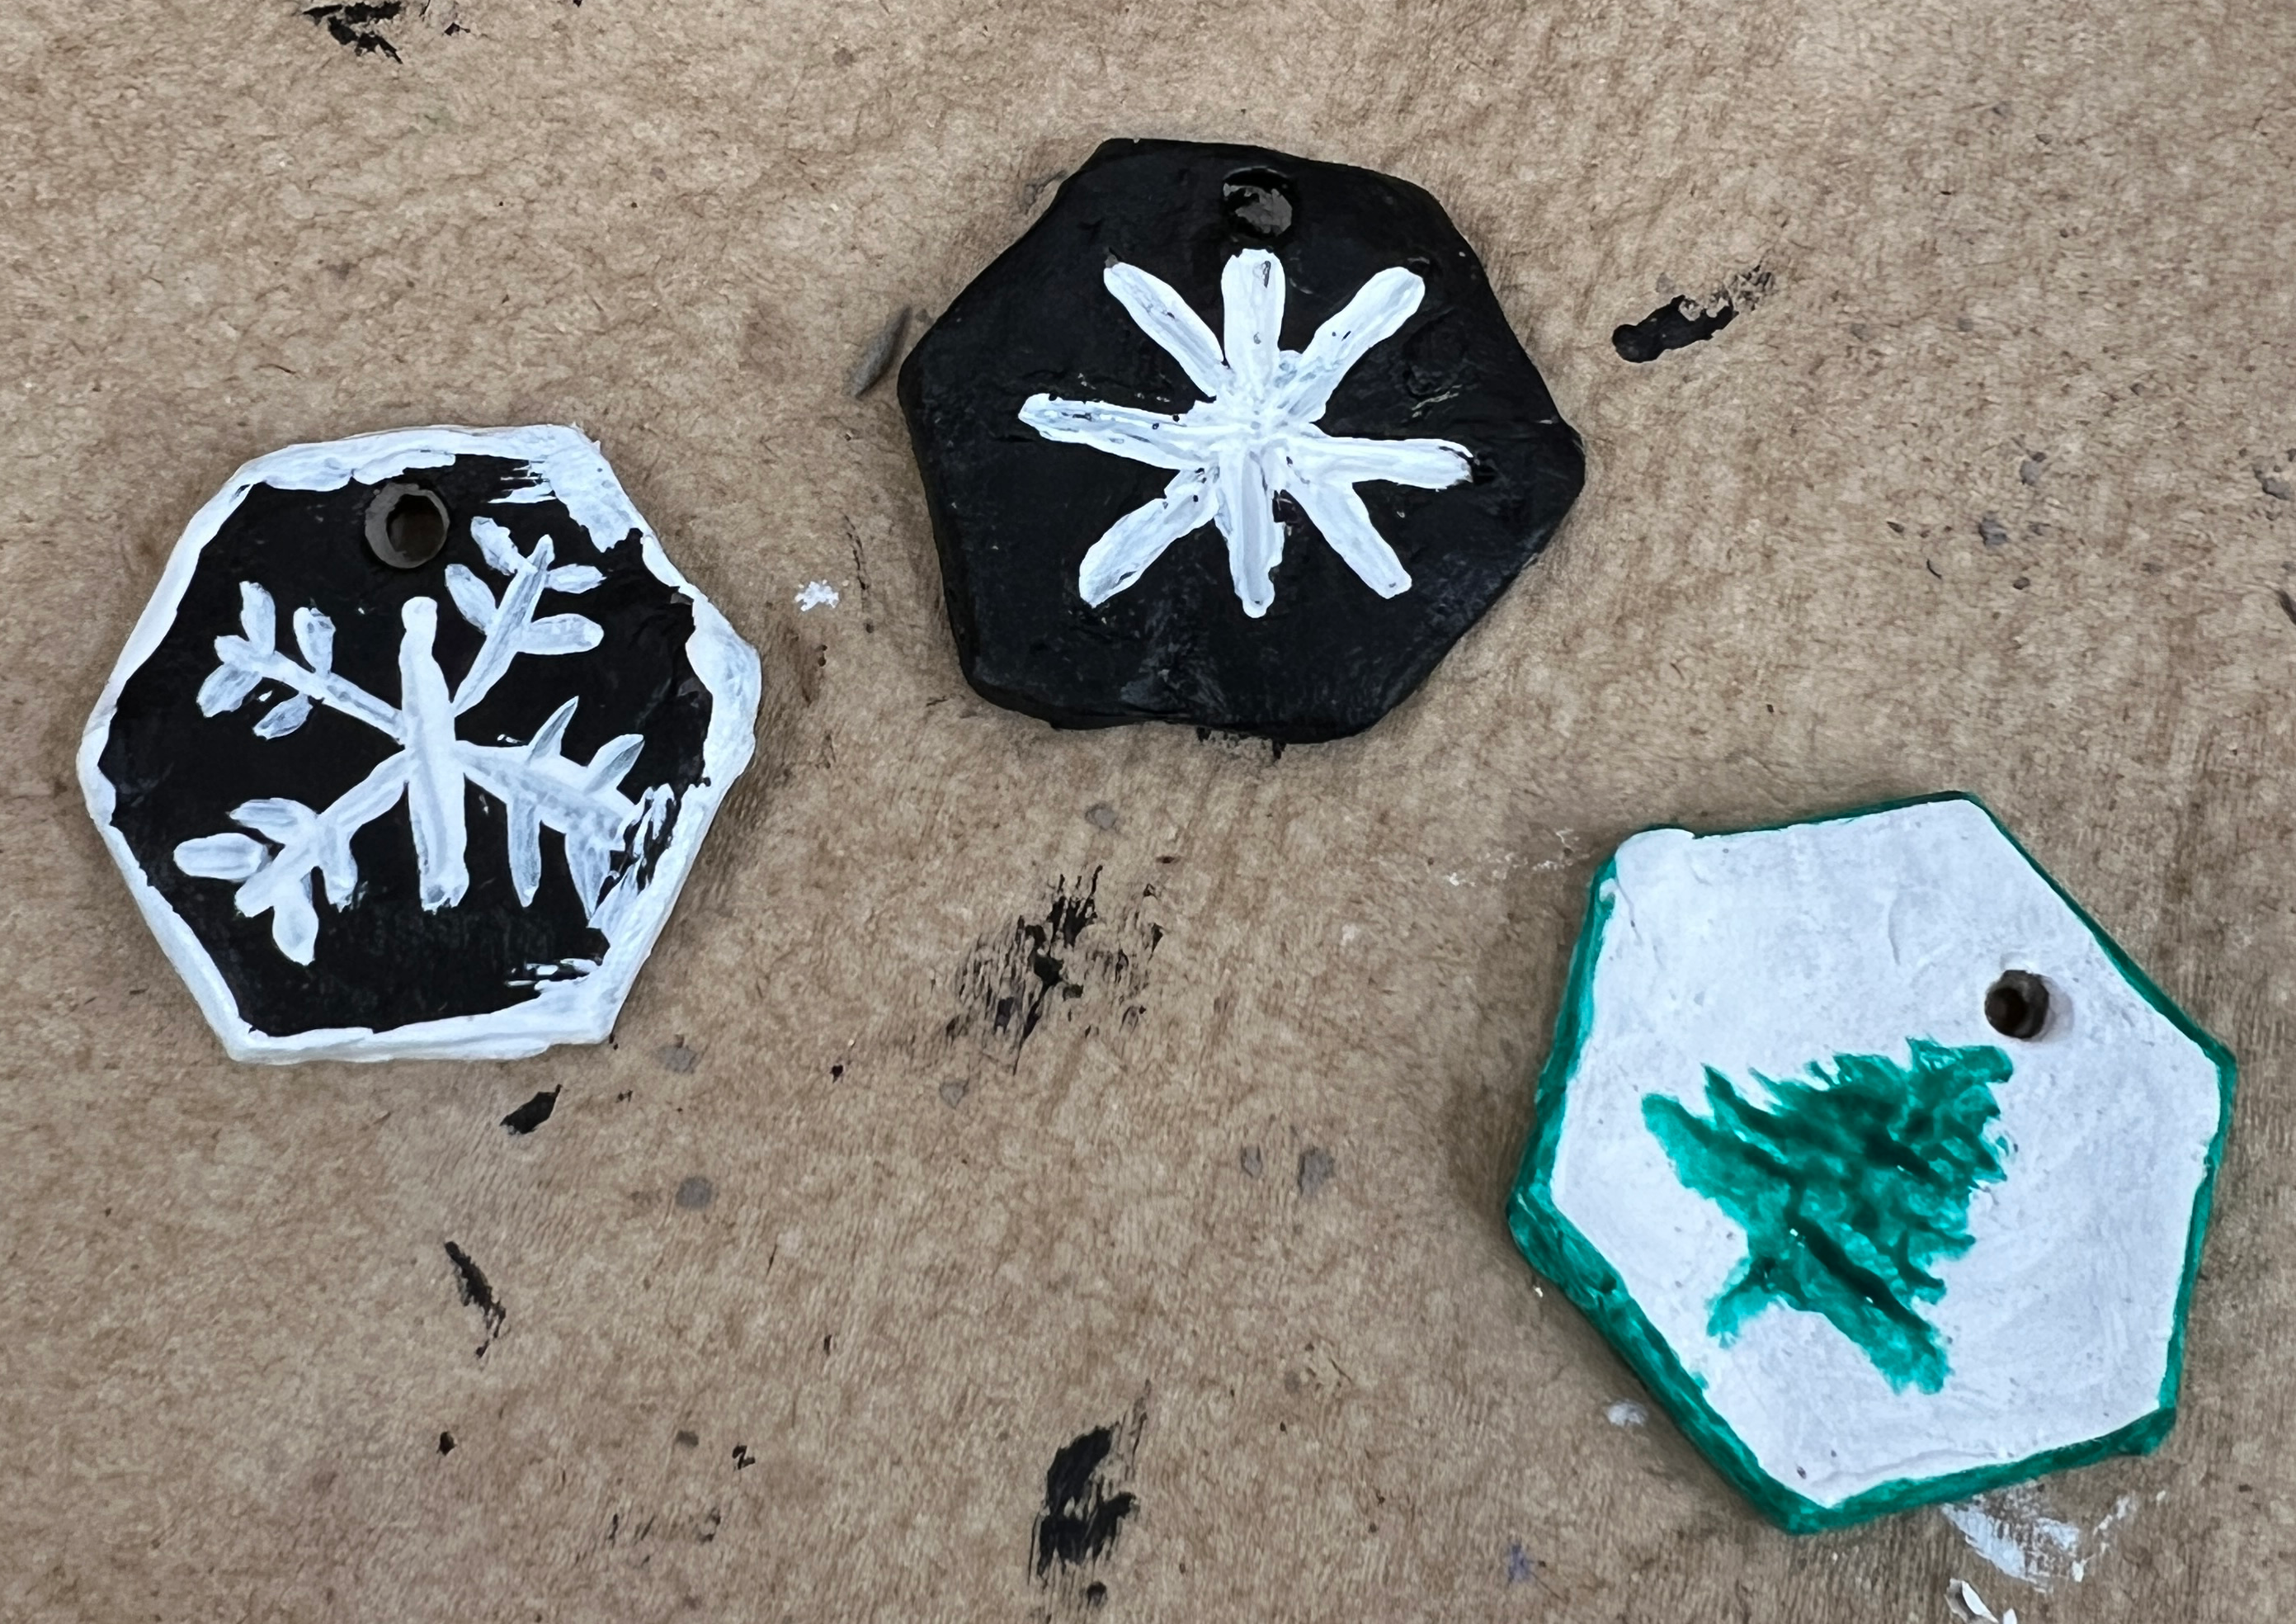 Once fully dry, sand rough edges lightly with fine-grit sandpaper for a smooth finish.
 - Paint with acrylics — solid colors, metallics or even watercolor-style washes.
- Add details with paint pens, glitter glue or gold leaf for extra sparkle.
- Seal with a clear varnish or Mod Podge if you want added durability and shine.
8. Finish & Display
- Thread ribbon, twine, or string through the hole and tie a secure knot.
- Choose ribbon colors that complement your design — rustic twine for farmhouse style, satin ribbon for elegance, or bright yarn for playful charm.
- Hang your ornaments on a tree, in a window, or even tie them onto gift packages for a handmade touch.
Creative inspiration
- Personalized keepsakes: Paint names, initials or dates to mark special occasions.
- Nature-inspired designs: Press pine needles, leaves, or flowers into the clay for organic textures.
- Minimalist chic: Leave ornaments plain white and pair with neutral ribbons for a modern look.
- Festive sparkle: Add glitter, metallic paint or gold leaf for holiday flare.
Why choose handmade ornaments?
Handmade ornaments aren’t just decorations, they’re keepsakes. Each piece reflects your creativity and can become part of family traditions, thoughtful gifts or treasured mementos. Plus working with clay is wonderfully calming, making the process as enjoyable as the finished product.
With air dry clay you can transform simple shapes into timeless treasures. Whether rustic, modern or whimsical, your ornaments will carry the warmth of handmade artistry and the joy of crafting something uniquely yours.