
Artsy Crafty Library: Clay color blends & kaleidoscopes
Polymer Clay Skinner blend cane
A few months ago, I decided to start trying my hand at working with polymer clay. I had watched a bunch of tutorials and videos on Pinterest and was incredibly intrigued at how versatile the medium could be. It also appealed to me as the mom of little kids, since polymer clay - unlike regular clay - does not dry out. So you can leave it for a while if life (or crazy bedtime routines) get in the way of completing a project!
One of my favorite things to make with polymer clay are Skinner blend canes. They are relatively simple to make but result in a beautiful gradient of color.
Tools you will need
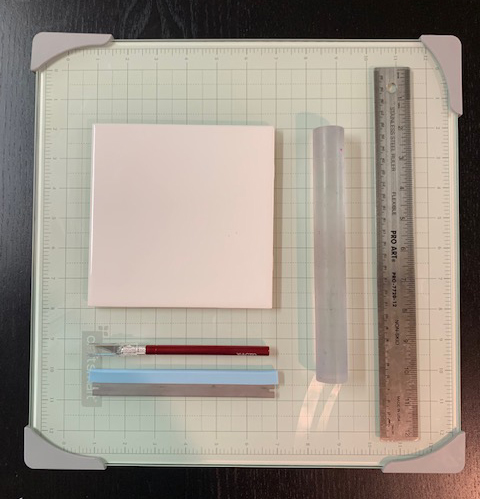
While you can create things with polymer clay with your hands, if you want to try some of the more involved techniques, you’ll need a few basic tools. One important thing to remember is any tool you use should be strictly kept for clay use. Do not use kitchen utensils or anything that might come into contact with food.
You will need:
- Work surface (preferably glass or ceramic). I have a glass work surface, as well as a ceramic tile I use for baking my projects.
- Roller (preferably acrylic)
- Ruler
- Straight blade
- Craft knife
If you really want to go the extra mile, I highly recommend getting a clay conditioning machine, which is just a fancy term for a pasta roller. (Again, you will only use this for clay not pasta.) This not only saves you time, but also helps achieve a uniform thickness with your projects.

Making a Skinner blend cane
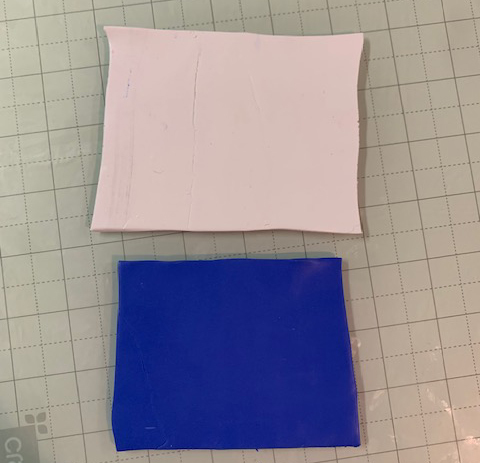
Since Skinner blends create a gradation of color, you need at least two colors. One should be light and one should be dark. I used white here, as well as a darker blue-purple color.
Step 1
Condition both your colors. This means gently knead the clay in your hands or run it through your conditioning machine a few times to make it more pliable. Roll out sheets that are around ¼” thick and cut two squares roughly the same size.
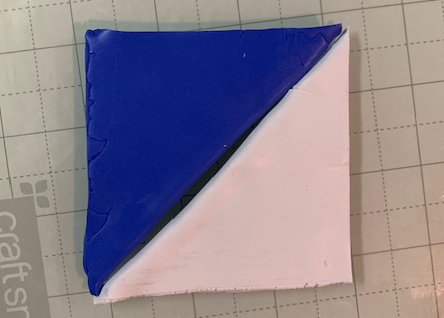
Step 2
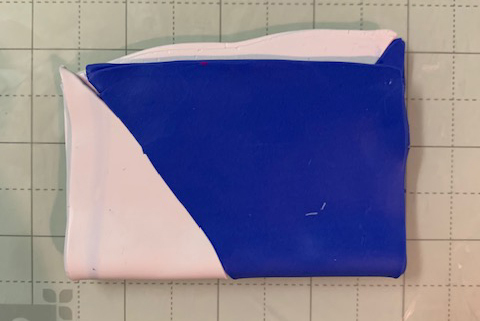
Fold both colors from corner to corner, creating two right triangles. Make a square by putting these two triangles together, long edges touching. Run your roller over the square you’ve created to join them.
Step 3
Fold the square in half from the bottom to the top, so you have the two colors from the bottom edge meeting the two colors from the top. This is the only way to fold the clay to obtain a Skinner blend.
Step 4
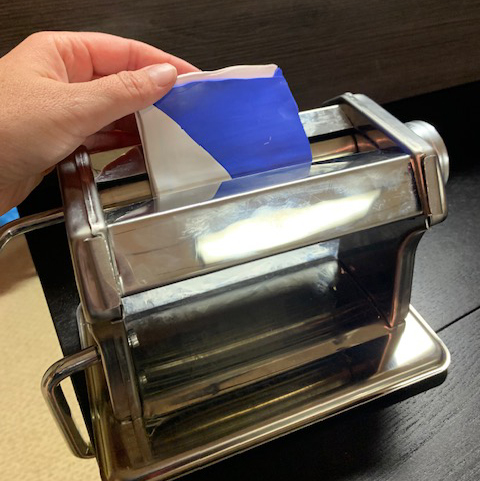
Using either your roller or the conditioning machine, roll out the clay out to about ¼” thickness. If you’re using a machine, make sure to put the clay in folded side first. This helps reduce air bubbles.
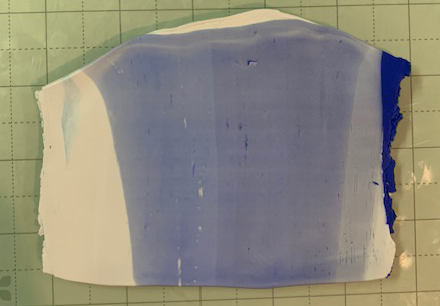
Step 5
Repeat Steps 3 and 4. You will need to do this several times. Eventually you will start to see the colors blend together in the middle. Keep folding and rolling until you have a seamless gradient of color.
Step 6
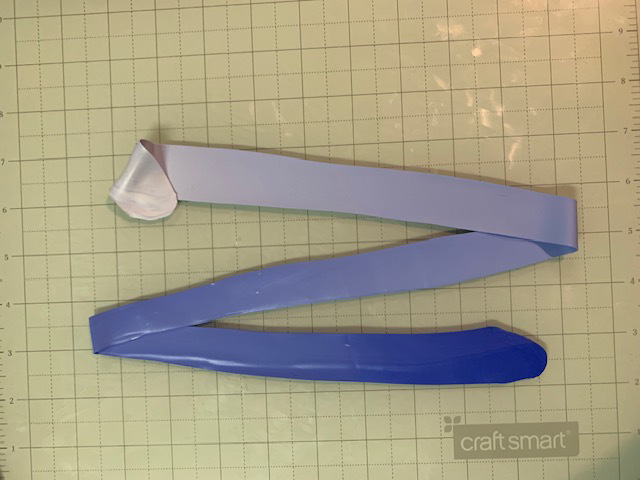
Fold the clay in half to create a long rectangle. Using either your roller or the machine, roll the strip out from one short end to the other, gradually reducing it in thickness but extending its length. Eventually, you should have a very thin, long ribbon of clay.
Step 7
Starting at the lightest end, roll the ribbon up. Make it as tight a roll as possible to avoid gaps and air bubbles. You should end up with a cylinder that has the darkest color on the outside.
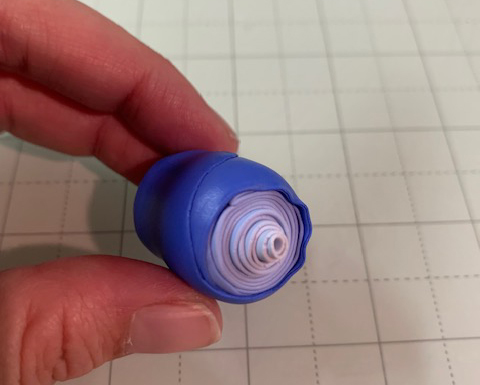
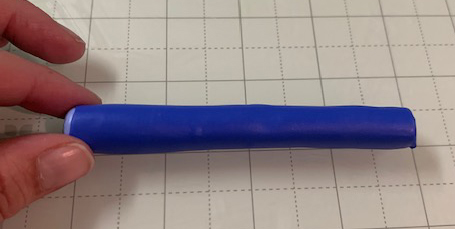
Step 8
Decide how large or small you want your cane. If you want it to be smaller, roll your cane out into a snake to the desired size.
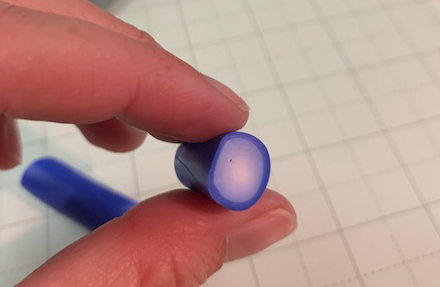
Step 9
Trim the uneven edges off and you should be left with a beautiful gradient color circle.
What can I do with this?
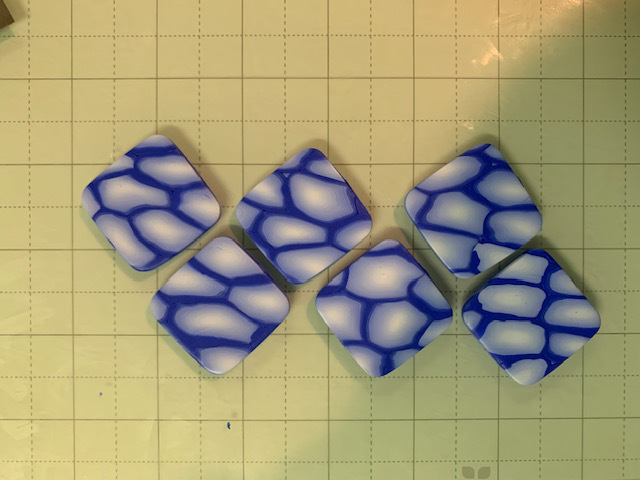
You can use your Skinner blend cane for all types of projects. For this particular one, I sliced thin pieces from the cane and put them on an extra piece of purple clay I had leftover. I ran my roller over it and then sent it through my conditioning machine. I then cut out some squares to eventually be baked and made into earrings.
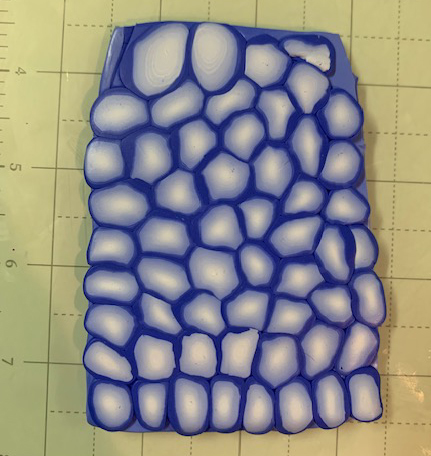
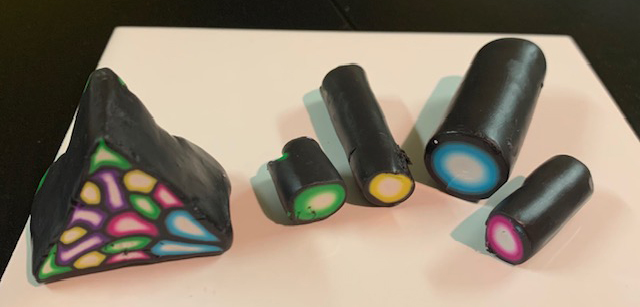
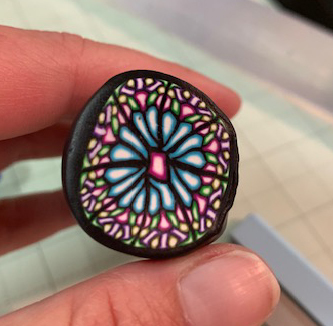
There are endless possibilities for what you can create with Skinner canes. You can combine multiple colors of Skinner blend canes to create beautiful kaleidoscope effects.
Check out the books below and Creativebug (free with your library card!) for more ideas. Happy crafting!