


Art Reproductions: Lino block printing
Background
If you enjoyed creating art using potato prints or are interested in designing your own stamps it's time to try creating a linoleum (lino) block print.
Background
Used throughout modern history by artists including Henri Matisse and Pablo Picasso, lino block printing originated in the making of wallpapers and books in the 1800s. It quickly become a popular artist medium by the end of the century.
Lino block prints (or linocuts) are created by carving into a piece of linoleum. The mehtod itself is a type of relief printmaking. Relief prints are created by adding ink to an object's raised surface, pressing that surface down onto paper (or other mediums such as fabric) and then lifting to reveal a print. So in a sense, relif printing is much like using your average inked stamp, only more intricate and detailed.
Lets explore examples of lino block prints in the library's collection.
The Library's Collection
We have several examples of lino block prints in our art collection. Here are a few of my favorites!
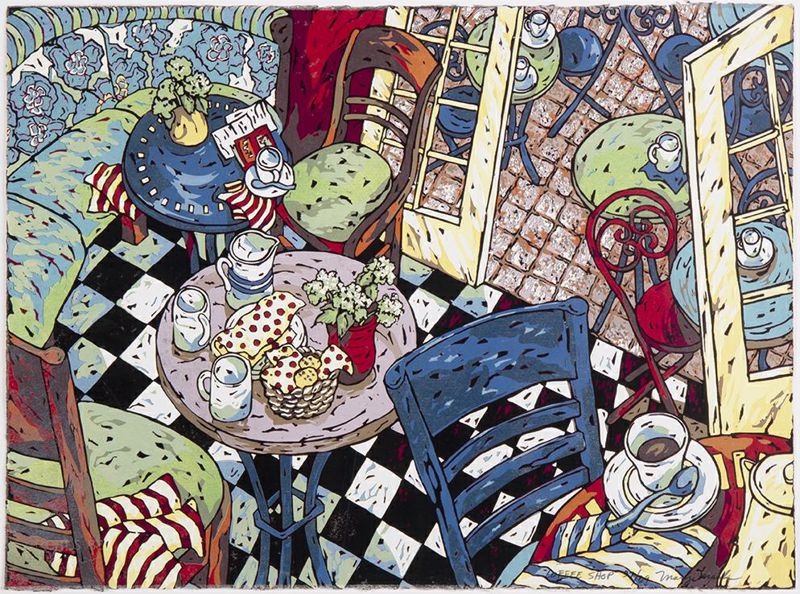 Coffee Shop (2008.022)
Avis Chitwood, 2011
Linocut on paper
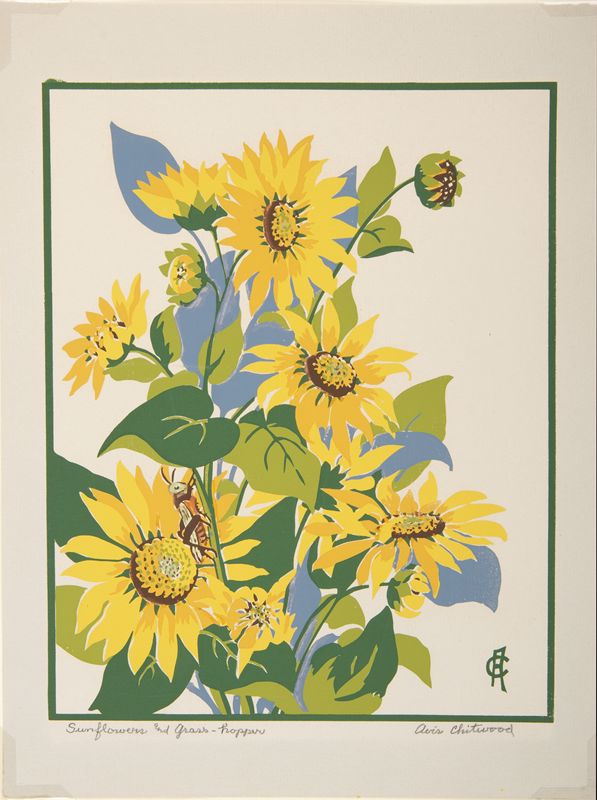 Sunflowers and Grass-Hopper (2011.001.001)
Avis Clintwood, 2011
Linocut on paper
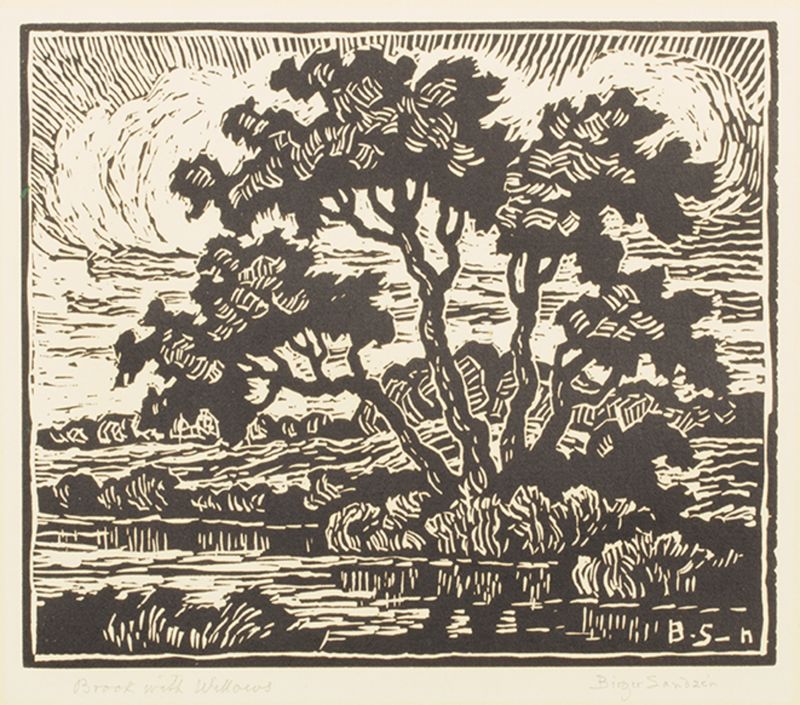 Brook with Willows (2003.009.003)
Birger Sandzen, 1937
Lincut on paper
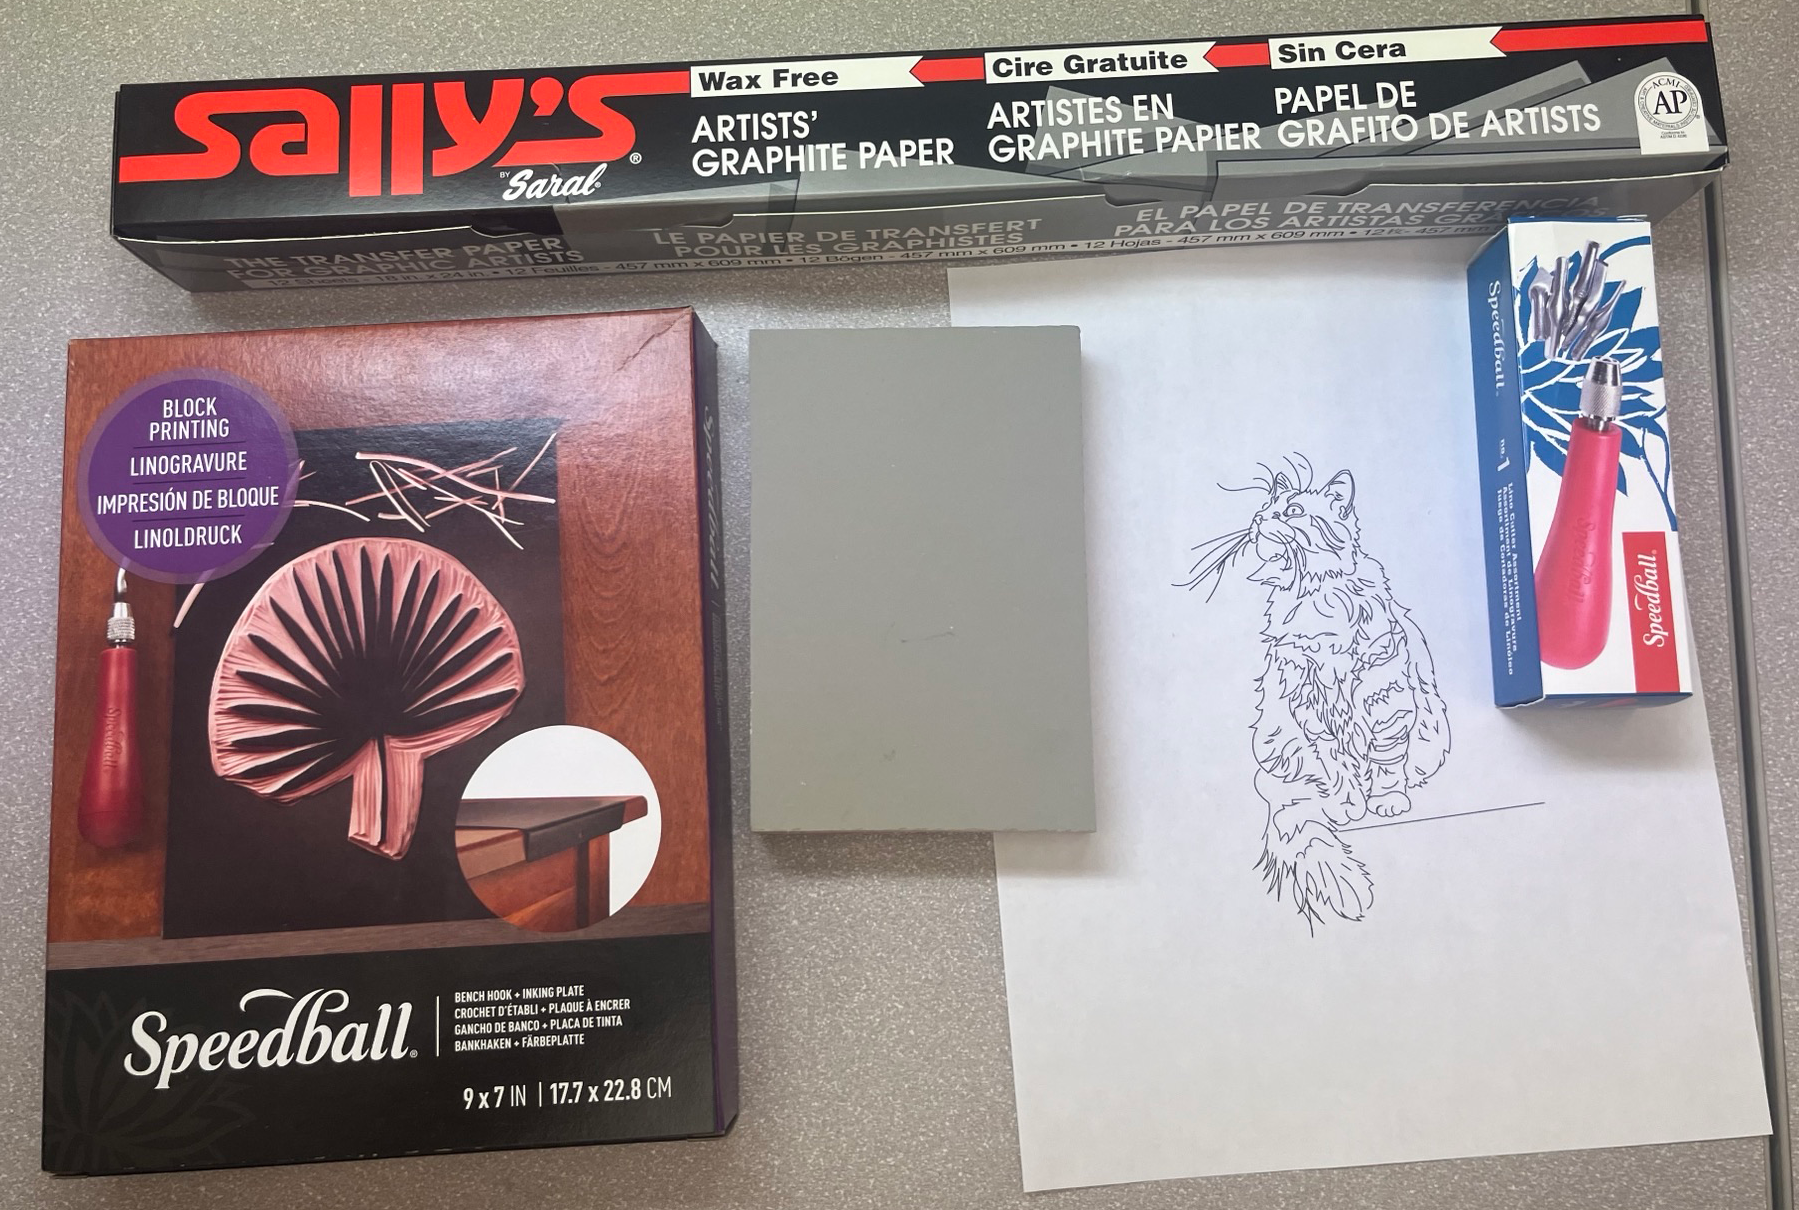
Supplies for this Project
At a minimum you will need:
-
A surface to carve into. For my project I used linoleum blocks but to start out you are welcome to use blank rubber stamps or even the Styrofoam.
-
Carving tools. Starting out I suggest getting a basic set. The starter Speedball set is available at most arts & craft stores in town and online.
-
Ink or other printing material. For my project I used Speedball ink, but you could try using slightly watered down acrylic or craft paints. Just keep in mind that these materials print and dry differently from each other.
-
Paper. Plain copy paper will work but I encourage you to experiment with others. Different papers lend to different print qualities.
-
A roller or paint brush. A roller will give you a more even ink application, but a plain paintbrush or foam paintbrush would also get the job done.
-
An ink slab or inking plate. A plain plate larger than your roller or brush will work.
-
A baren or burnisher – any hard, flat object works. I’ve used my library card in the past.
Other supplies I used:
-
Tracing/carbon paper. This is definitely not required but made tracing my image much easier.
-
A bench hook or vice. This helps prevent injuries during the cutting process. While these aren’t required for the project, I strongly suggest using one.
Project Steps
Carving your block
Step 1
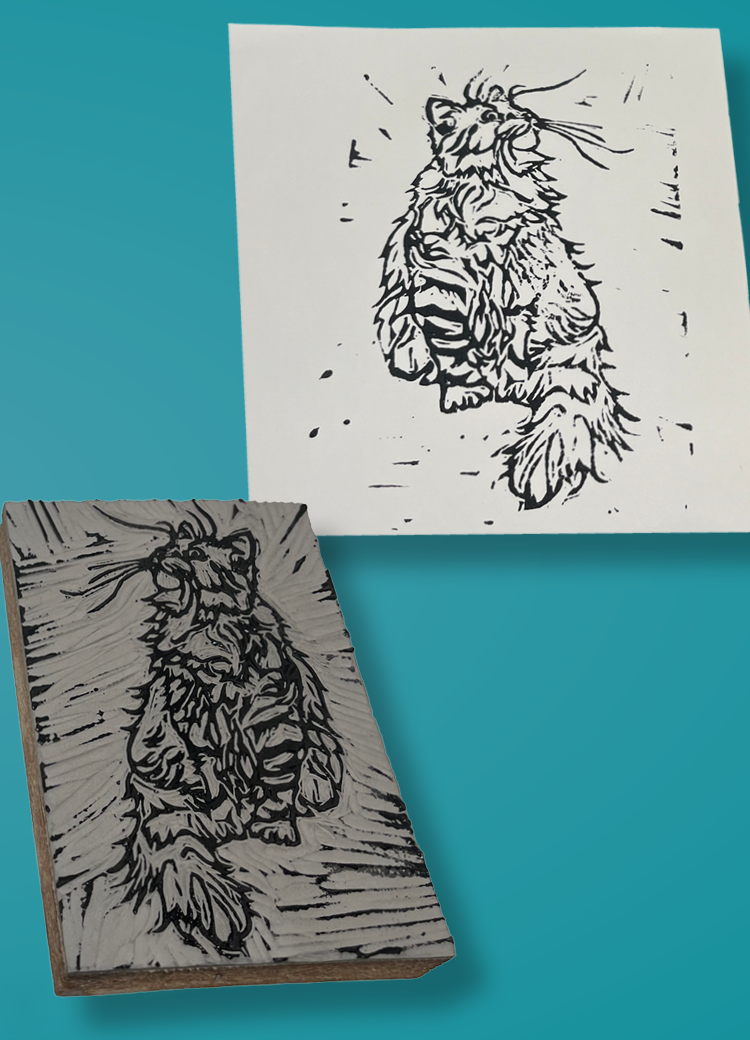
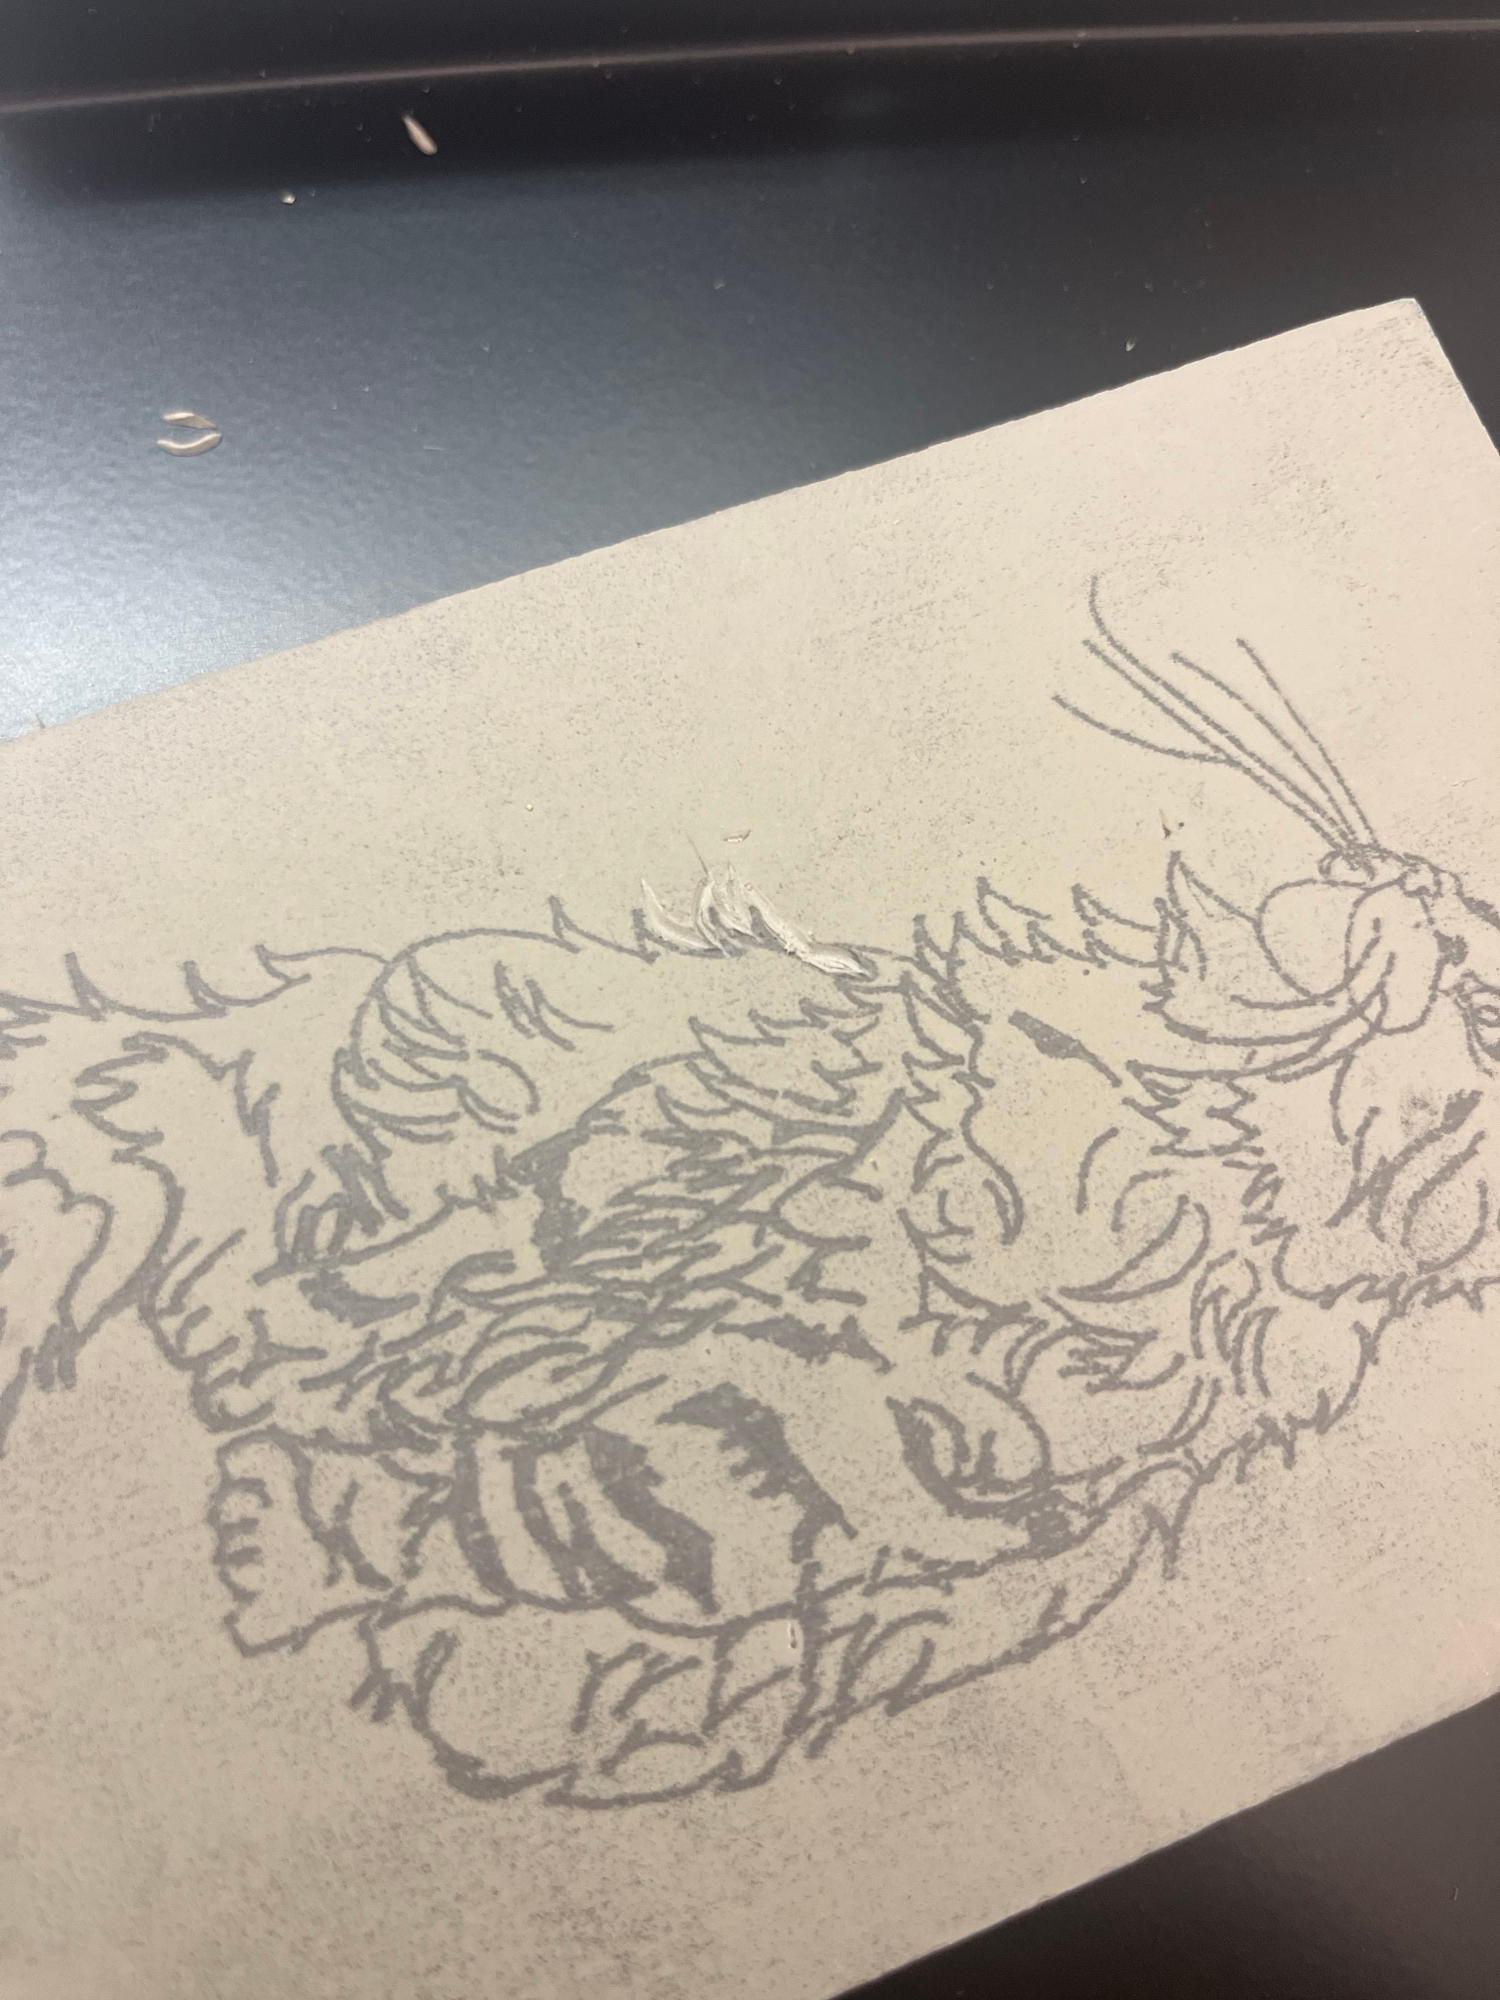
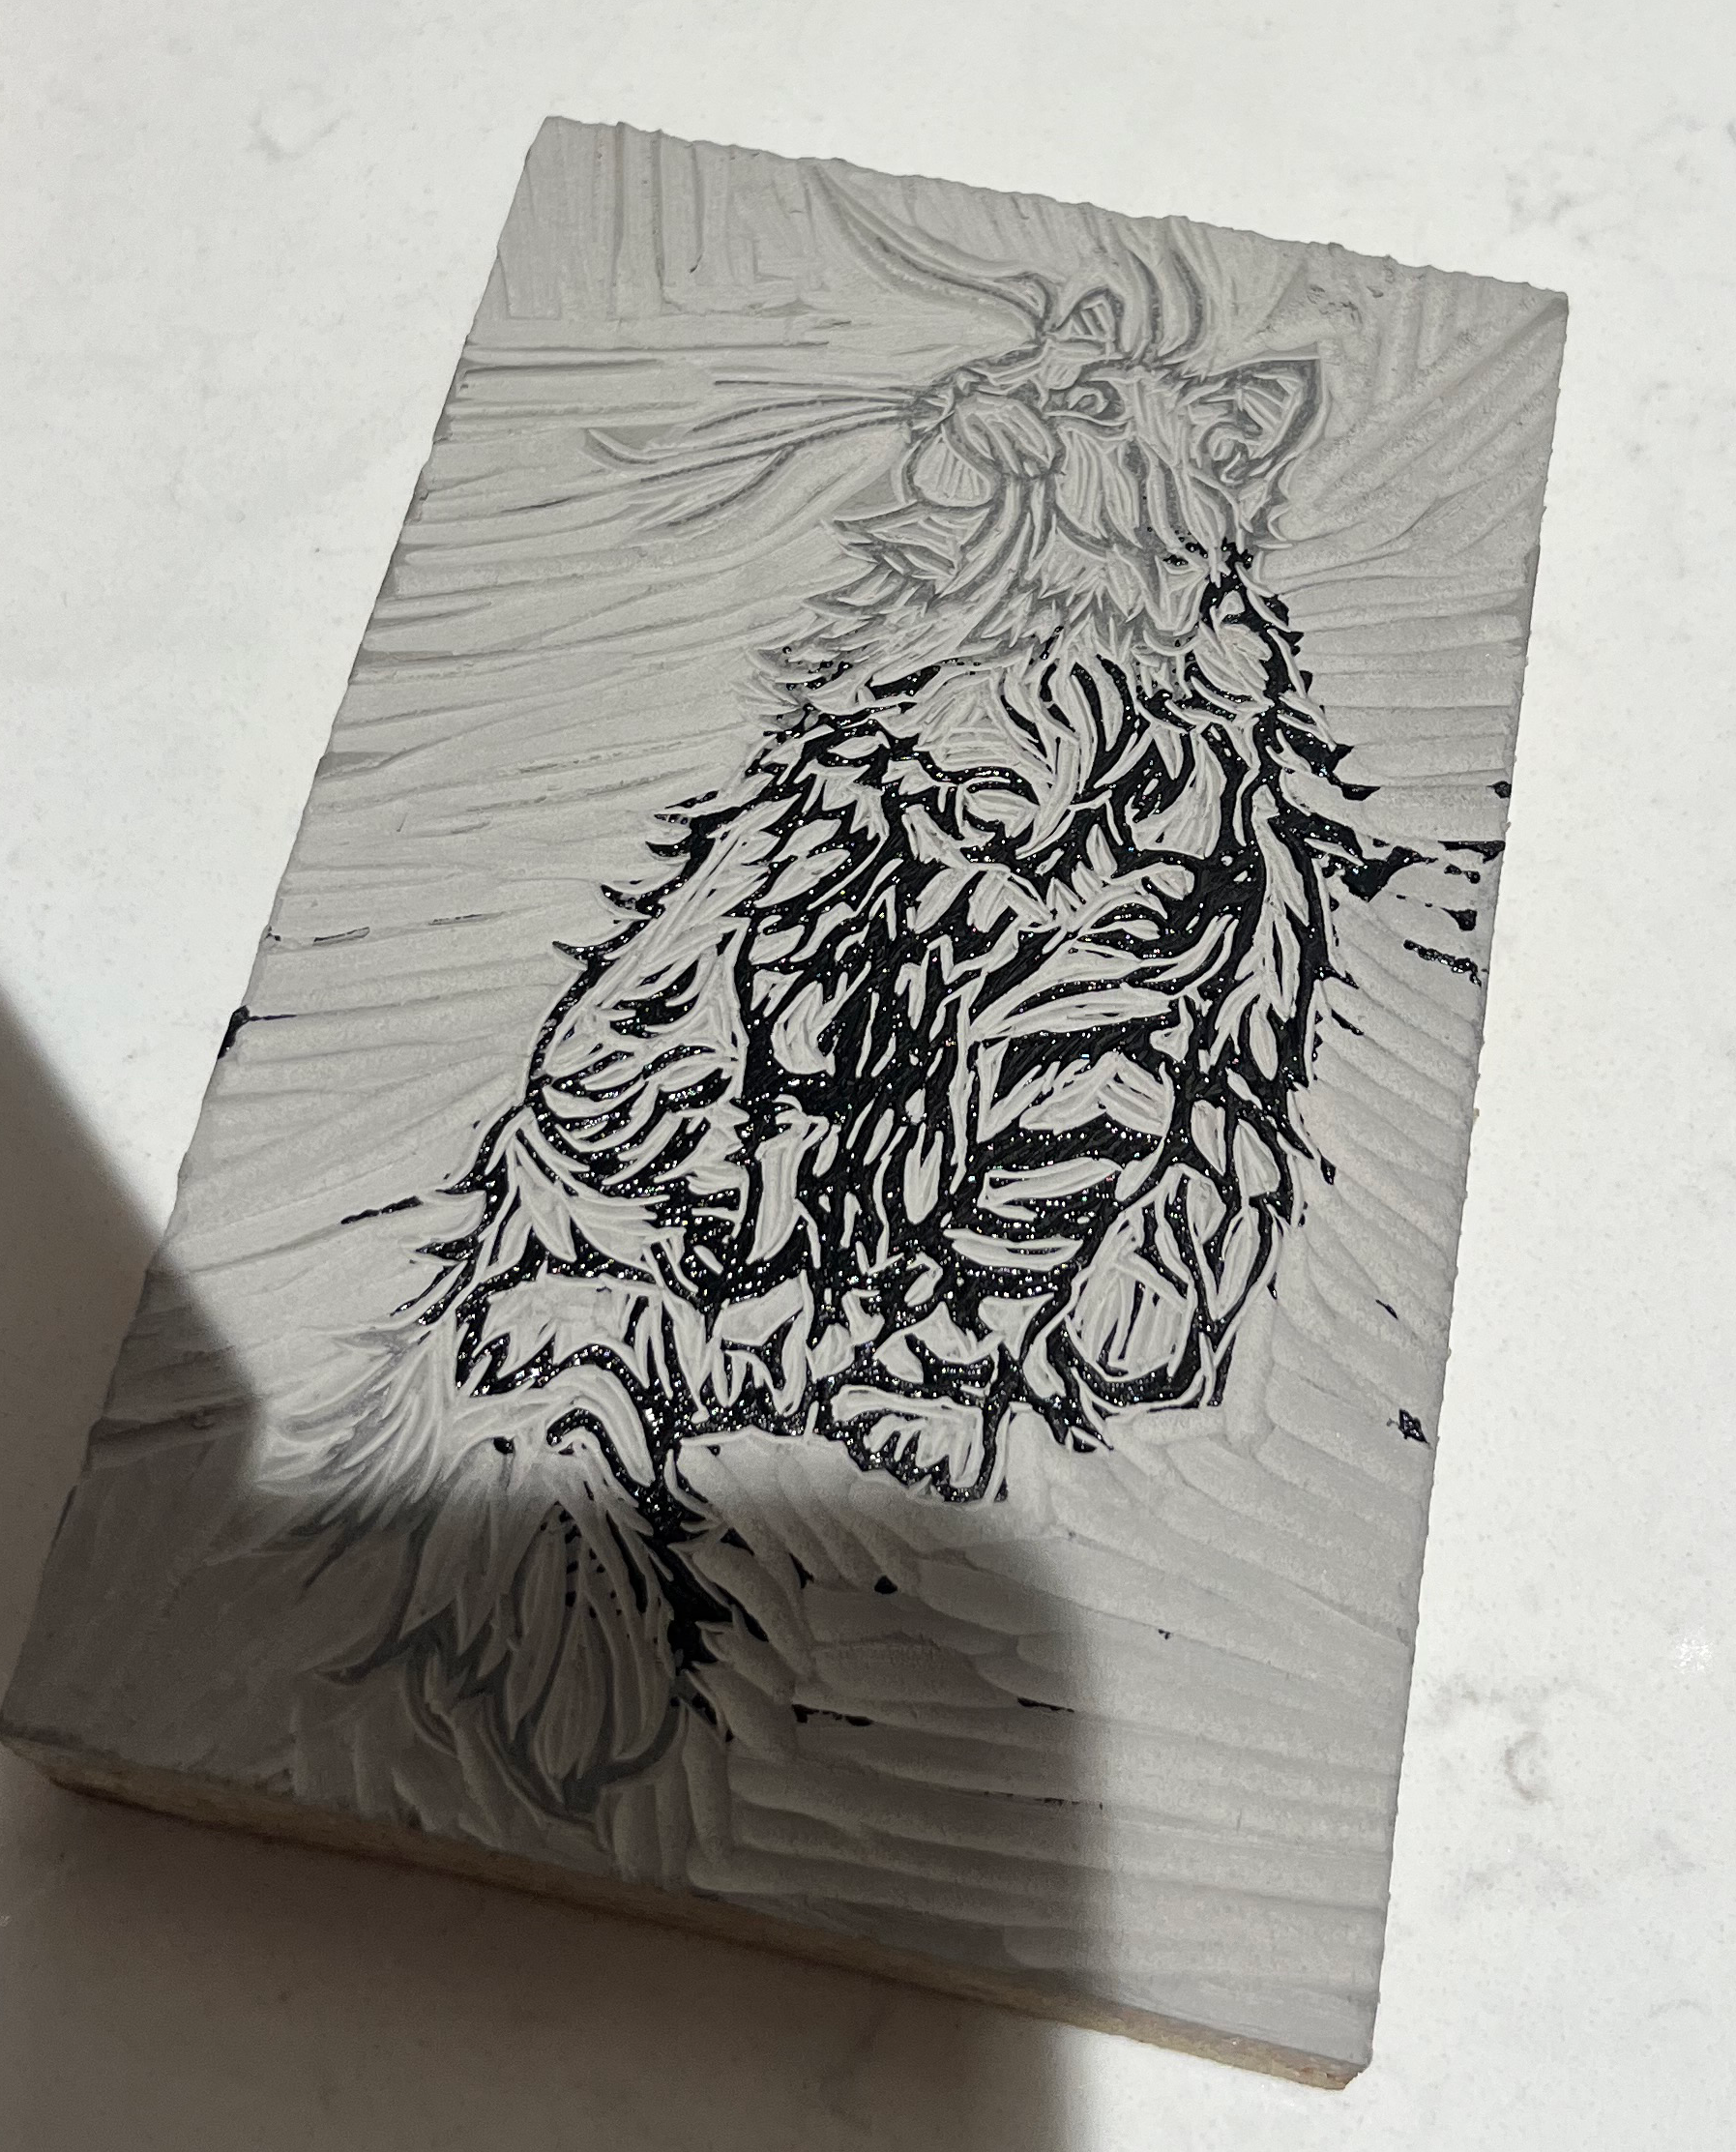
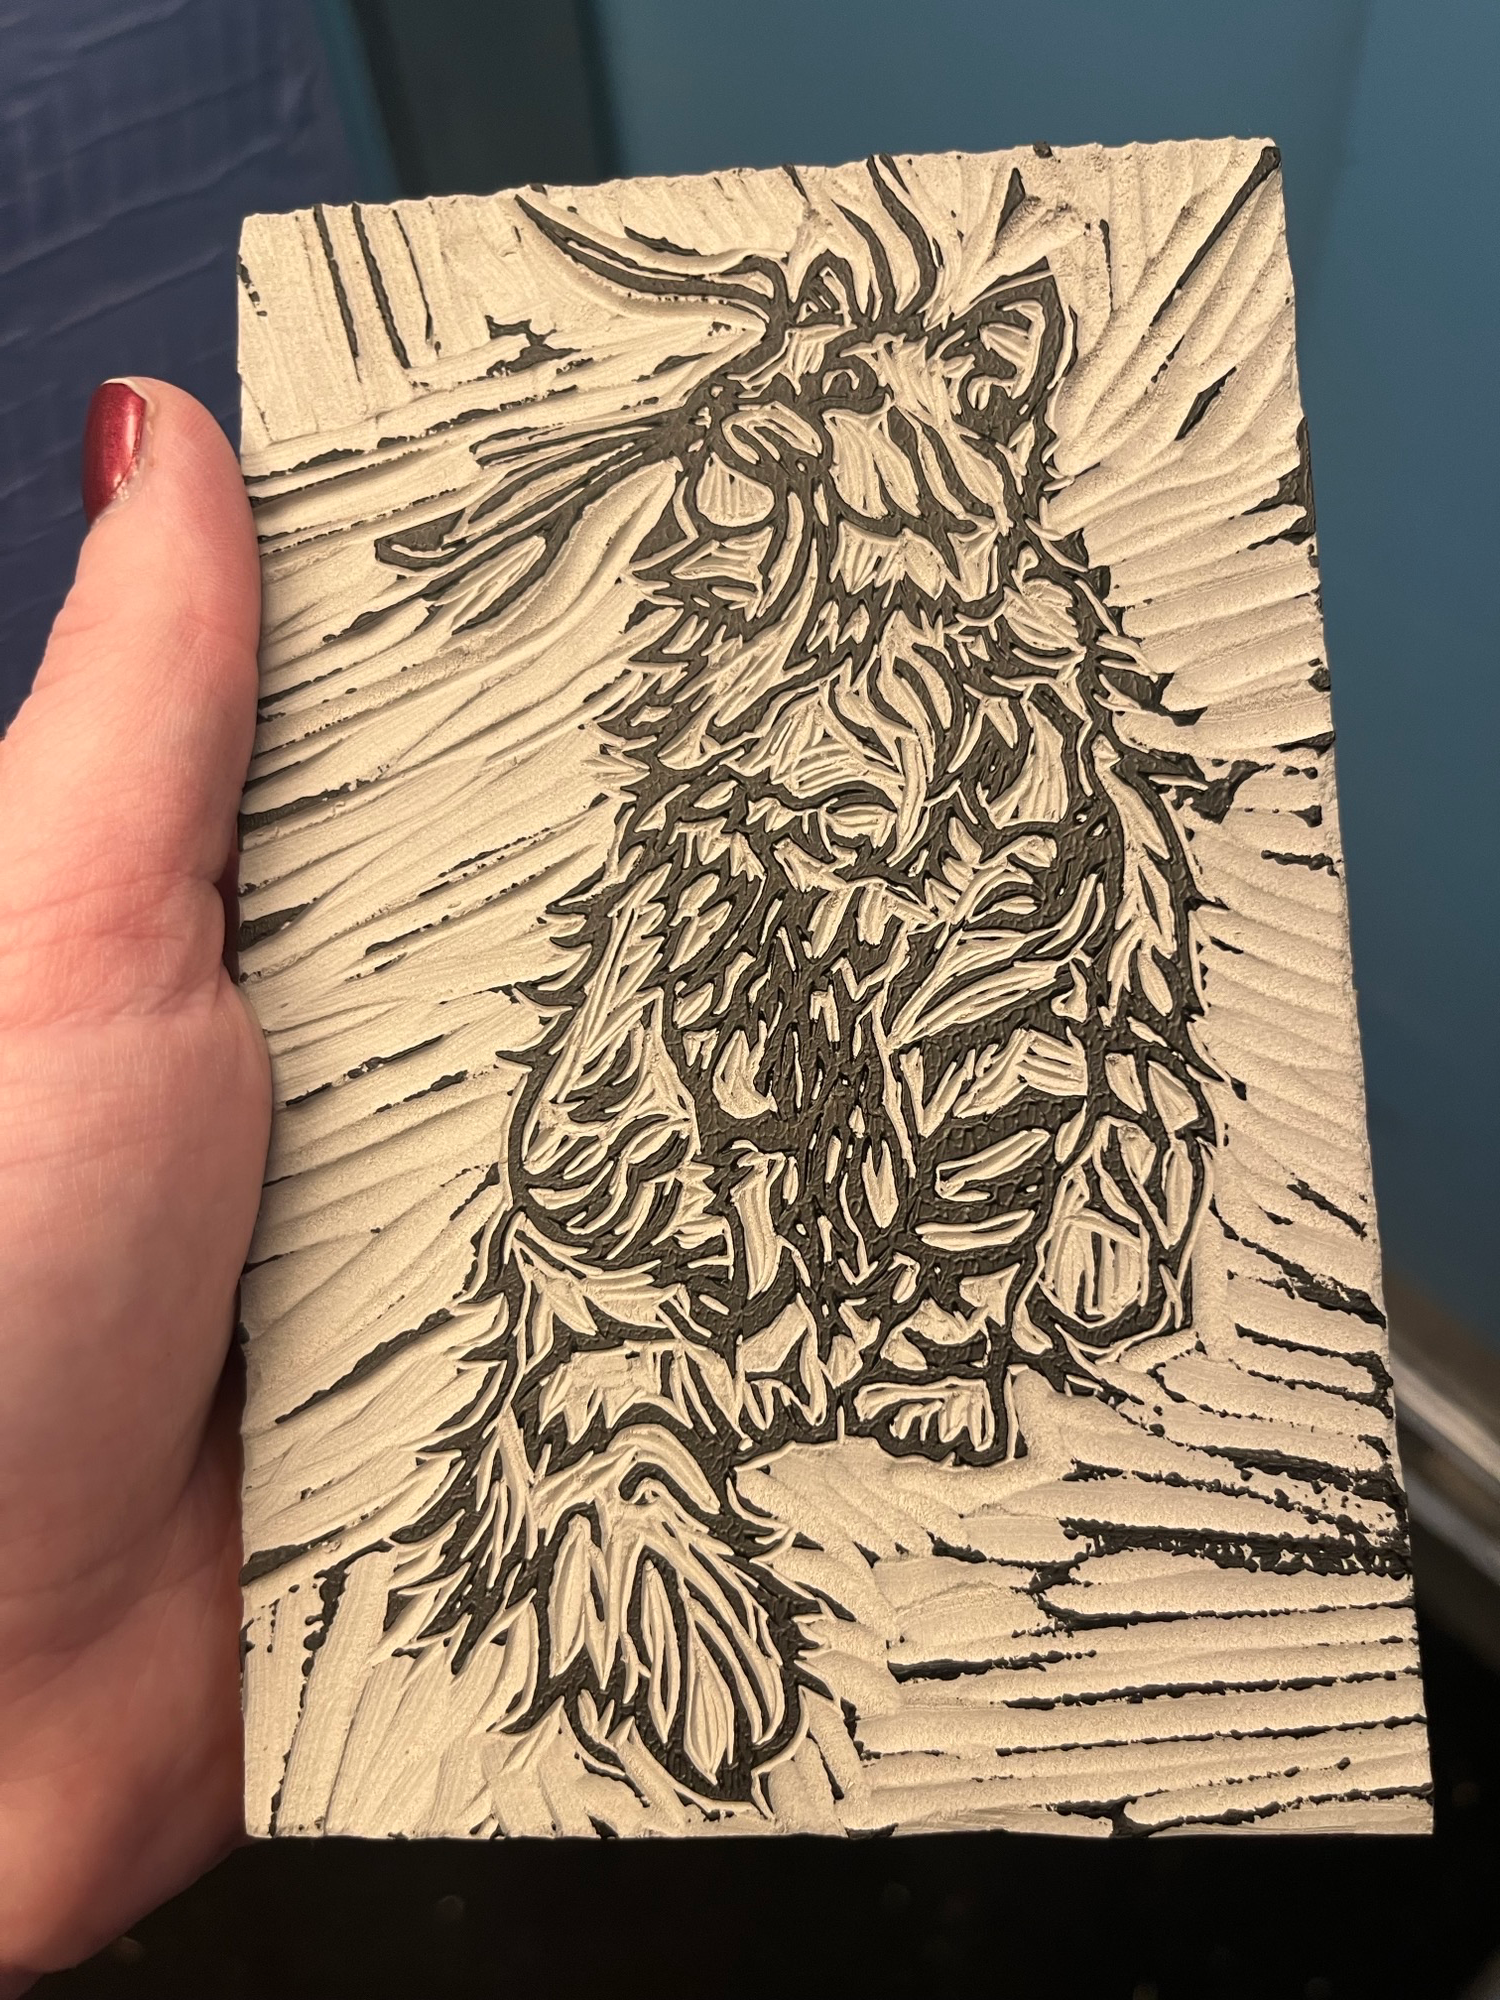
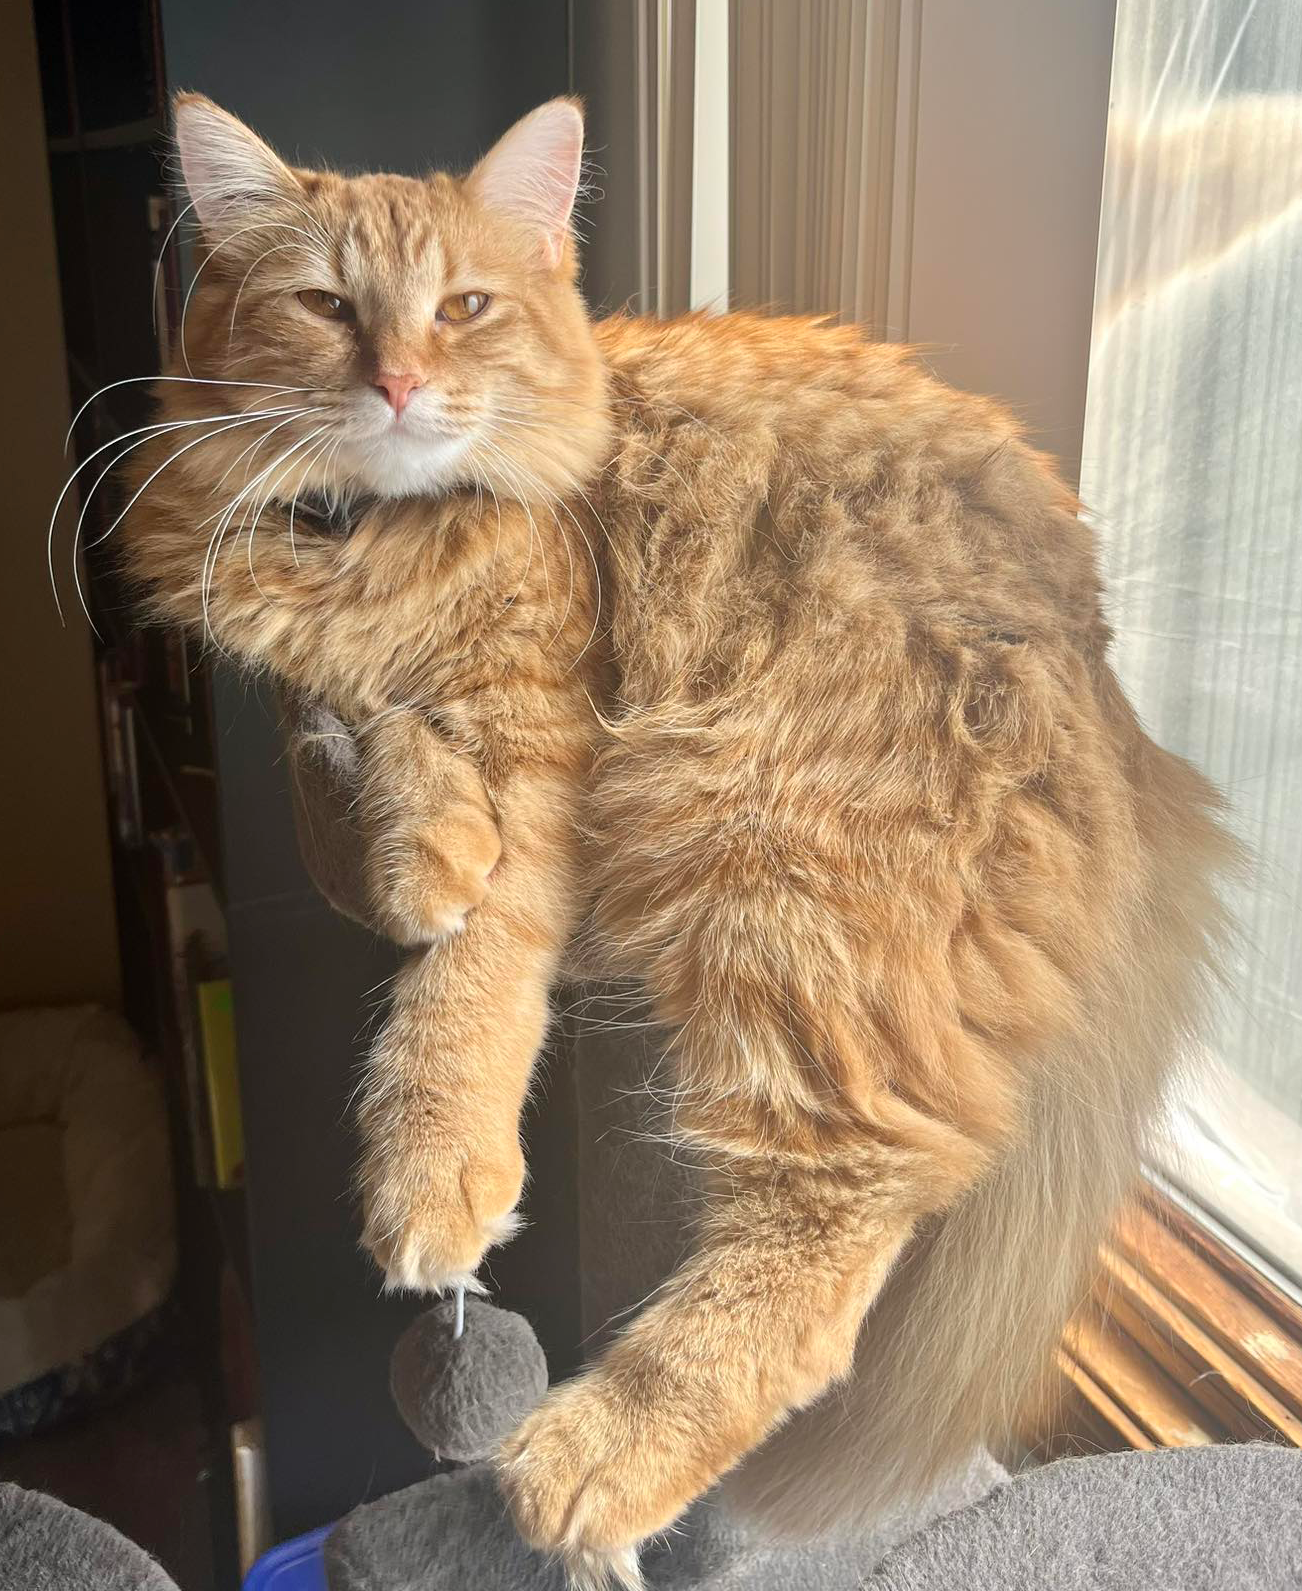
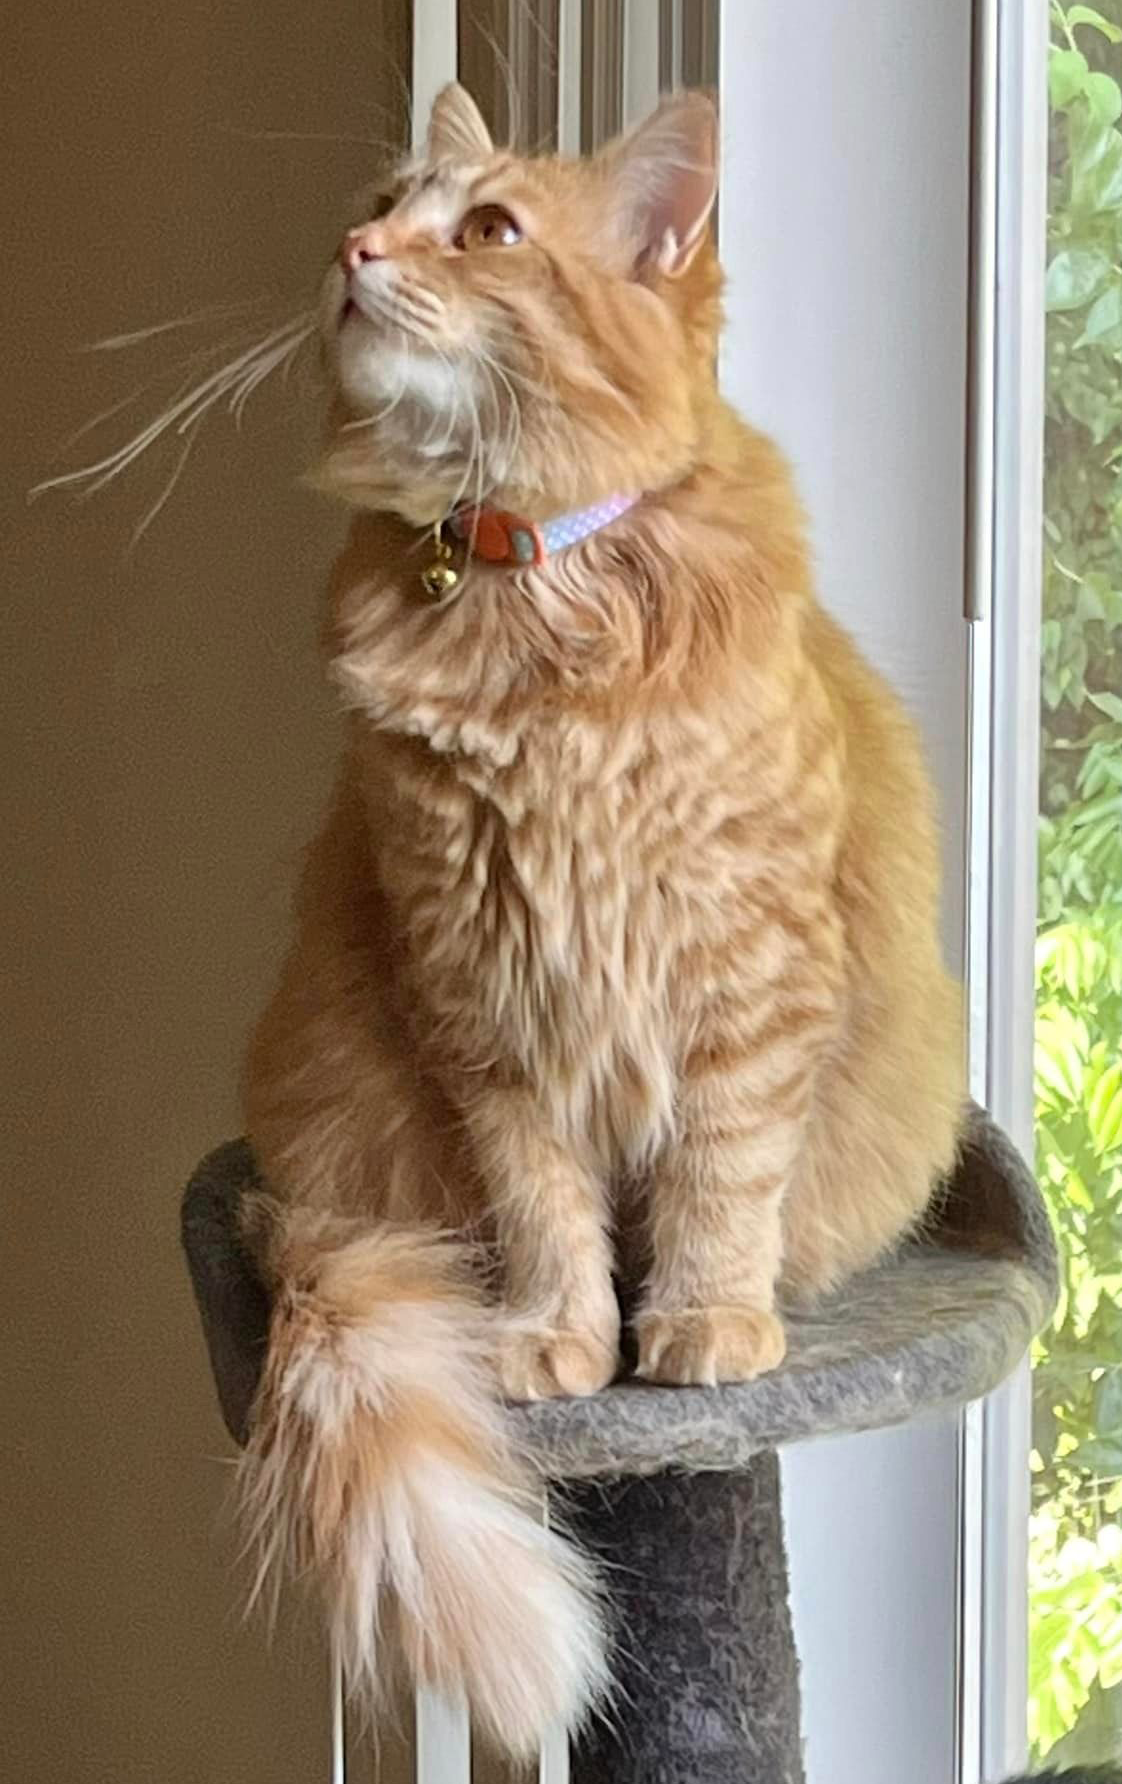 Your first step is to select the image you want to work with. For my project I chose to work from a photo of one of my cats, Tilly, looking majestic. For your first project I suggest choosing something simple such as a line drawing or high contrast (very little greyscale) black and white photo. You are welcome to hand draw directly onto your carving surface, but I prefer working from an image. Remember: any words or numbers will need to be reversed to prevent them from appearing backwards in your prints.
Step 2
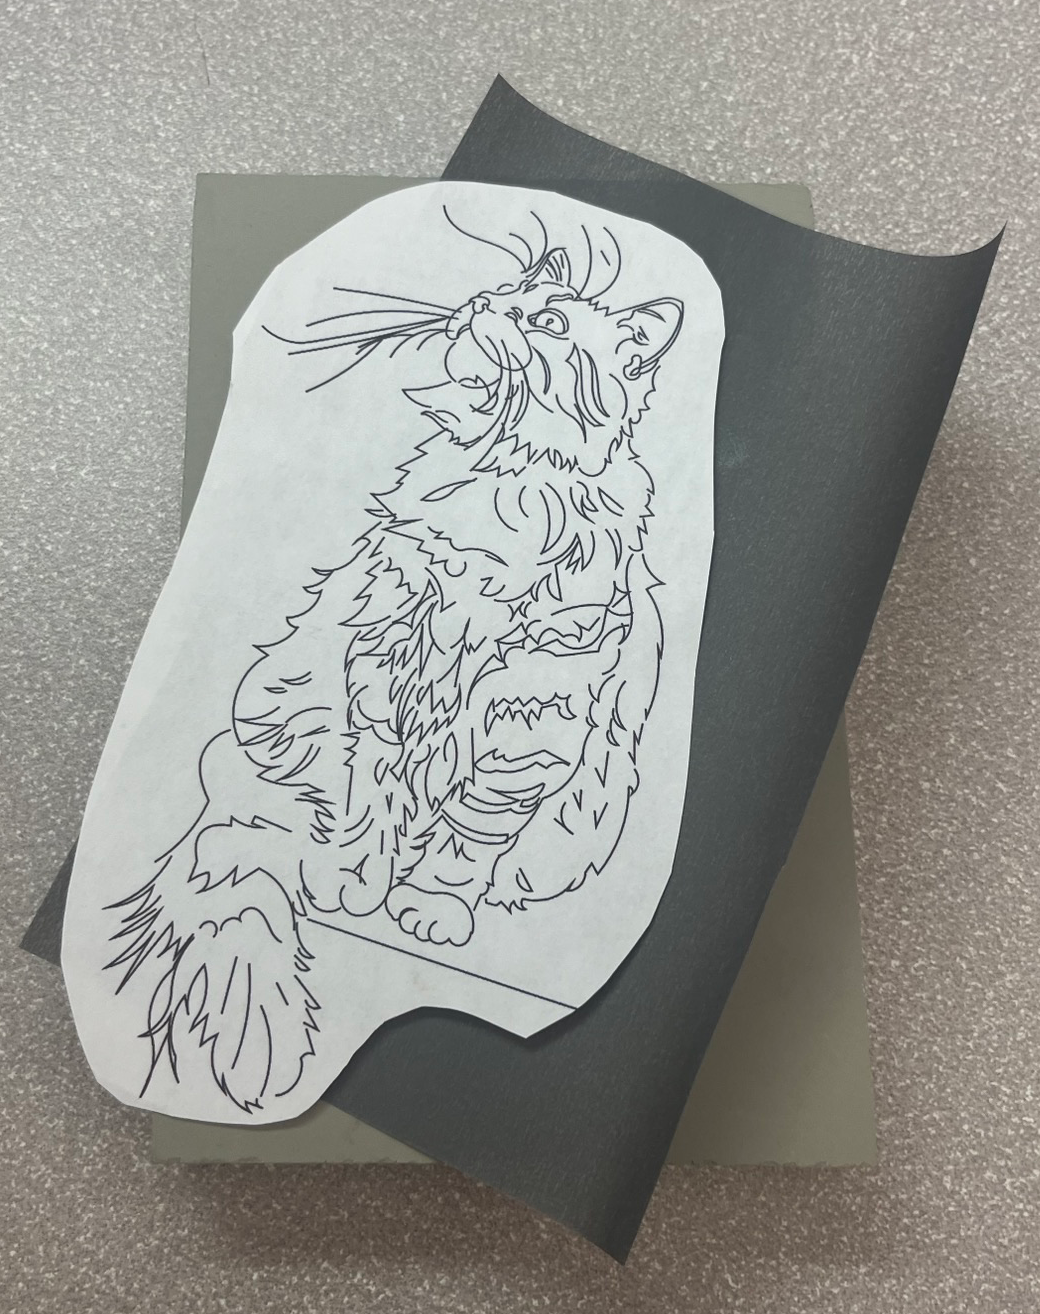 Cut your image and tracing paper down to the size of your linoleum block. Tape these down onto the block in the following order: 1- the tracing paper should go directly on the block with the ink-side down, 2- the image should then go on top of the tracing paper.
Trace your image, the tracing paper will then transfer the image onto the carving surface. Once complete, remove the image and tracing paper.
Step 3
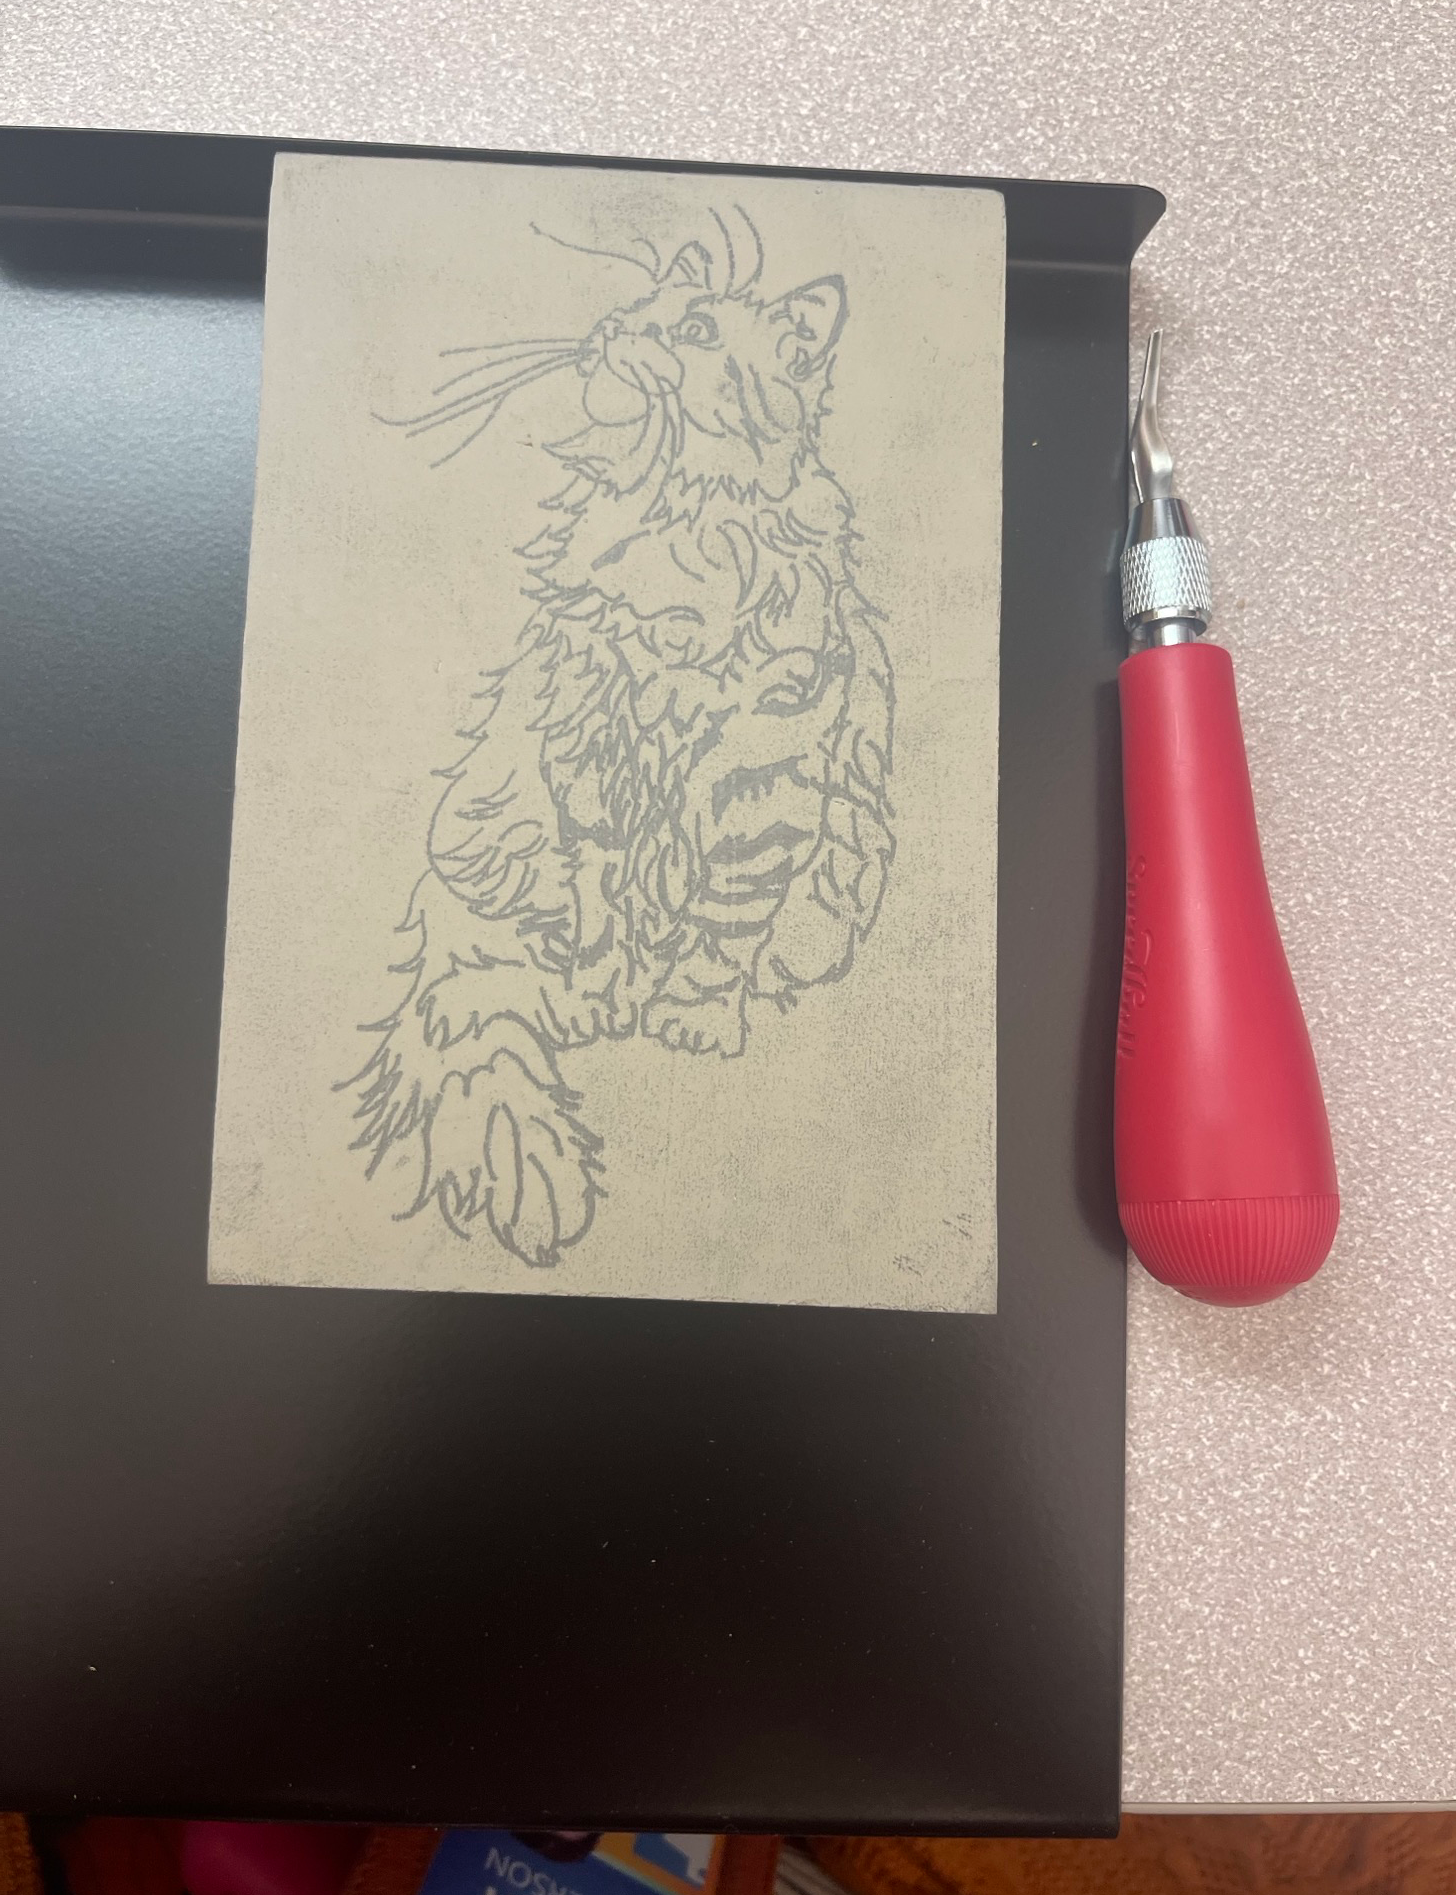
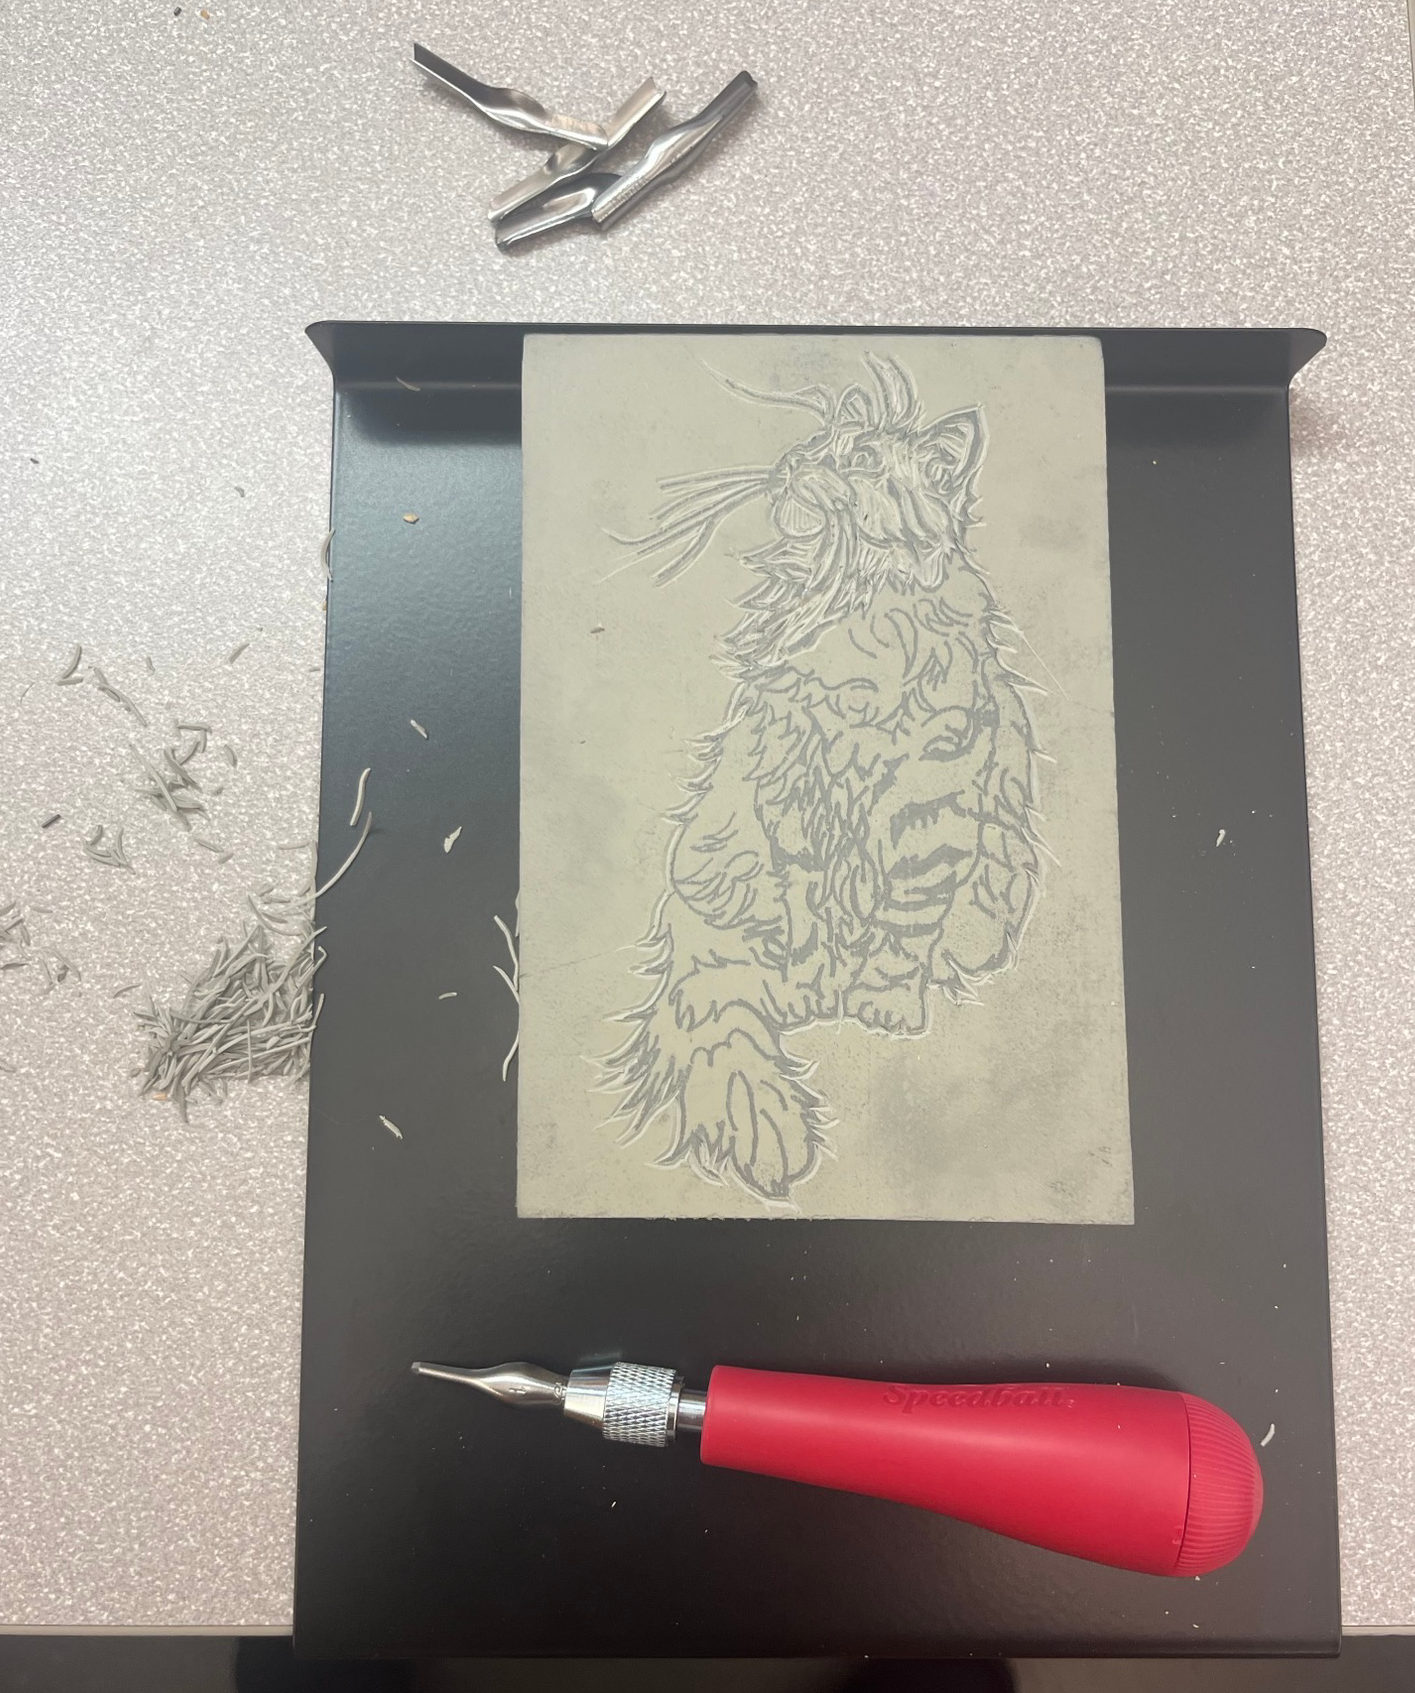
 Carefully cut your image. Please be sure to use your bench hook or vice to help control where the printing block moves. I have been injured by slipping carving tools on more than one occasion. Always carve away from yourself! It is best to start carving lightly. It is much easier to carve more out than it is to repair the linoleum later or start over. If you are new to this, I suggest starting in a larger open area to practice with the various types of blades. The “V” shaped blades are used for details while the flat blades or “U” shaped ones are best for clearing larger areas. If the linoleum is difficult to carve, try warming it up with a blow dryer. If it continues to be difficult your blades might be dull, or the linoleum might be too old.
Step 4
Step 5

Step 6
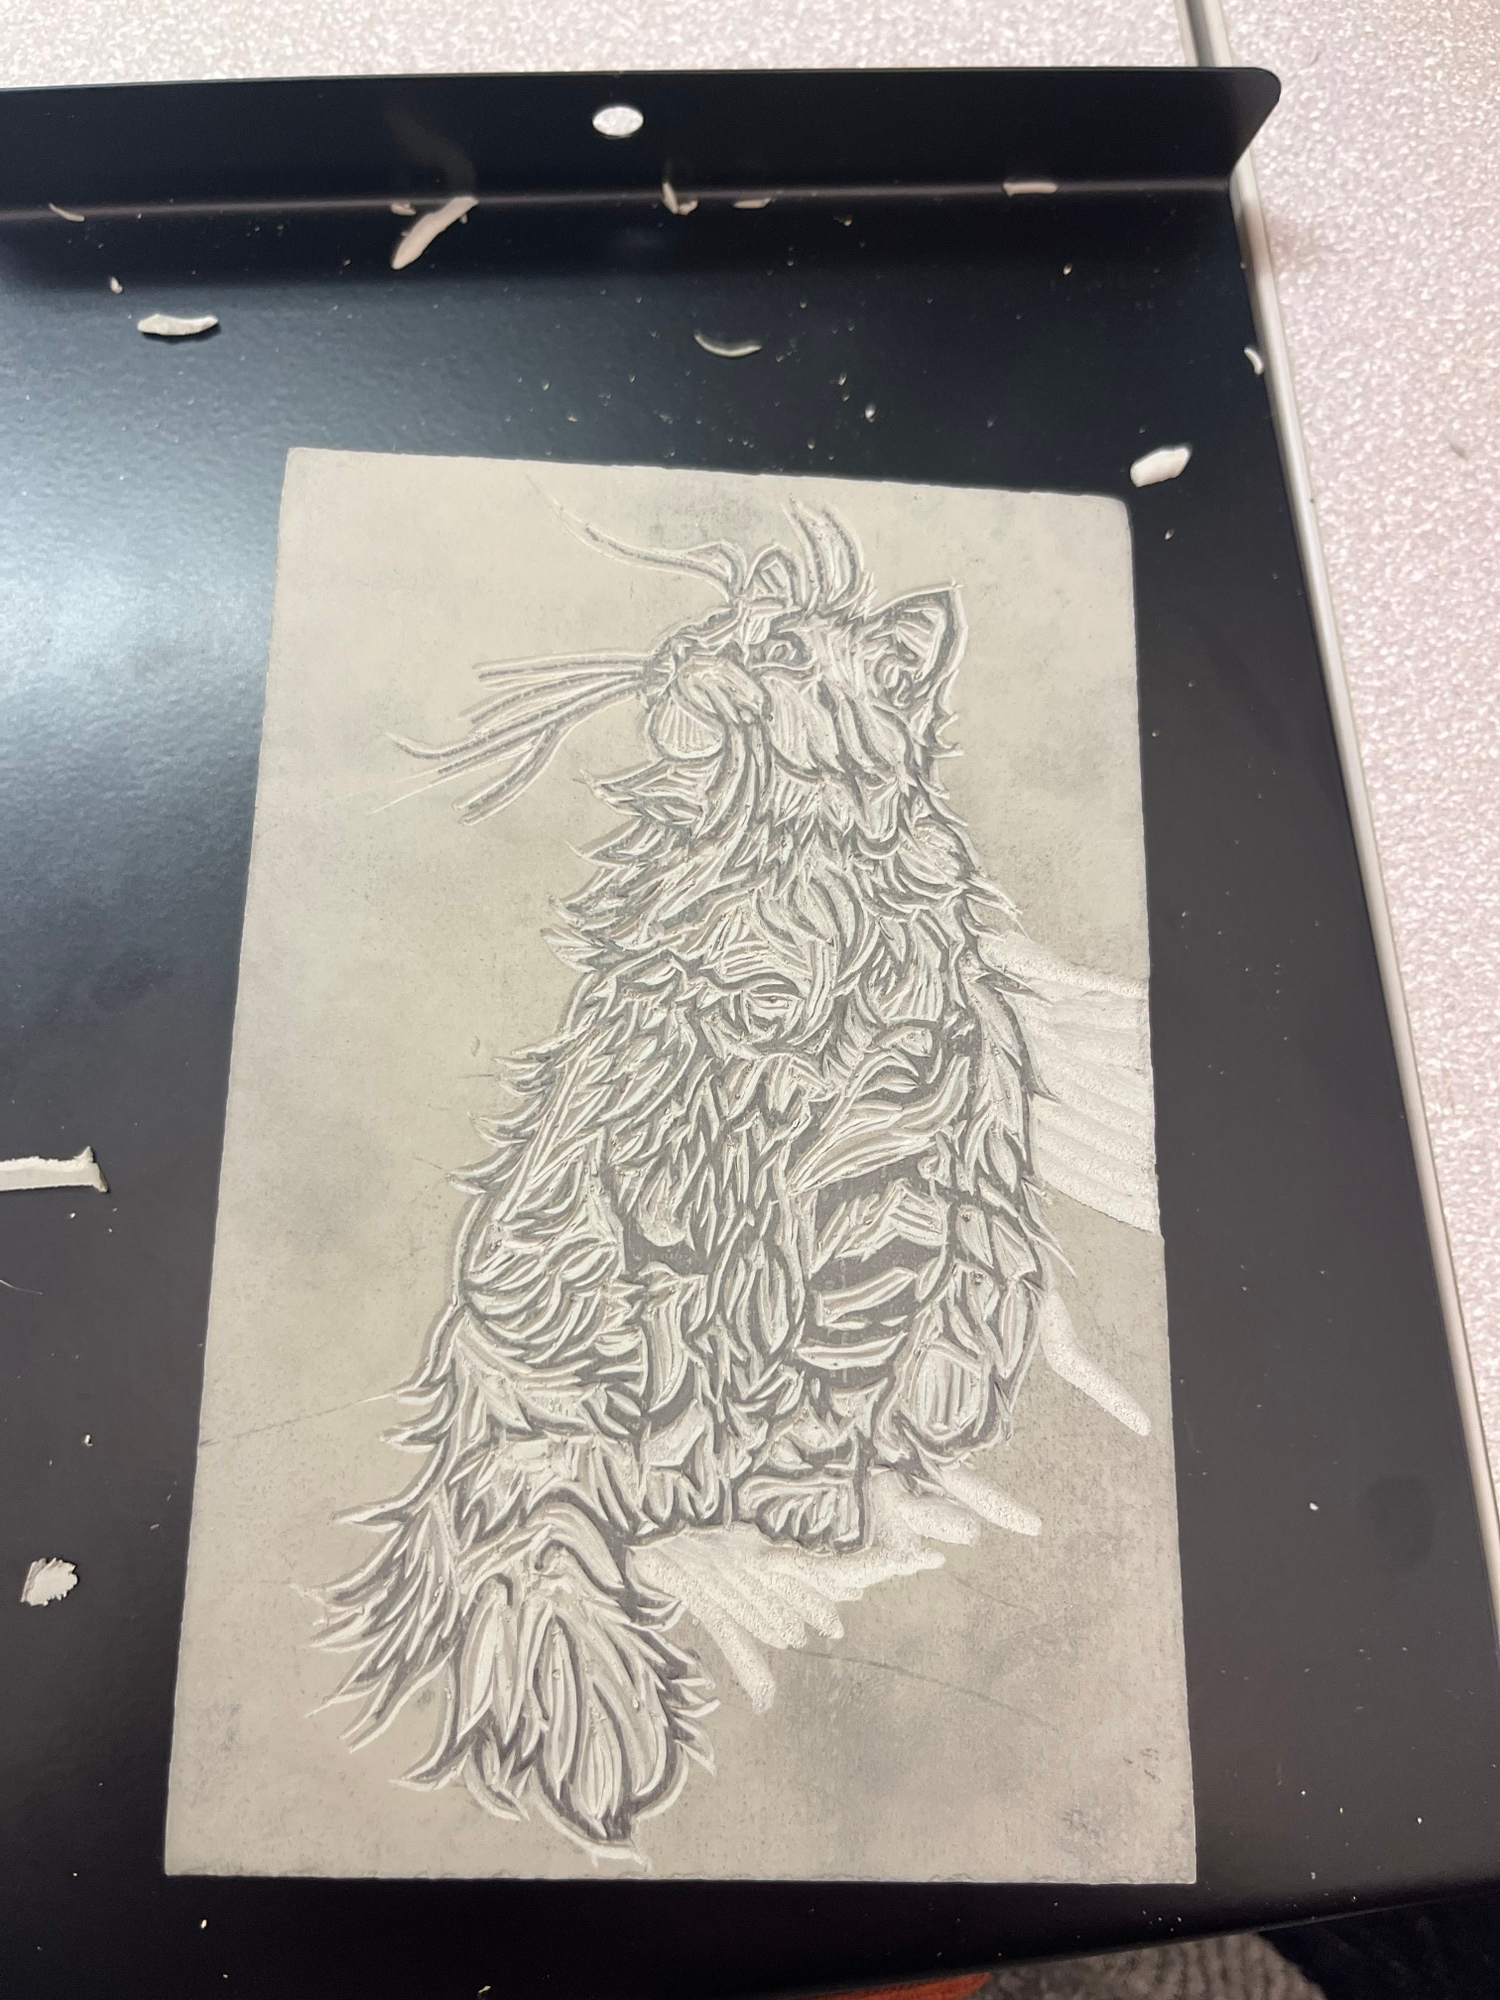 Continue carving until you have cut away everything you do not want in your final image.
Block print inking
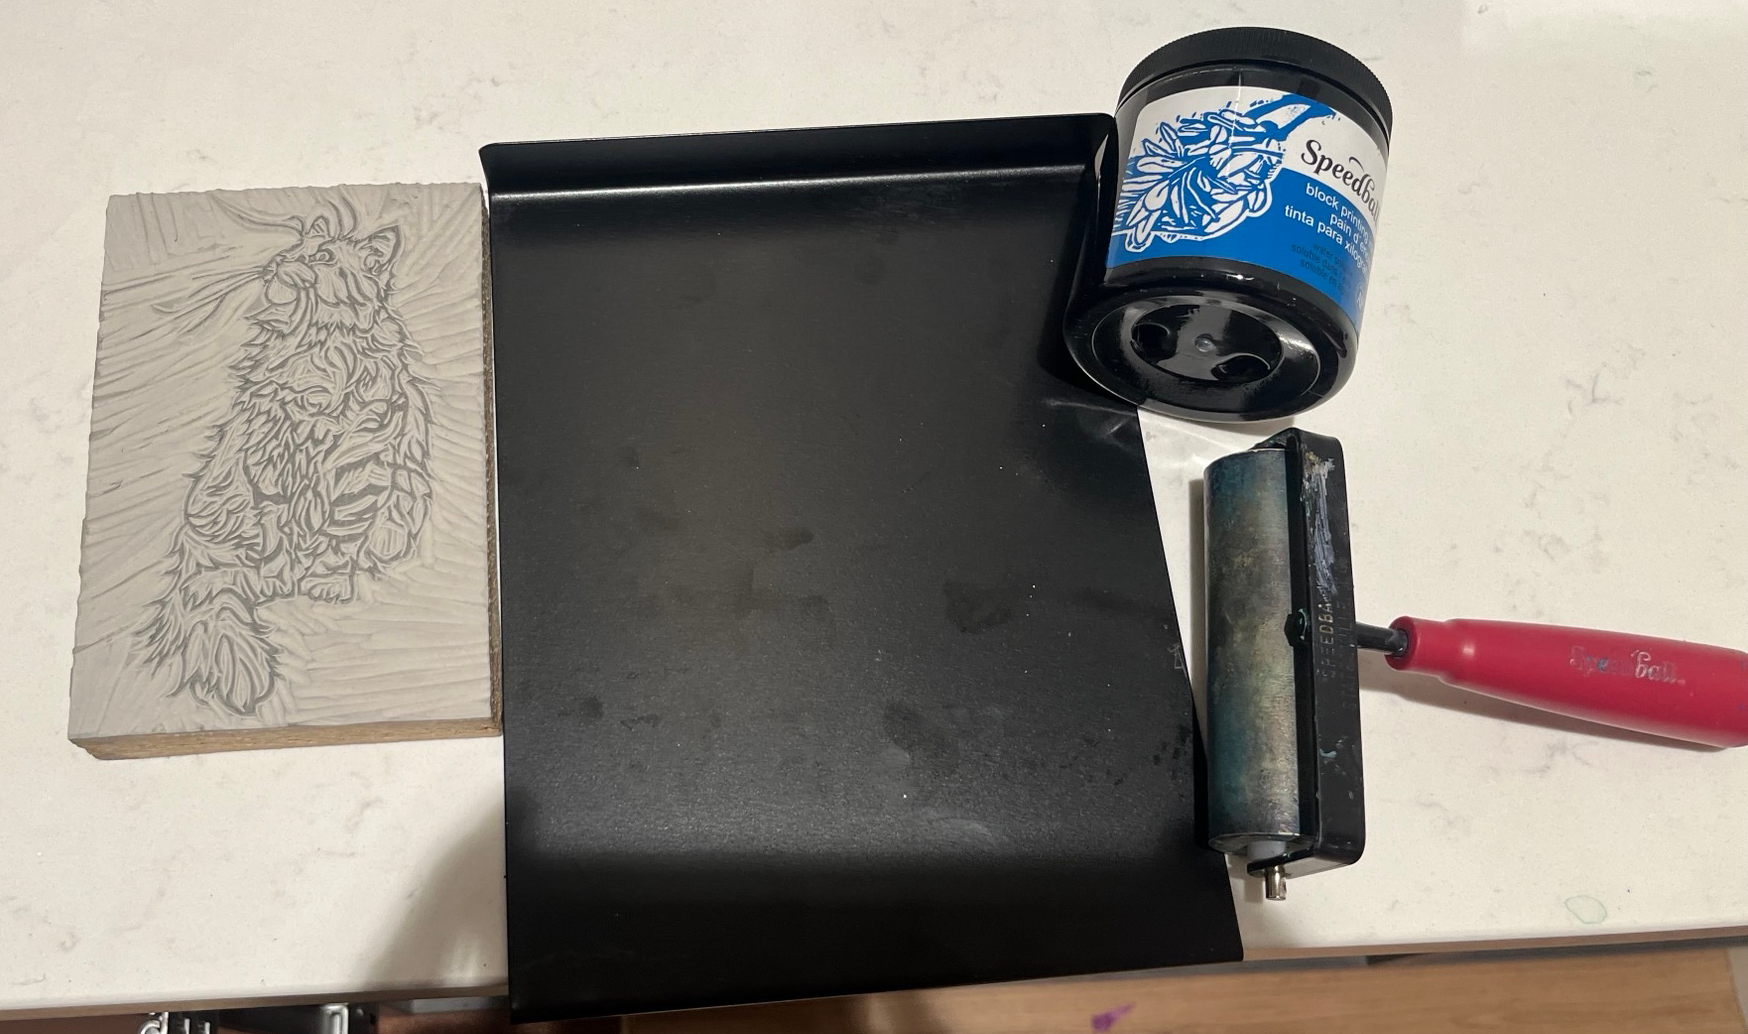
Step 1 - Layout your supplies.
Step 2
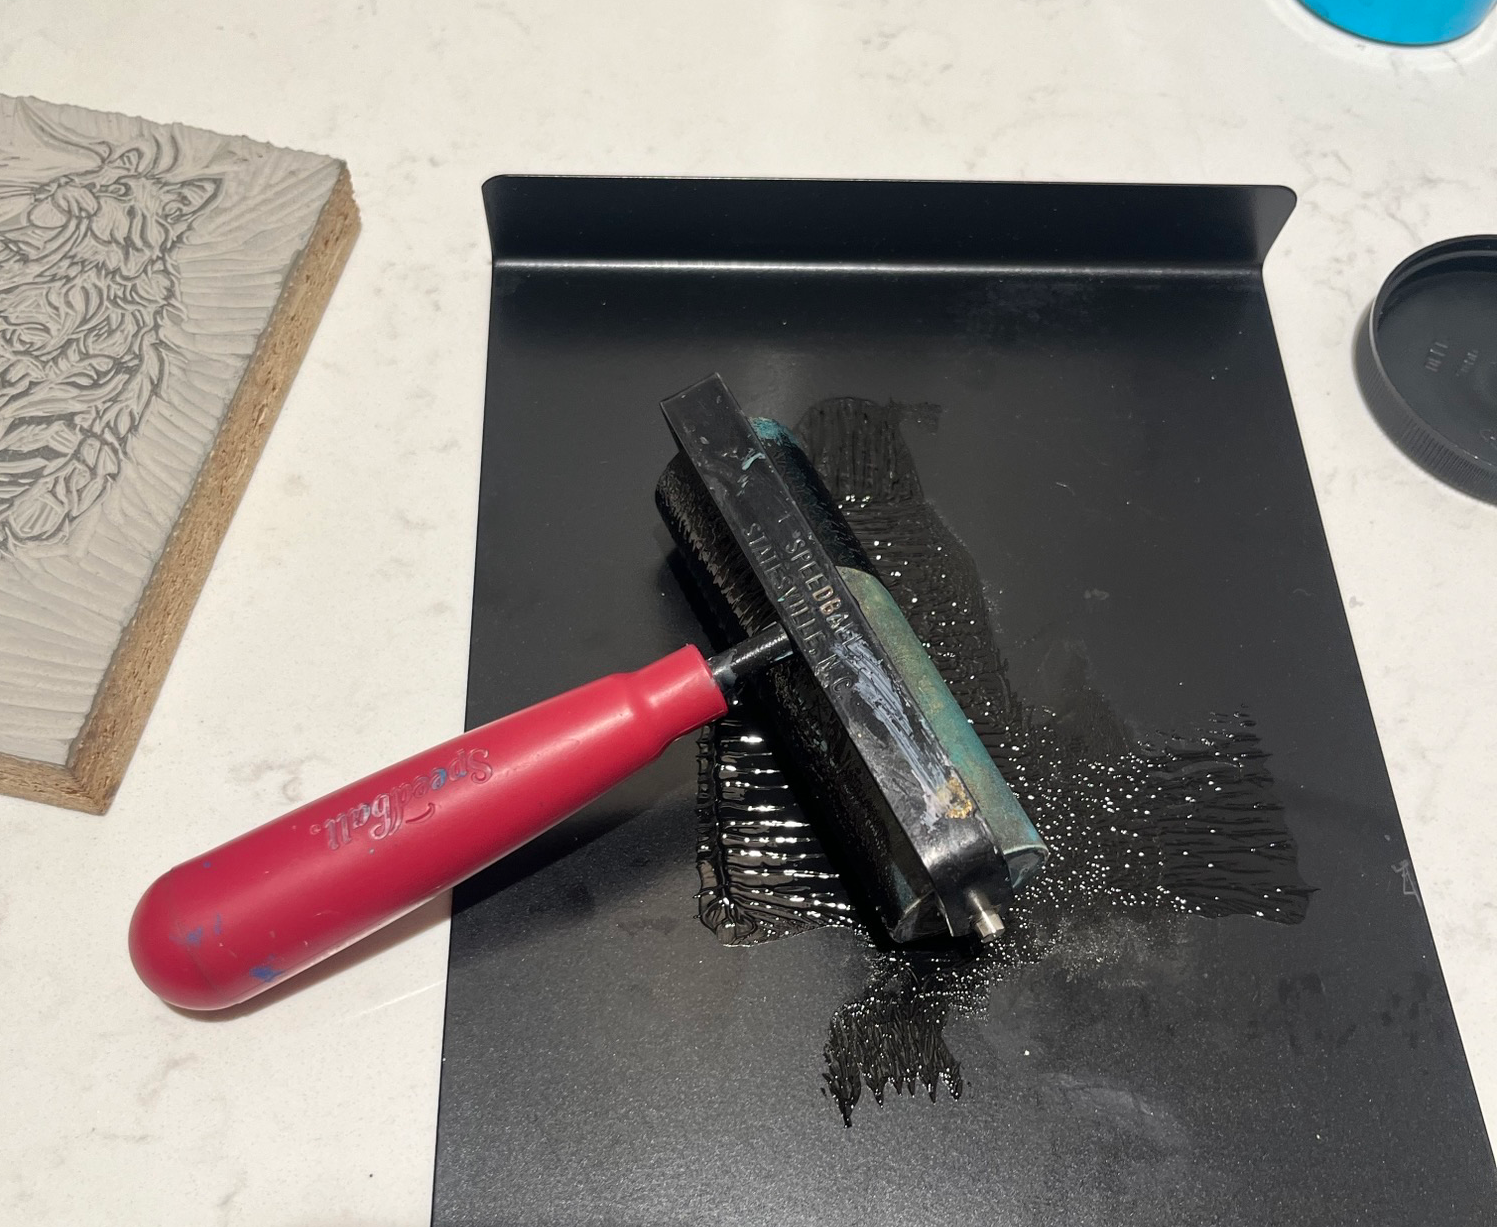 Once you’ve removed all the portions of your carving that you don’t want to show up in your final print, its time to ink. Start by placing a small amount of ink (a little ink goes a long way) onto your inking plate. Using your roller, spread the ink out into an even layer that is slightly wider than your roller. Roll the roller through the ink – you want the ink on the roller to be even.
Step 3
 Roll the inked roller along your carved image. Keep the pressure even, but don't push down too hard or you could flood your carving.
Step 4
 Once your carving is fully inked, place your paper down on top of it. Using a burnisher, press down on the back of the paper. Finding the right amount of pressure takes practice, too little, and you may not get all your print, too much, and you could flood the details of your carving. Gently move the burnisher around on the back of the paper until you're sure you have covered the entire image. Gently pull the paper up from the block.
Ta-da! You have created a print.
 At this point you should examine your print. If you see something you'd like to remove, simply carve it out of the original linoleum block.
To make repeat prints simply reink the linoleum block. To avoid over-inking, you may have to pull multiple prints from the block after each reinking. This is called a ghost print.
Once done, clean the ink off your block using water and allow it to dry for next use.
Troubleshooting
- Where did my details go? The carving could be over-inked. This happens when too much ink is applied and the details flood. To fix this rinse all the ink off the block and allow it to dry before trying again using less ink.
- If the image looks “dry” or “spotty” try adding more ink to your ink plate and roller.
 Tilly would like me to encourage you to practice and experiment! The only way to truly master these techniques is by doing them and learning what works best for you.
More information
by Gwen Diehn
by Emily Louise Howard
by Elise Young
by Sam Marshall
This article in Artists and Illustrators magazine is also extreamly helpful.
Don't forget to check out Creativebug, free with your library card. I suggest the classes:
- From Block to Print: A Printmaking Daily Challenge
- Block Printed Monogram
- Print Your Own Stationary
