


Art Recreations: Screen Printing
Introduction
Let's dive into the world of screen printing. Get ready to be inspired by some amazing pieces from the library's art collection. I’ll also share my screen printing experience with the supplies I used, the steps and some handy tips to help you on your own printing journey. Whether you’re looking to create custom apparel or unique artwork, screen printing opens up a whole new realm of artistic possibilities.
Overview
Screen printing is a versatile printing technique that uses a mesh screen to transfer ink onto a variety of surfaces. The process involves creating a stencil (or “screen") that blocks out areas where ink should not go, allowing ink to pass through only the desired design.
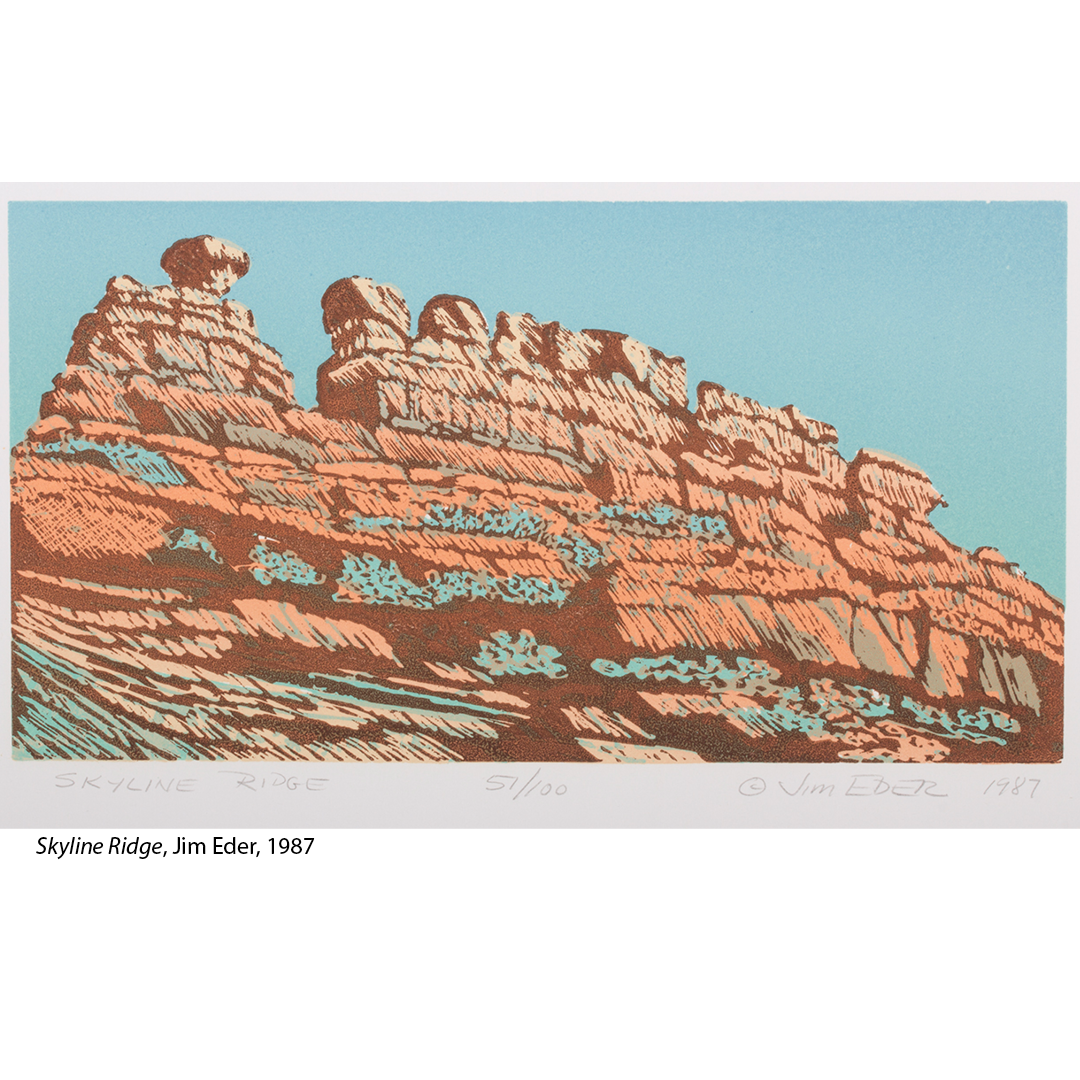
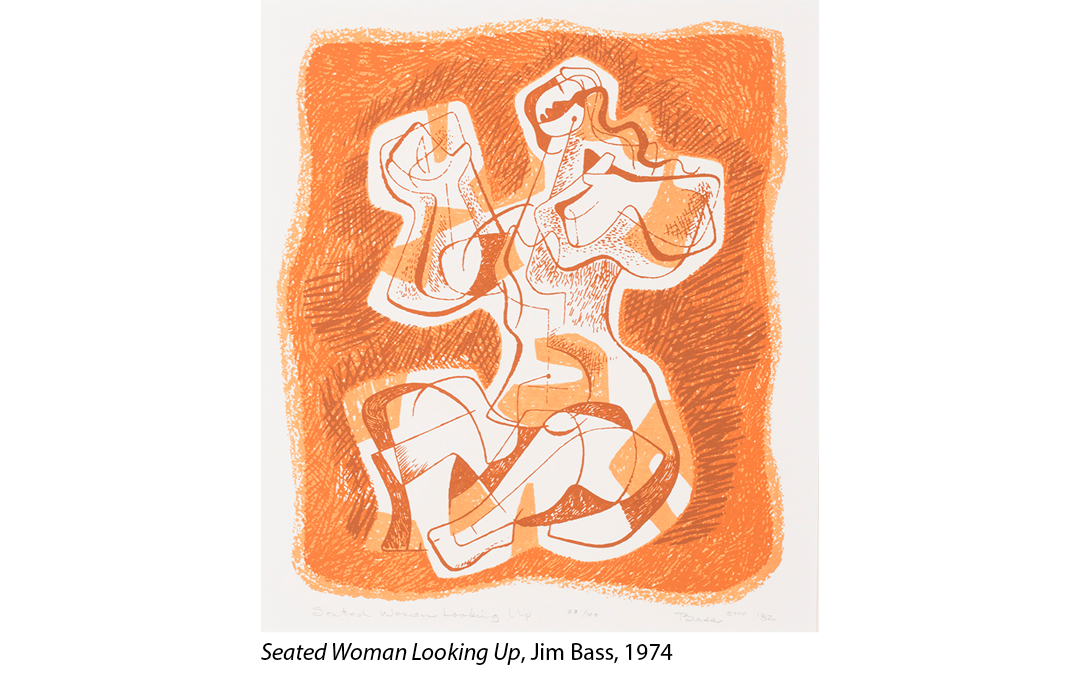
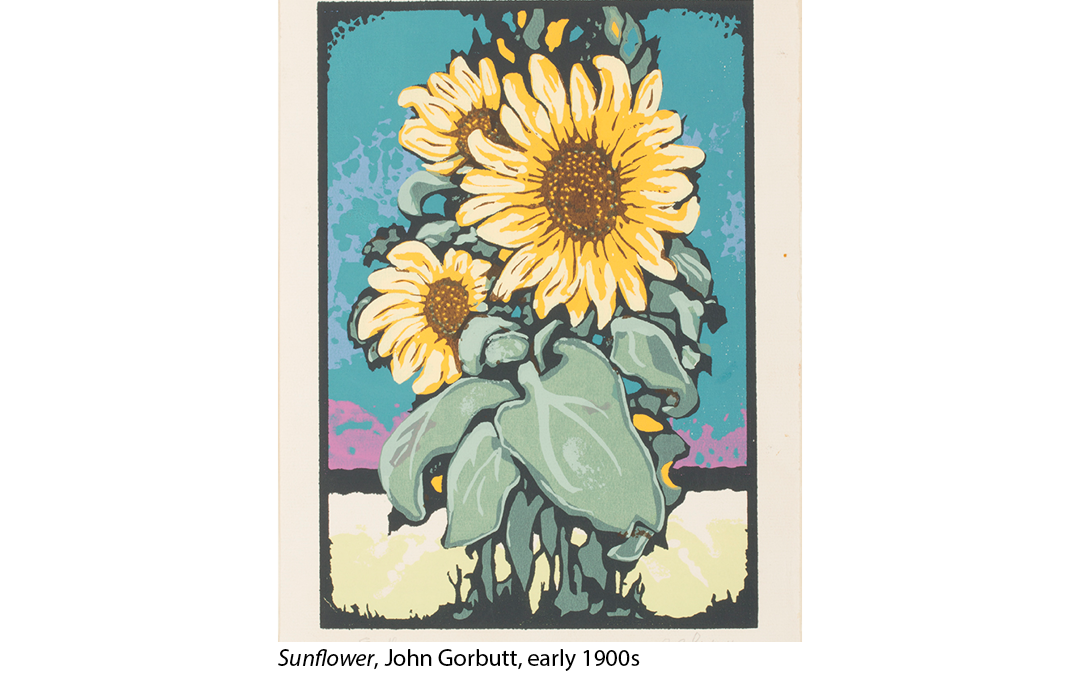
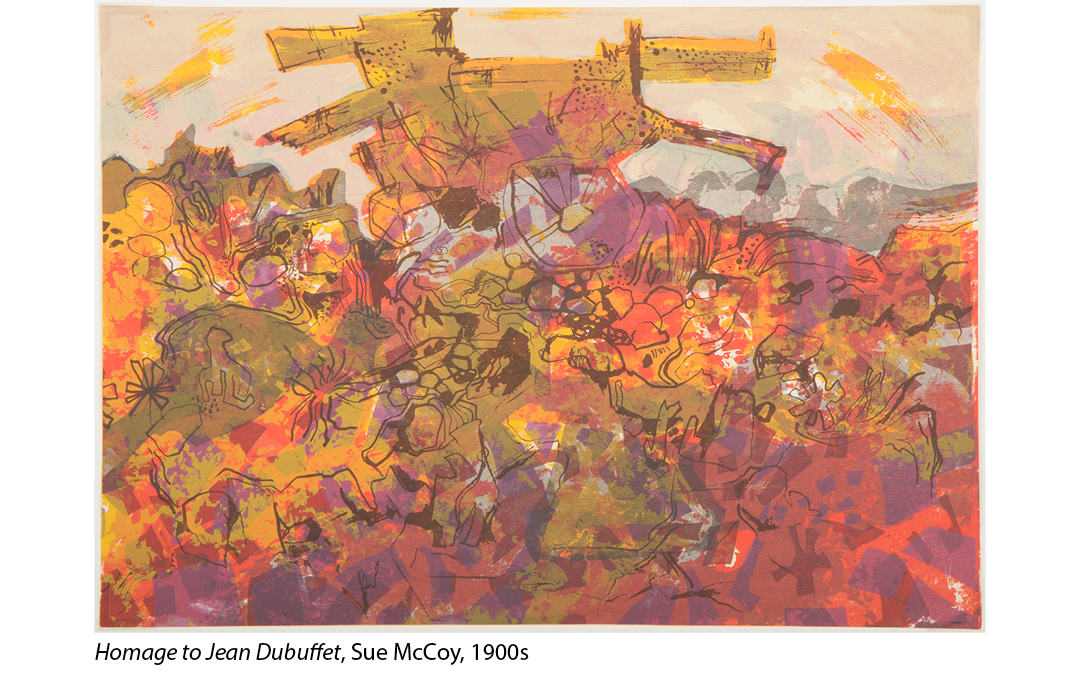
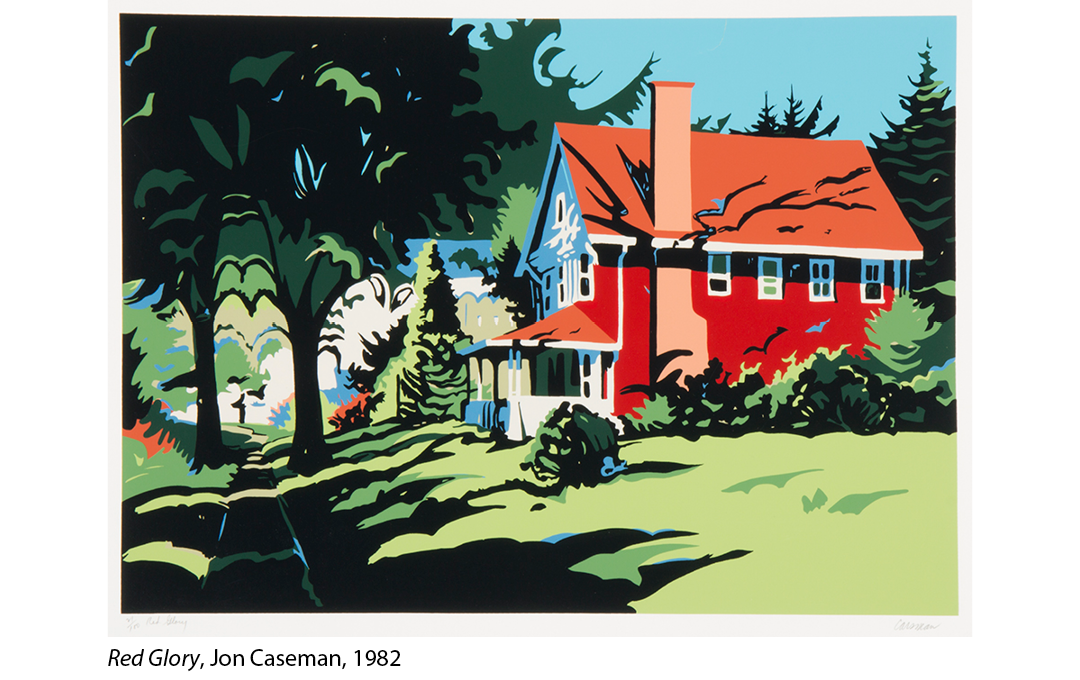
Example's from the library's art collection
My Process
Supplies
- Monofilament Screen Fabric: This type of mesh is woven from single threads, creating a smooth surface that allows ink to flow through easily.
- Embroidery Hoop: I wanted to experiment with an embroidery hoop instead of a typical screen-printing frame. I started with a standard wooden hoop, but it didn’t provide enough tension. I eventually switched to a smaller tension hoop, which worked better, though maneuvering the ink was a bit tricky. Make sure your hoop is large enough for your design with some extra space — mine was a bit too small.
- Iron-On Cricut Vinyl: I initially tried regular permanent vinyl, but it didn’t stick well to the fabric. Iron-on vinyl worked much better for creating a sturdy stencil
- Ink: For my print I used watered-down block print ink because it was on hand. Getting the consistency just right can be a challenge, so I recommend using screen printing ink instead. Just ensure you choose the right ink for the medium you’re printing on—fabric or paper.
- Squeegee: You don’t need a fancy squeegee; any flat tool, like a gift card, will work — just ensure it’s large enough for your design.
- Paper: For your first prints, go with newsprint or inexpensive copy paper. As you get better and produce cleaner prints, experiment with other types of paper. Expect some trial and error while you learn the ropes!
Steps
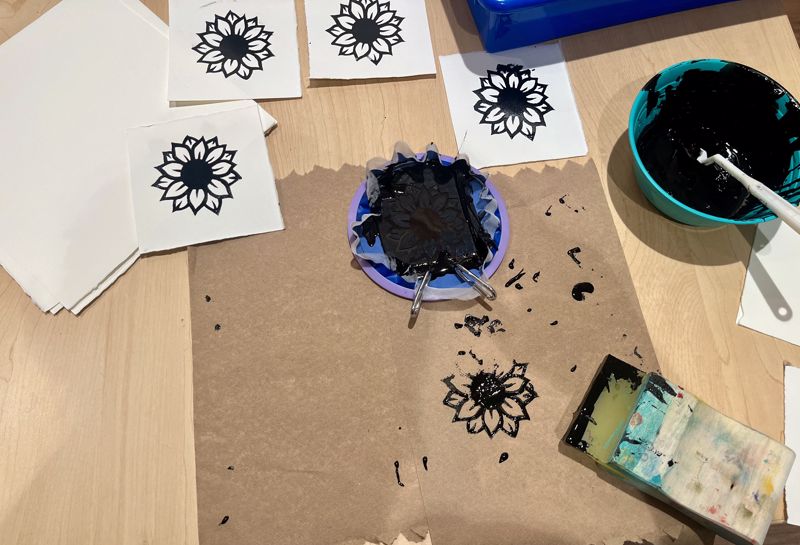
- Create Your Stencil: I used the library's Cricut machine to cut my stencil from iron-on vinyl. To reserve the library’s Cricut, you need to complete an online orientation first. I chose a free design from Cricut’s software. Using the Cricut saved me from cutting it by hand and made placement a breeze.
- Attach the Stencil to the Screen Fabric: After cutting the stencil, remove excess vinyl and adher it to the screen fabric according to the instructions that come with the vinyl.
- Secure Your Stencil in the Hoop: Once the stencil is attached, place the fabric in the embroidery hoop, ensuring it is taut.
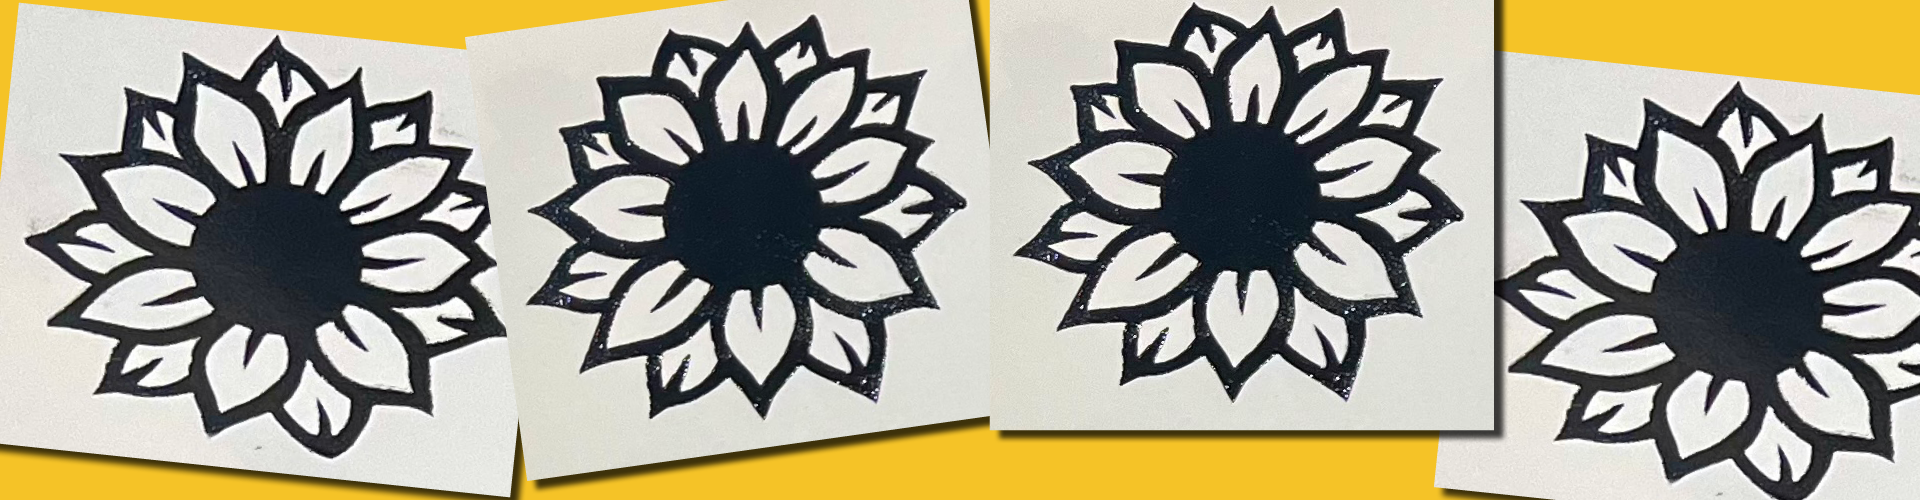
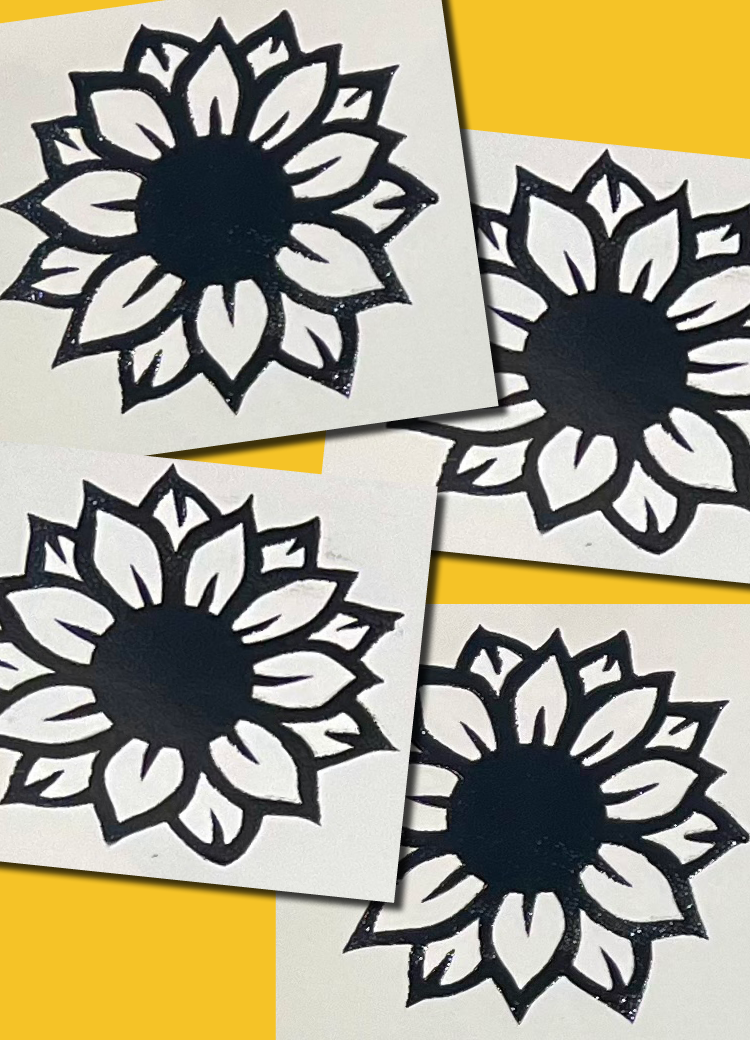
- Start printing: Spoon ink onto your stencil above the design. After placing a piece of paper beneath it, use a squeegee and pull the ink down over the design, transferring it to the paper below.
- Repeat: It’s important to keep your stencil wet with ink while printing. A dried-out stencil can get clogged.
- Clean up: The stencil can be reused! Once you finish printing, rinsed it out and set it aside to dry.
- For a more detailed guide, check out the Creativebug video "Screen Printing for Beginners: A 3-Part Series" by Hilary Williams. You can access Creativebug for free with your library card!
Conclusion
I hope this blog has inspired you to dive into screen printing! I’m excited to incorporate some repetitive patterns into my own work to add depth and dimension. Remember, experimentation is key — don’t hesitate to make the process your own!
If you're interested in learning more, check out this list of recommended screen printing books. Happy printing, and I can’t wait to see what you create!
