


Fall in Love with Outdoor Portraits
Autumn is a wonderful time to take outdoor portraits of your family and friends. As the trees change their lovely hues, it seems appropriate to 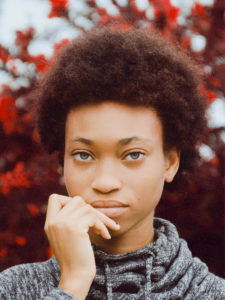 commemorate how we and the people we love change from year-to-year. The landscape serves up a majestic background for your portraits and the light is some of the most beautiful of the entire year. You really can’t beat autumn portraits!
I am going to focus on some tips and tricks you can use to improve your photography at the point-n-shoot experience level. If you're interested in advancing your technical skills, check out books we have on photography in the Arts and Crafts Neighborhood or watch a Photography Foundations class with your library Lynda subscription.
Tip #1: Plan ahead
 Scout out your location pretty close to the date and around the same time of day you're going to have your portrait session. This gives you an idea of the color of the leaves and how busy the area is going to be. Weekends might be busier than weekdays. In the fall, things can change pretty quickly. Keep an eye on the weather as well. Hopefully, you’ll have beautiful skies. However, don't get discouraged if it is going to be cloudy. Clouds work as a great natural diffuser and promise nice and even light (we’ll cover that more in Tip #3).
Tip#2: Dress appropriately
I know this seems obvious, but adding those layers doesn’t just keep us warm while the weather gets chillier. They provide a great excuse to show off your favorite fall fashions! Scarves, hats, boots and coats can all add to the depth and interest of your portraits. Also, keep in mind the tones of the background when you’re planning your outfits. Do you want to pop with a contrasting blue set on a background of orange, yellow and red leaves? Or would you prefer to keep the overall tones warm and inviting?
Tip #3: Pay attention to the light

The golden hour at our library!
One of the things that surprised me the most when I was learning photography was how even a drab background can create beautiful portraits if your subjects are lit correctly. One of the things you’ll hear the most is to make sure your portraits are taken during the “golden hour,” or approximately one hour just after sunrise or before sunset. It’s a great and reliable technique, to be sure, but once you have that gorgeous golden light, how do you ensure your subjects are well lit?

Watch out for uneven light.
My suggestion is to learn to see the light. Checking to make sure that the light on your subjects is bright enough and that there aren’t any shadows being cast by branches or other objects is key to getting great portraits. One of the tricks I use to see light is to make my hand into a thumbs-up and hold my arm straight out in front of my face in the direction that I am placing my subjects. Then I turn in a circle and watch how the light changes on the surface of my hand. This is an easy way to see, in the moment, if you are placing your subject in the best possible light.
Tip #4: Decide on the type of portraits you want to take
 Are you doing family portraits? Incorporating your pets? Is this portrait eventually going to end up on a holiday card? It’s vitally important to know your “why” when you're heading out to do portraits. If you're going out just to practice your portrait skills, try to think about one skill you can focus on to improve. How will you measure that improvement?
For instance, if I were doing a family portrait, I would want to ensure that I start with at least one posed shot I’d be able to print out and frame. Then I start capturing candid images. One good way to ensure a family portrait goes well is to be very clear about when you are taking the image. Your subjects know when they should be looking at the camera and, hopefully, not in the middle of a blink. Often, I will count to three while my subjects have their eyes closed. When I announce “Three!,” I have them open their eyes and look at the camera before I take the image. It certainly cuts down on the amount of time that I spend in post-processing fixing those blinks!
Of course, posed shots aren’t everyone’s favorite. You might prefer candid portraits. Allowing your model to get into situations where they forget there is a camera involved might be the best way to capture their true self. Playing with a pet, exploring the scene or even just being engaged in conversation can help your subjects feel more at ease in front of your lens.
Tip #5: Incorporate nature
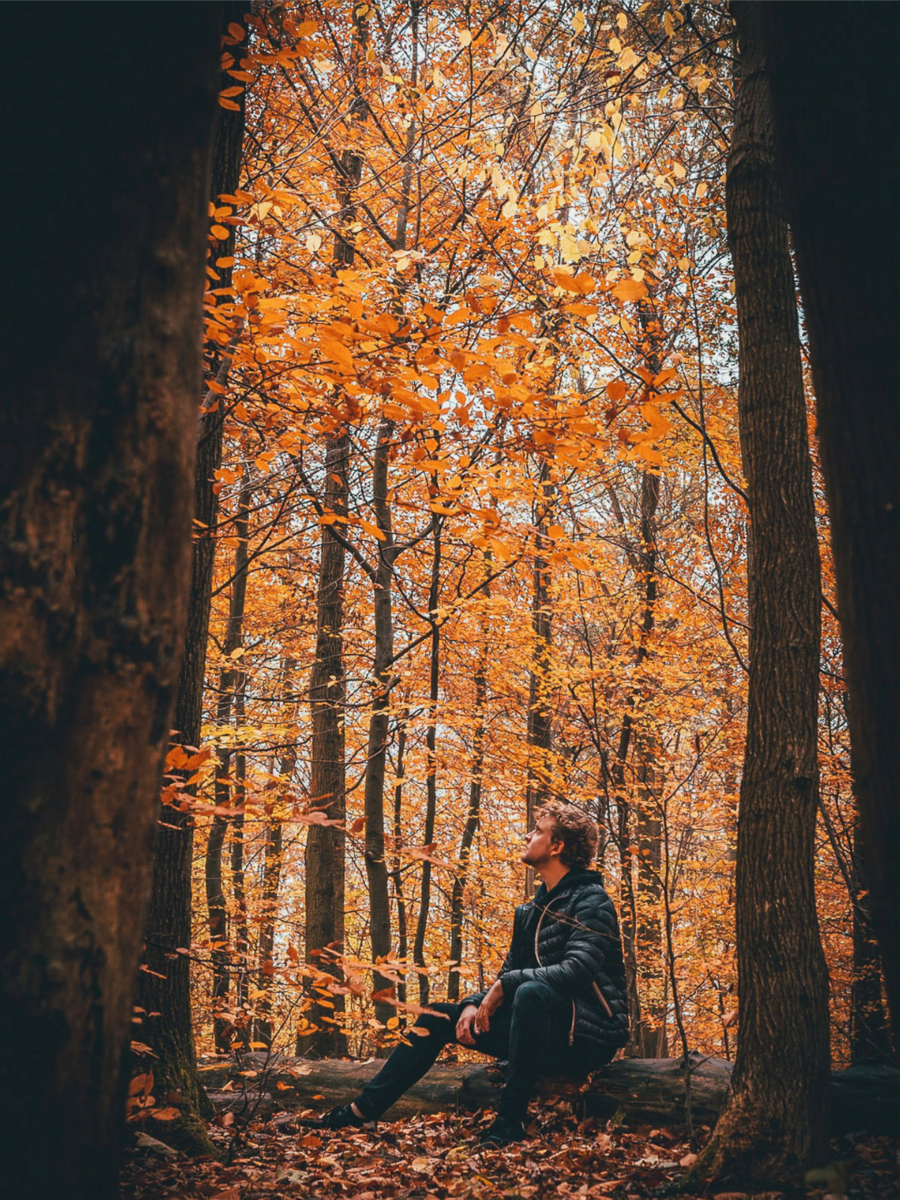
Try framing with trees or branches!
My last tip may be the most obvious: include those glorious fall elements into your portraits! Piles of leaves offer many opportunities to showcase the fall colors. Your subjects can pick them up and throw them in the air or toward the camera. They can sit peacefully under a colorful tree while reading a book (Hint: We have those! Check out the book list below). Consider gathering a few pumpkins or, if you don’t mind the mess, take portraits while carving them. If you're in a more heavily wooded area, consider framing your subjects with leaves or branches for a more artful effect.
I hope this article has given you a little bit of inspiration to get outside and attempt some fall portraits. No matter what level you are working from, there’s always something to learn. Just remember, if you’re taking photographs, you’re a photographer. Now, go out there and take some fall portraits!
