
Behind the Scenes of an Exhibit Transition
Many museums create exhibitions that remain on display for years. At the Alice C. Sabatini Gallery, we rotate our exhibits several times each year. It keeps things fresh and interesting, and gives our visitors the opportunity to see a wide variety of art. While it's always hard to say goodbye, there's a lot of work to be done to transition from one show to the next.
After the exhibit

Taking down
A Moment in Time
Before we do any work in the gallery space on a new exhibit, the old one must come down. It's one of the less glamorous aspects of museum work, but if we don't do it properly, it can cause all kinds of problems later on. The last thing we want to do is fix something after a new exhibit opens.
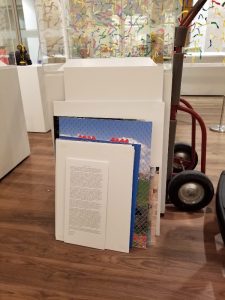
The first step is obvious: remove the artwork from the gallery. The paintings and prints come off the walls and the display cases are opened and emptied. The art pieces we own go into our workroom on the east end of the gallery where we'll store them until they can be returned to our climate-controlled storage space in the basement of the library. Any artwork on loan is returned to the artist or owner.
What goes up must come down
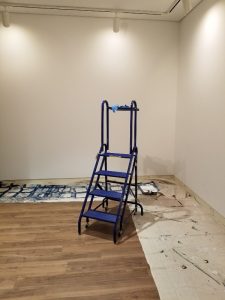
Now that we're back to bare walls, we're ready to hang the new exhibit, right? Not yet! The walls may be empty of artwork, but we still have a bunch of nails that need to be pulled. When you remove a nail, it leaves a hole that needs to be patched before you can paint over it. So, it's back to the workroom for the spackle and putty knife. Once we've painted over the patches, it's time to move on to the next step.
A blank canvas
Walls patched and ready to paint
The gallery is empty so now we're ready to install the new exhibit, right? Nope. Now we need to move the walls.
This is slightly easier than it sounds. We have four moveable walls in the gallery. We have a set of small, hand-cranked dollies that allow us to raise the walls off the floor by an inch or two. Once they're on the dollies, we can wheel them to their new locations.
No matter how much we plan and sketch out the layouts of our exhibits, the walls don't always look right once they've been moved into place. We make adjustments as needed and then "drop" them.
The finish line
Light fixtures for the next exhibit
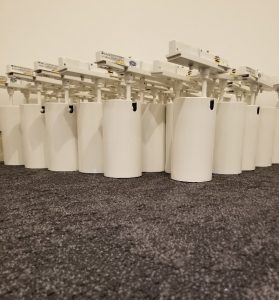
We are so close to being ready to install the next exhibit! But before we do that, we need to take a look at the lights. Not directly, of course, because they're very bright LEDs. Ouch.
To truly have a blank canvas for the next exhibit, we take down the light fixtures that were used to highlight the artwork on the walls and in the cases. We leave the "wall washers" up. These lights provide nice even illumination on the walls so when we start laying out the new artwork, there won't be any distracting highlights on any one piece.
Gallery staff in action
Because we work with visual art, I'm not just going to tell you how we de-install an exhibit, I'm going to show you. This video was recorded during the first two days we spent taking down the Alter Egos exhibit in the east gallery. It's a glimpse of our team in action.
Next month we'll go behind the scenes as we install Forest Bathing: A Walk in the Trees, on display Dec 21, 2020 to Feb 14, 2021.