Behind the Scenes: Installing an Exhibit
Once the gallery has been emptied of artwork and the walls have been patched and painted, the work of installing a new exhibit begins. While we plan our exhibits two years ahead of opening day, there are always little tweaks and adjustments that need to be made when we start bringing new art into the Alice C. Sabatini Gallery.
Choosing Art
 As we develop ideas for a new exhibit, we start choosing artwork that supports the central theme. The majority of the art we exhibit comes from the library's permanent collection. We sometimes borrow pieces from an artist or a museum to complement the work the library owns. Occasionally we display a traveling exhibit entirely of outside art.
As part of our planning process, we choose as many pieces as we want. Hooray! This is a really fun part of an exhibit, exploring the collection to see what will fit. We often choose more than 100 pieces during this phase. The recent gallery remodel allows us to hang more pieces than the old space did, so we average around 60-80 pieces now after our final edit.
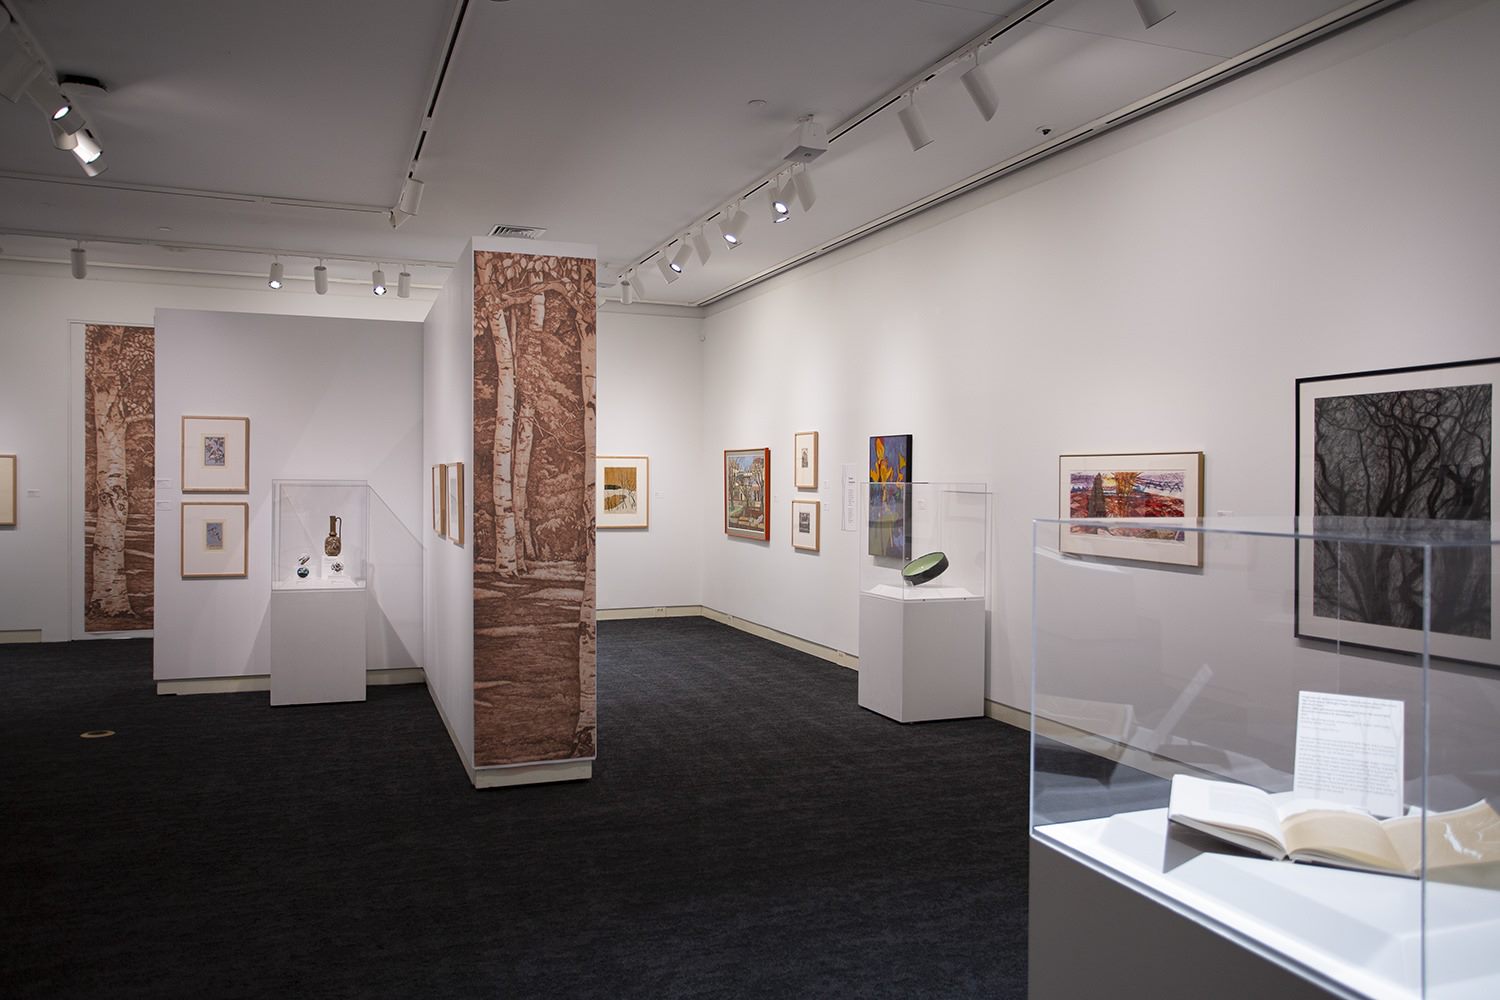
For the Forest Bathing: a Walk in the Trees exhibit, we did a deep dive into the library's collection of prints - woodcuts, etchings, engravings, lithographs, etc. - to pull out pieces that were tree-related in some way. Because the print collection is so large and because most of it was acquired before any of the current gallery staff worked here, we often come across pieces we've never seen before.
Scale It Up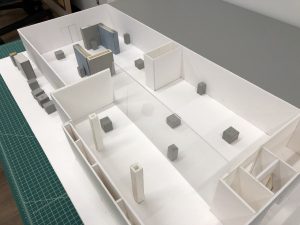
To help us envision where pieces will go, we refer to our scale model of the gallery. This model allows us to put the walls and cases in different configurations to decide how the exhibit will flow. We don't want our visitors to end up in a corner because we didn't plan our layout properly.
Up to this point, we've been looking at the art in the exhibit as little images printed on paper. We move these around our gallery model to decide what pieces should be together and where they should go.
Installing Art
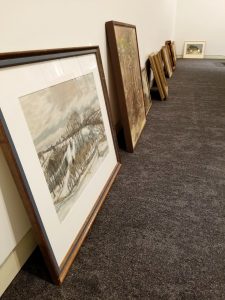
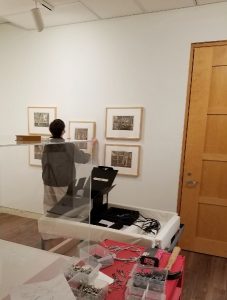
 Before we hang any art, we need to put the prints in frames. Our print collection is stored in flat files, unframed. So part of our planning process is making sure we have enough frames to exhibit the art. We also need to make sure we have enough cases to accommodate the 3-D works, like ceramics, glass and artists' books.
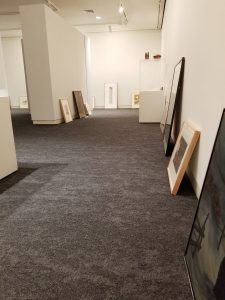
Once we've chosen the pieces we want in an exhibit, we lay out the artworks in the gallery according to the plan we've developed. This is the first time we see all the pieces together in one space. This is also the time when we realize our plan may need a few tweaks here and there.
Move It a Little to the Left
 With all the art in the gallery space, now is the time for adjustments to be made. Some adjustments are big, but most are small.
A big one might be that we put two framed works side by side and they just don't look right together. If it's a matter of scale, we might stack two pieces vertically next to a larger piece to balance it out.
The goal is to have an open feel to the gallery, with each piece having space to "breathe." We don't want works crowded so close together that they lose their visual impact in the clutter. We also don't want them too far apart where they seem stranded by themselves.
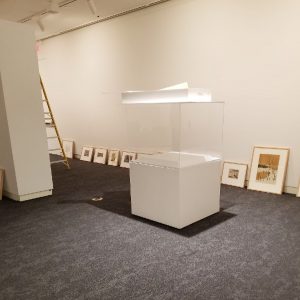
 The small adjustments can be numerous, especially when it comes to placing objects in the display cases. It doesn't look right to have all the artwork in a case at the same height. It makes it hard for the viewer to get a clear look at each piece on its own. We use a variety of risers to create more interesting arrangements that highlight each object and give it its own space.
Artwork - check. Risers - check. But wait, the pieces in the case still look weird. Maybe if we moved that piece to this riser and the other one over there. Nope. It's still off. How about half an inch to the left? An inch to the right? Maybe if we rotate it 90 degrees? That's it! Perfect.
The Lights Come On
Once all the artwork is installed in its proper place, it's time to set up the lights. This can take a day or two of going up and down a ladder, making adjustments as we go.
 We start with wall washers. We leave these up between exhibits because they provide nice, even light for us to lay out the artwork. We don't want anything highlighted just yet.
As we start lighting, we think about how intense the light should be on a piece. Ceramics and glass can handle more light without being damaged than works on paper.
Next, we work on spotlighting each piece. This is where the process can get tricky. To be able to light properly we need thorough knowledge of our lighting system. Which filter should we use for that piece? Should the spotlight be circular or rectangular? How do we make sure we highlight each piece in a case without shining lights in our visitors' eyes?
Exhibit Opens
 After we've installed all the artwork and finished lighting, we're ready to open our doors. We want the experience to be all about the art and for visitors to flow smoothly from one area of the gallery to another. Our goal is to allow visitors to immerse themselves in the artwork and forget about the outside world for a little while. Due to COVID-19 the opening date of the Forest Bathing exhibit has not been determined. Watch the library website and Facebook page for updates.
Gallery Staff in Action
This video is a time-lapse of us hanging paintings and prints for the Forest Bathing: a Walk in the Trees exhibit. You'll see us using a laser level to hang everything with the same center height, and a smaller level to make sure the artwork itself is straight. We want everything to be just right before we open our doors.